free UK postage
over £40.00
Search


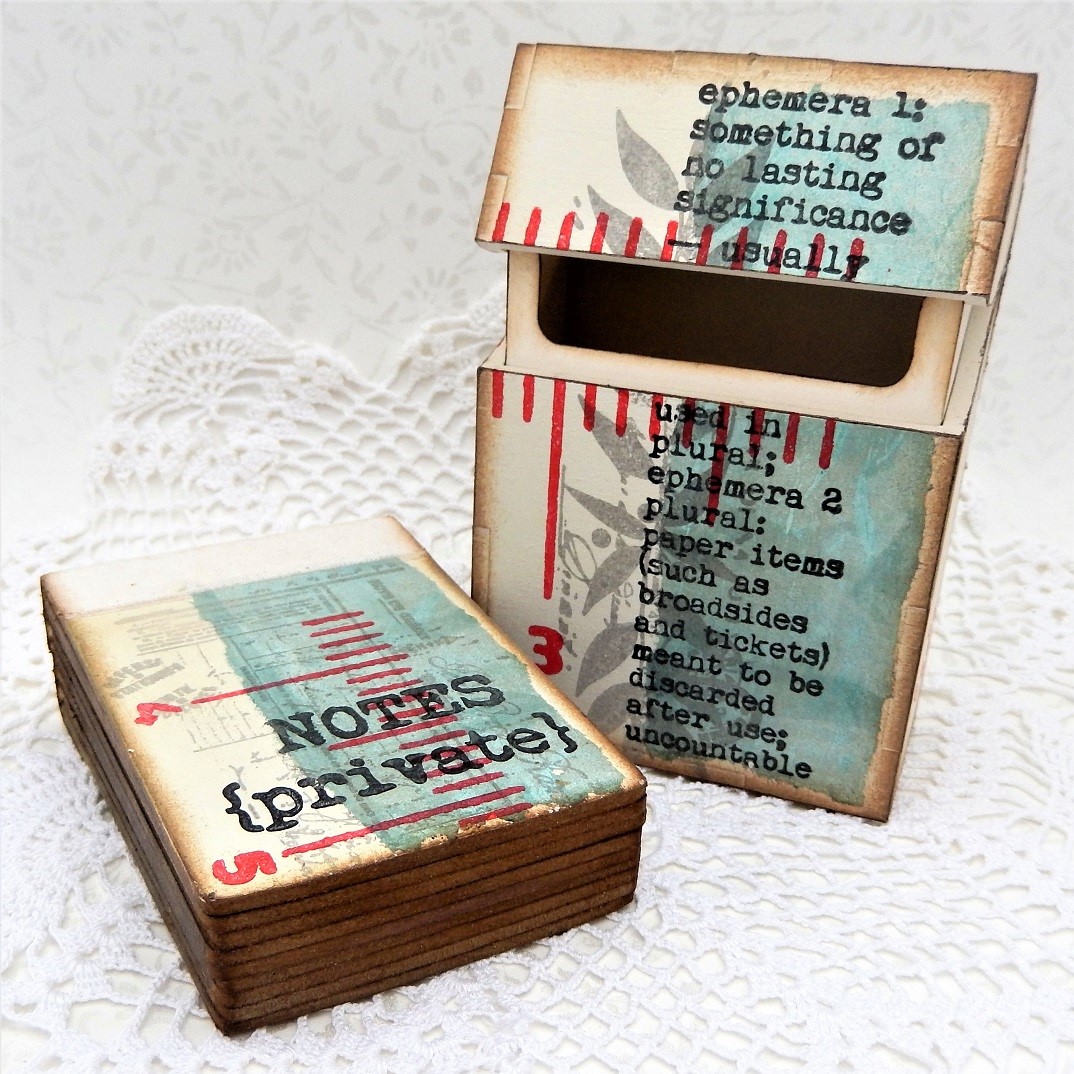
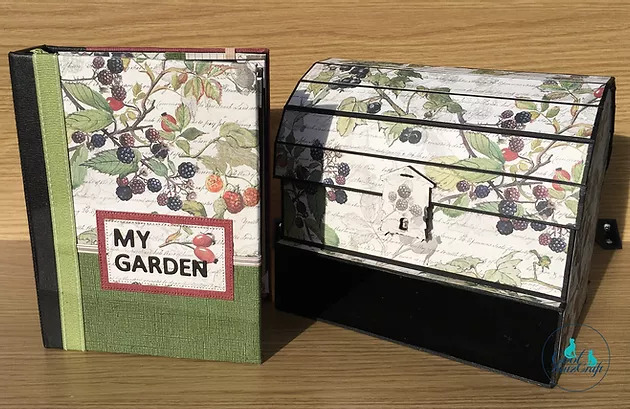
ATC Box and Mini Book by Jenny

Here’s an idea for using the new CoolKatz ATCs to create a mini book that fits
snuggly inside the matching ATC Box.
Whilst this sample is decorated throughout you could also choose to leave spaces
for photos, ephemera and handwritten notes.
Here’s a step-by-step guide to creating your own version with some handy hints
along the way.
Start by painting both sides of your greyboard ATCs; I would recommend applying a
layer of gesso before adding the paint to get a smoother, more even coverage. For
this sample I used PaperArtsy Fresco Finish Chalk Paint in ‘Heavy Cream’. Make
sure to cover the whole of each ATC in paint.
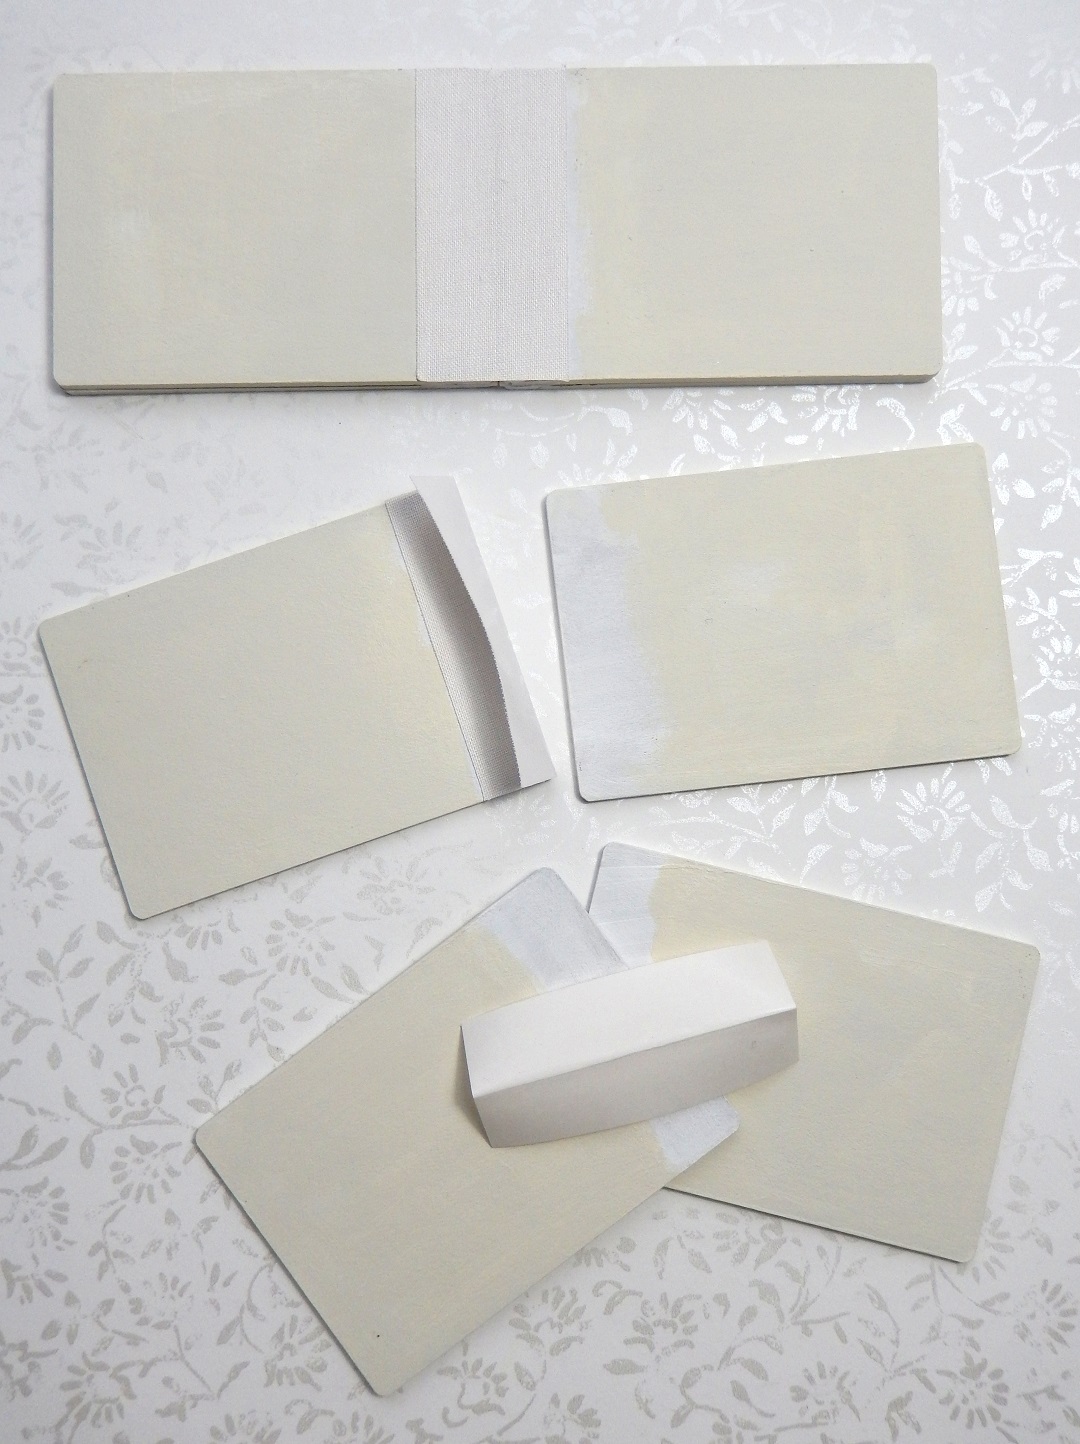
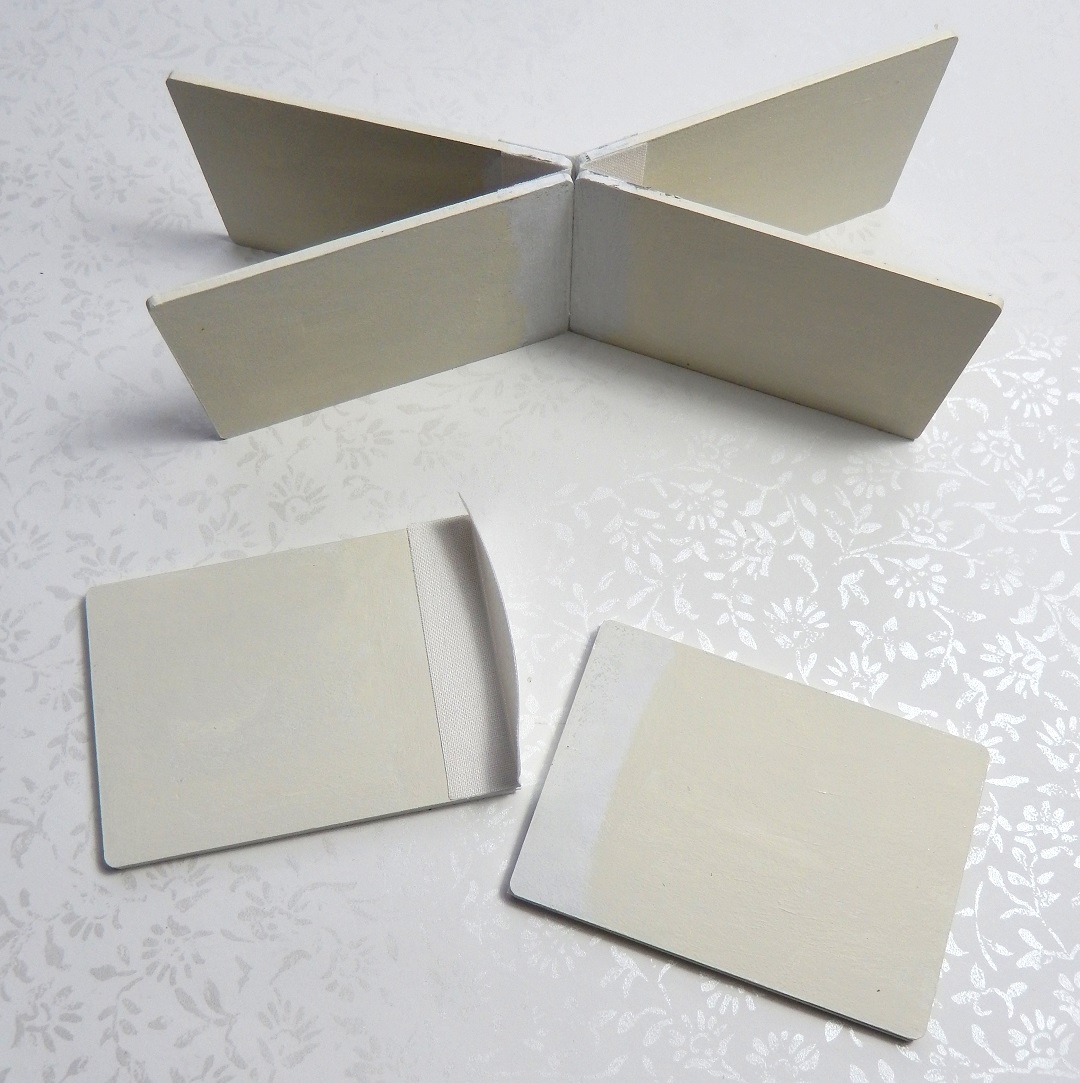
Use 2½ inch strips of 30mm wide Architape® to stick two ATCs together at the top
and repeat for all the other ATCs; it helps to fold the tape in half to guide you about
where to place the tape at the top of the first ATC. Remember to burnish each piece
of tape once applied with your Teflon Tool to ensure they are firmly attached.
NOTE; using tape on your ATCs will add to the width of the finished book so I would
suggest you use a maximum of eight ATCs to ensure it will fit inside the box. Also, if
you plan to paint your tape to match the ATCs I would recommend using undiluted
paint as the water could cause the fabric on the tape to shrink a little.
Once you have paired up all your ATCs fold them in half (with the tape on the inside)
and join two sets of two together with more tape. Repeat with the remaining ATCs,
so now you have a pair of four ATCs joined together. Join these together and you
will have your mini book base completed, with tape connecting all the inside pages.
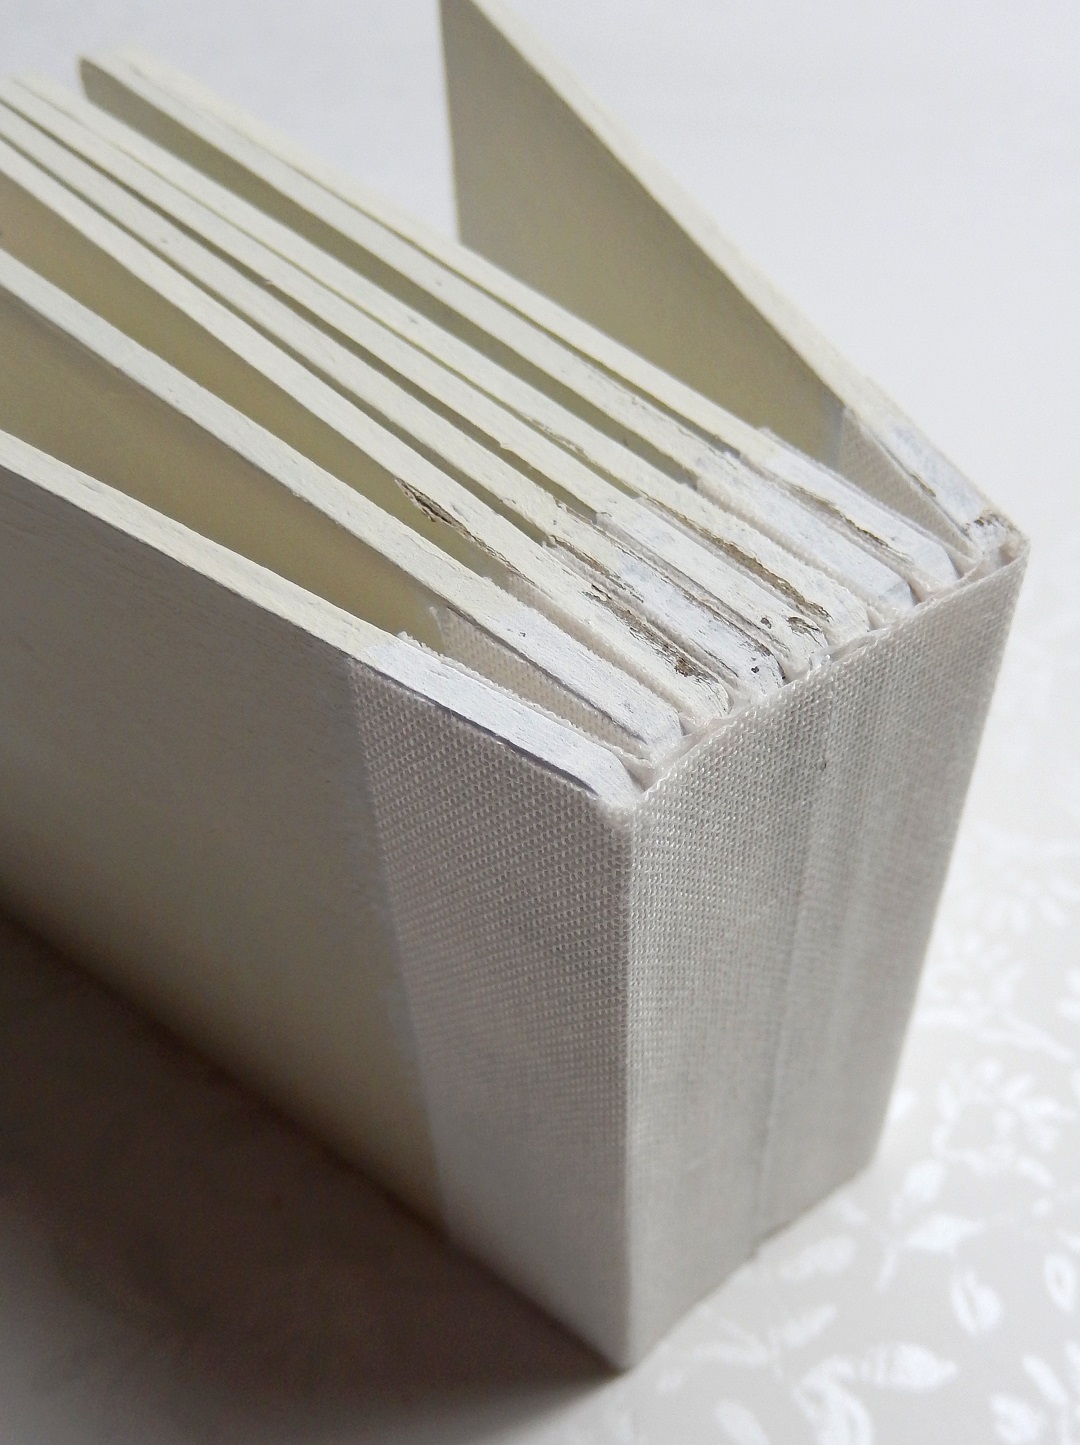
Bind the outside of the book by adding two more 2½ inch strips of 30mm wide
Architape® laying each piece down across the centre of the spine and then wrapping
them out onto the back and front covers as shown.
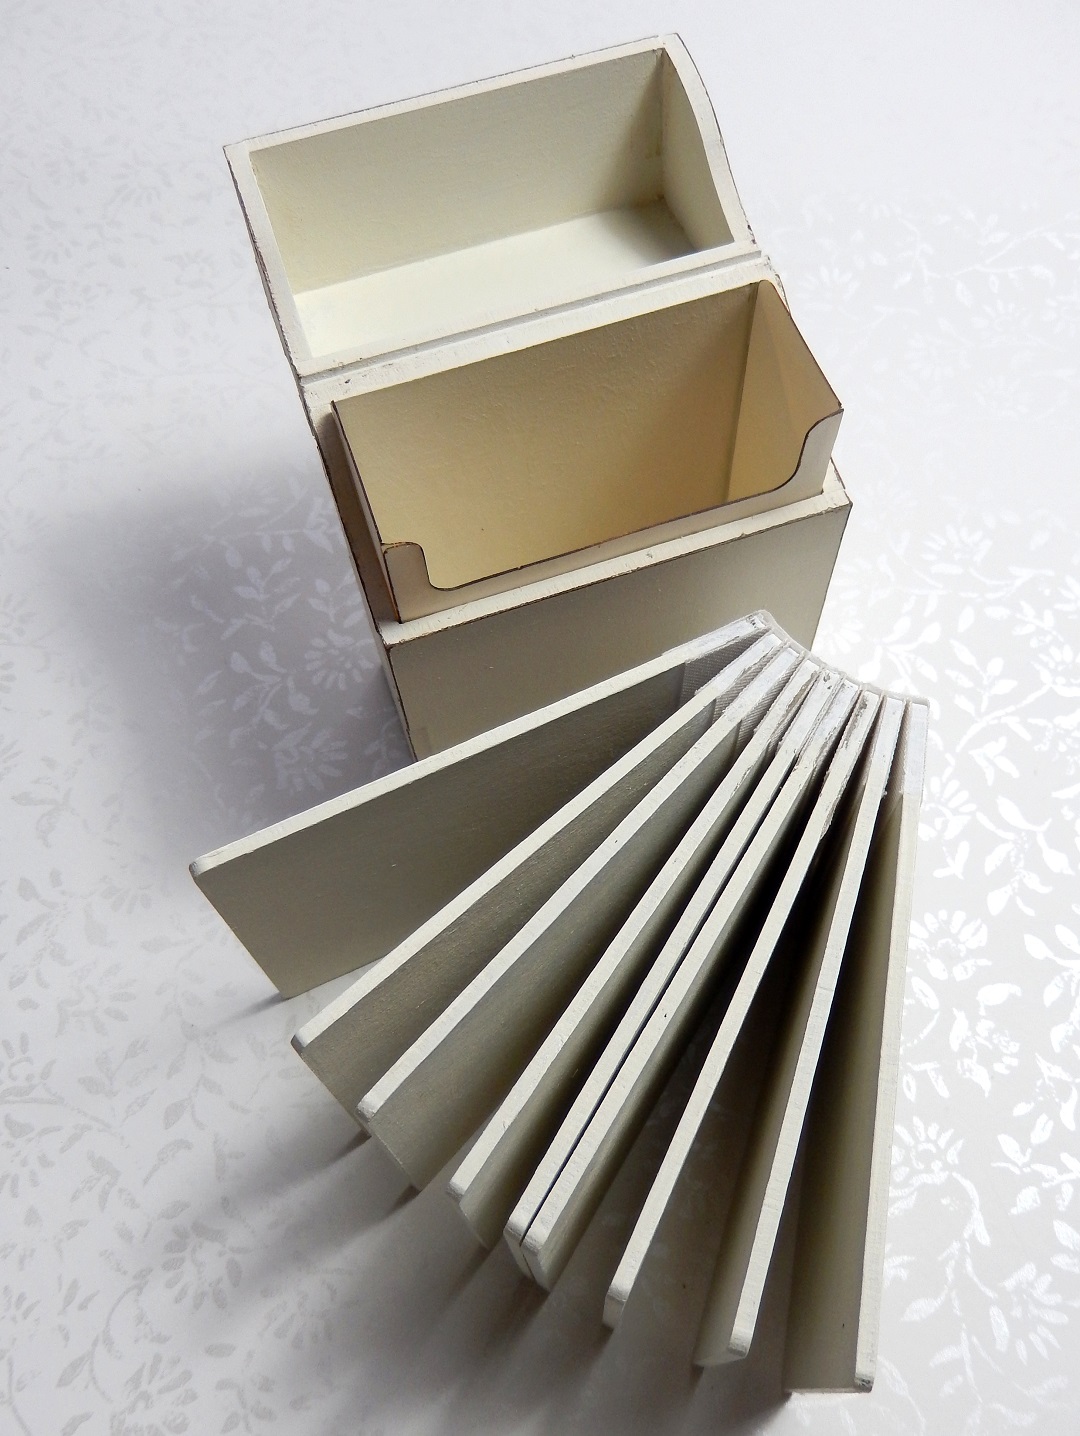
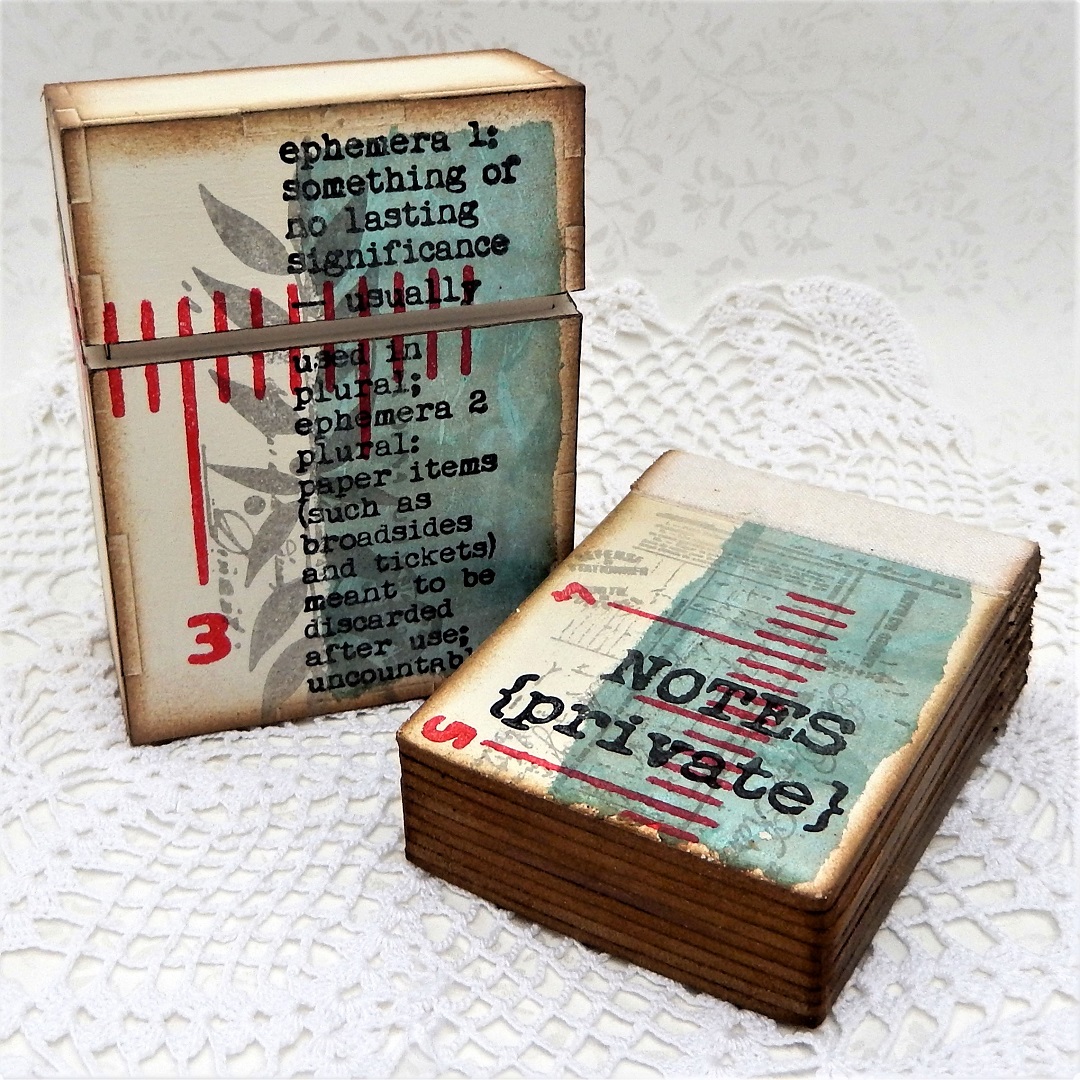
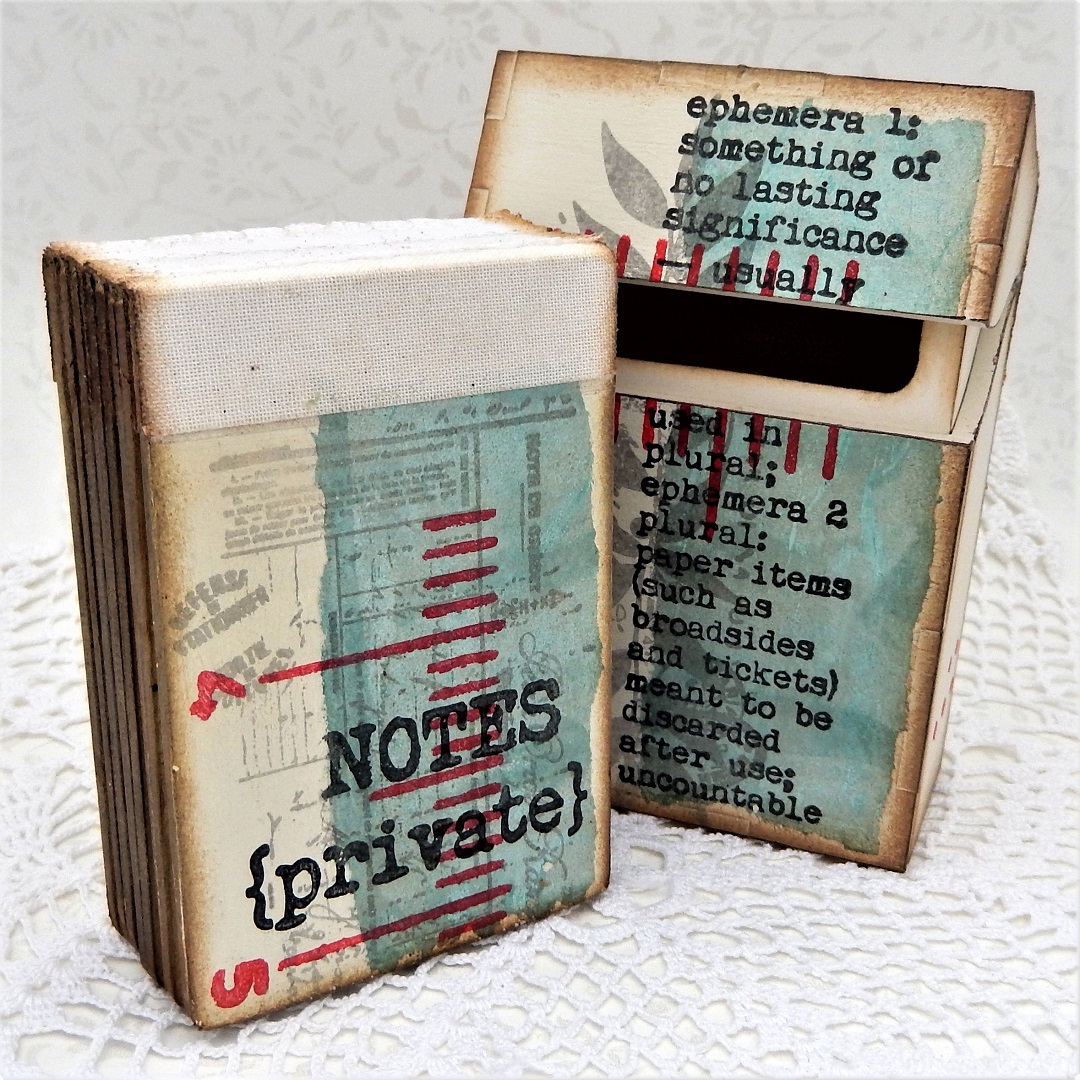
Assemble the ATC box as shown in the CoolKatz instructions (included in the kit)
and paint to match the book, adding the paper insert when dry.
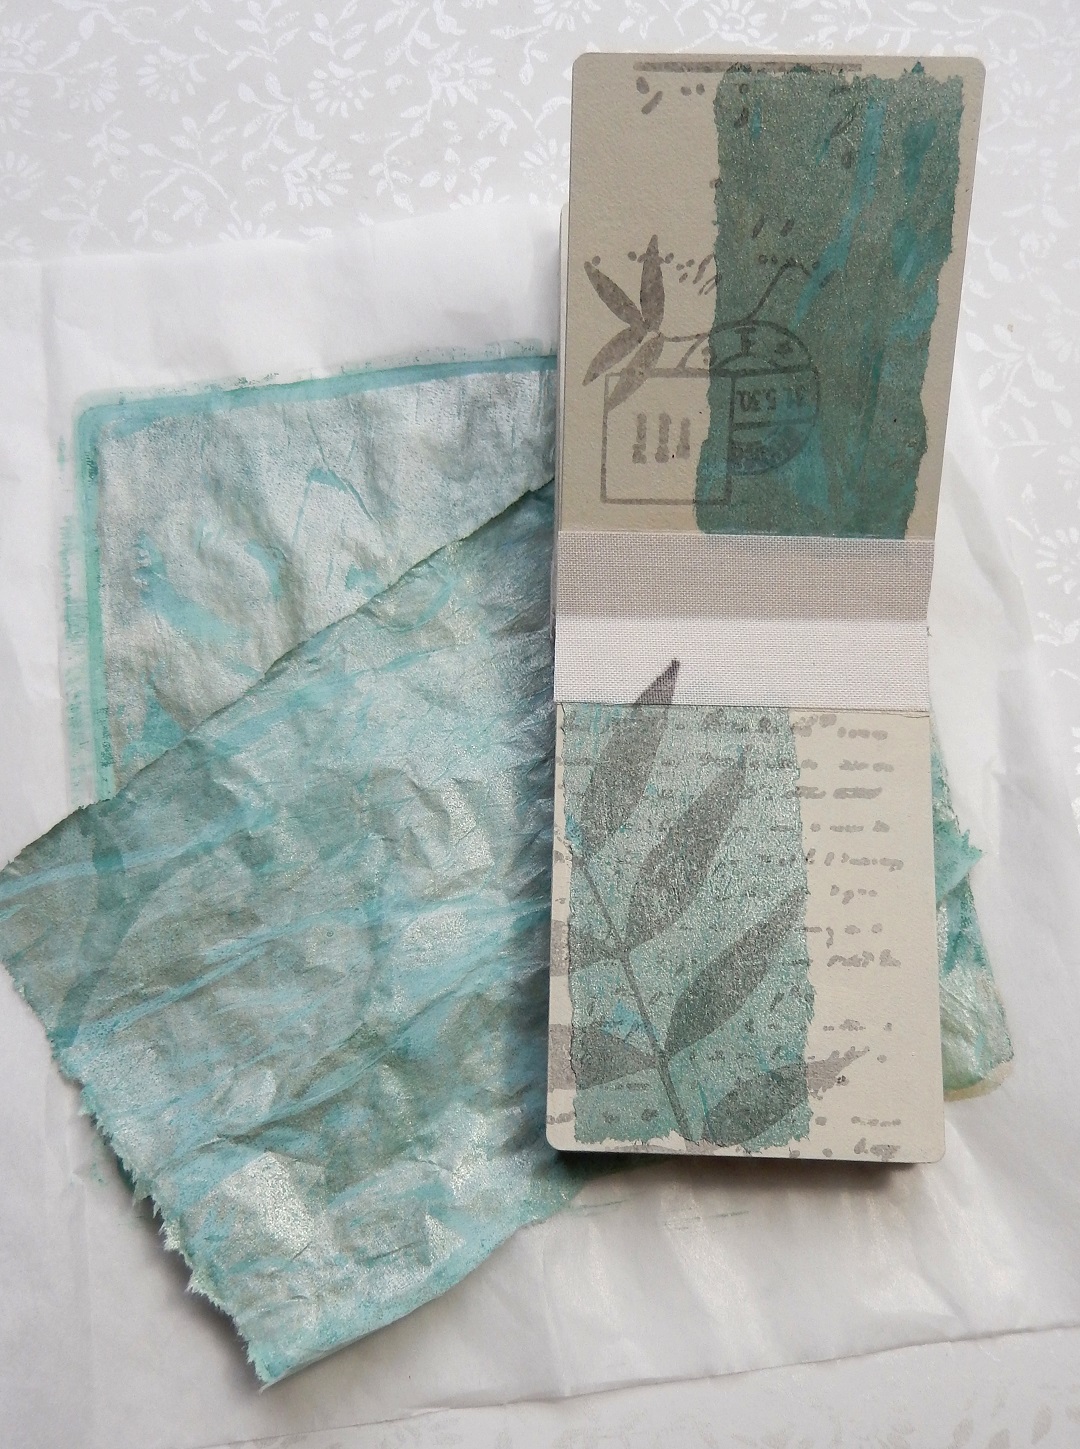
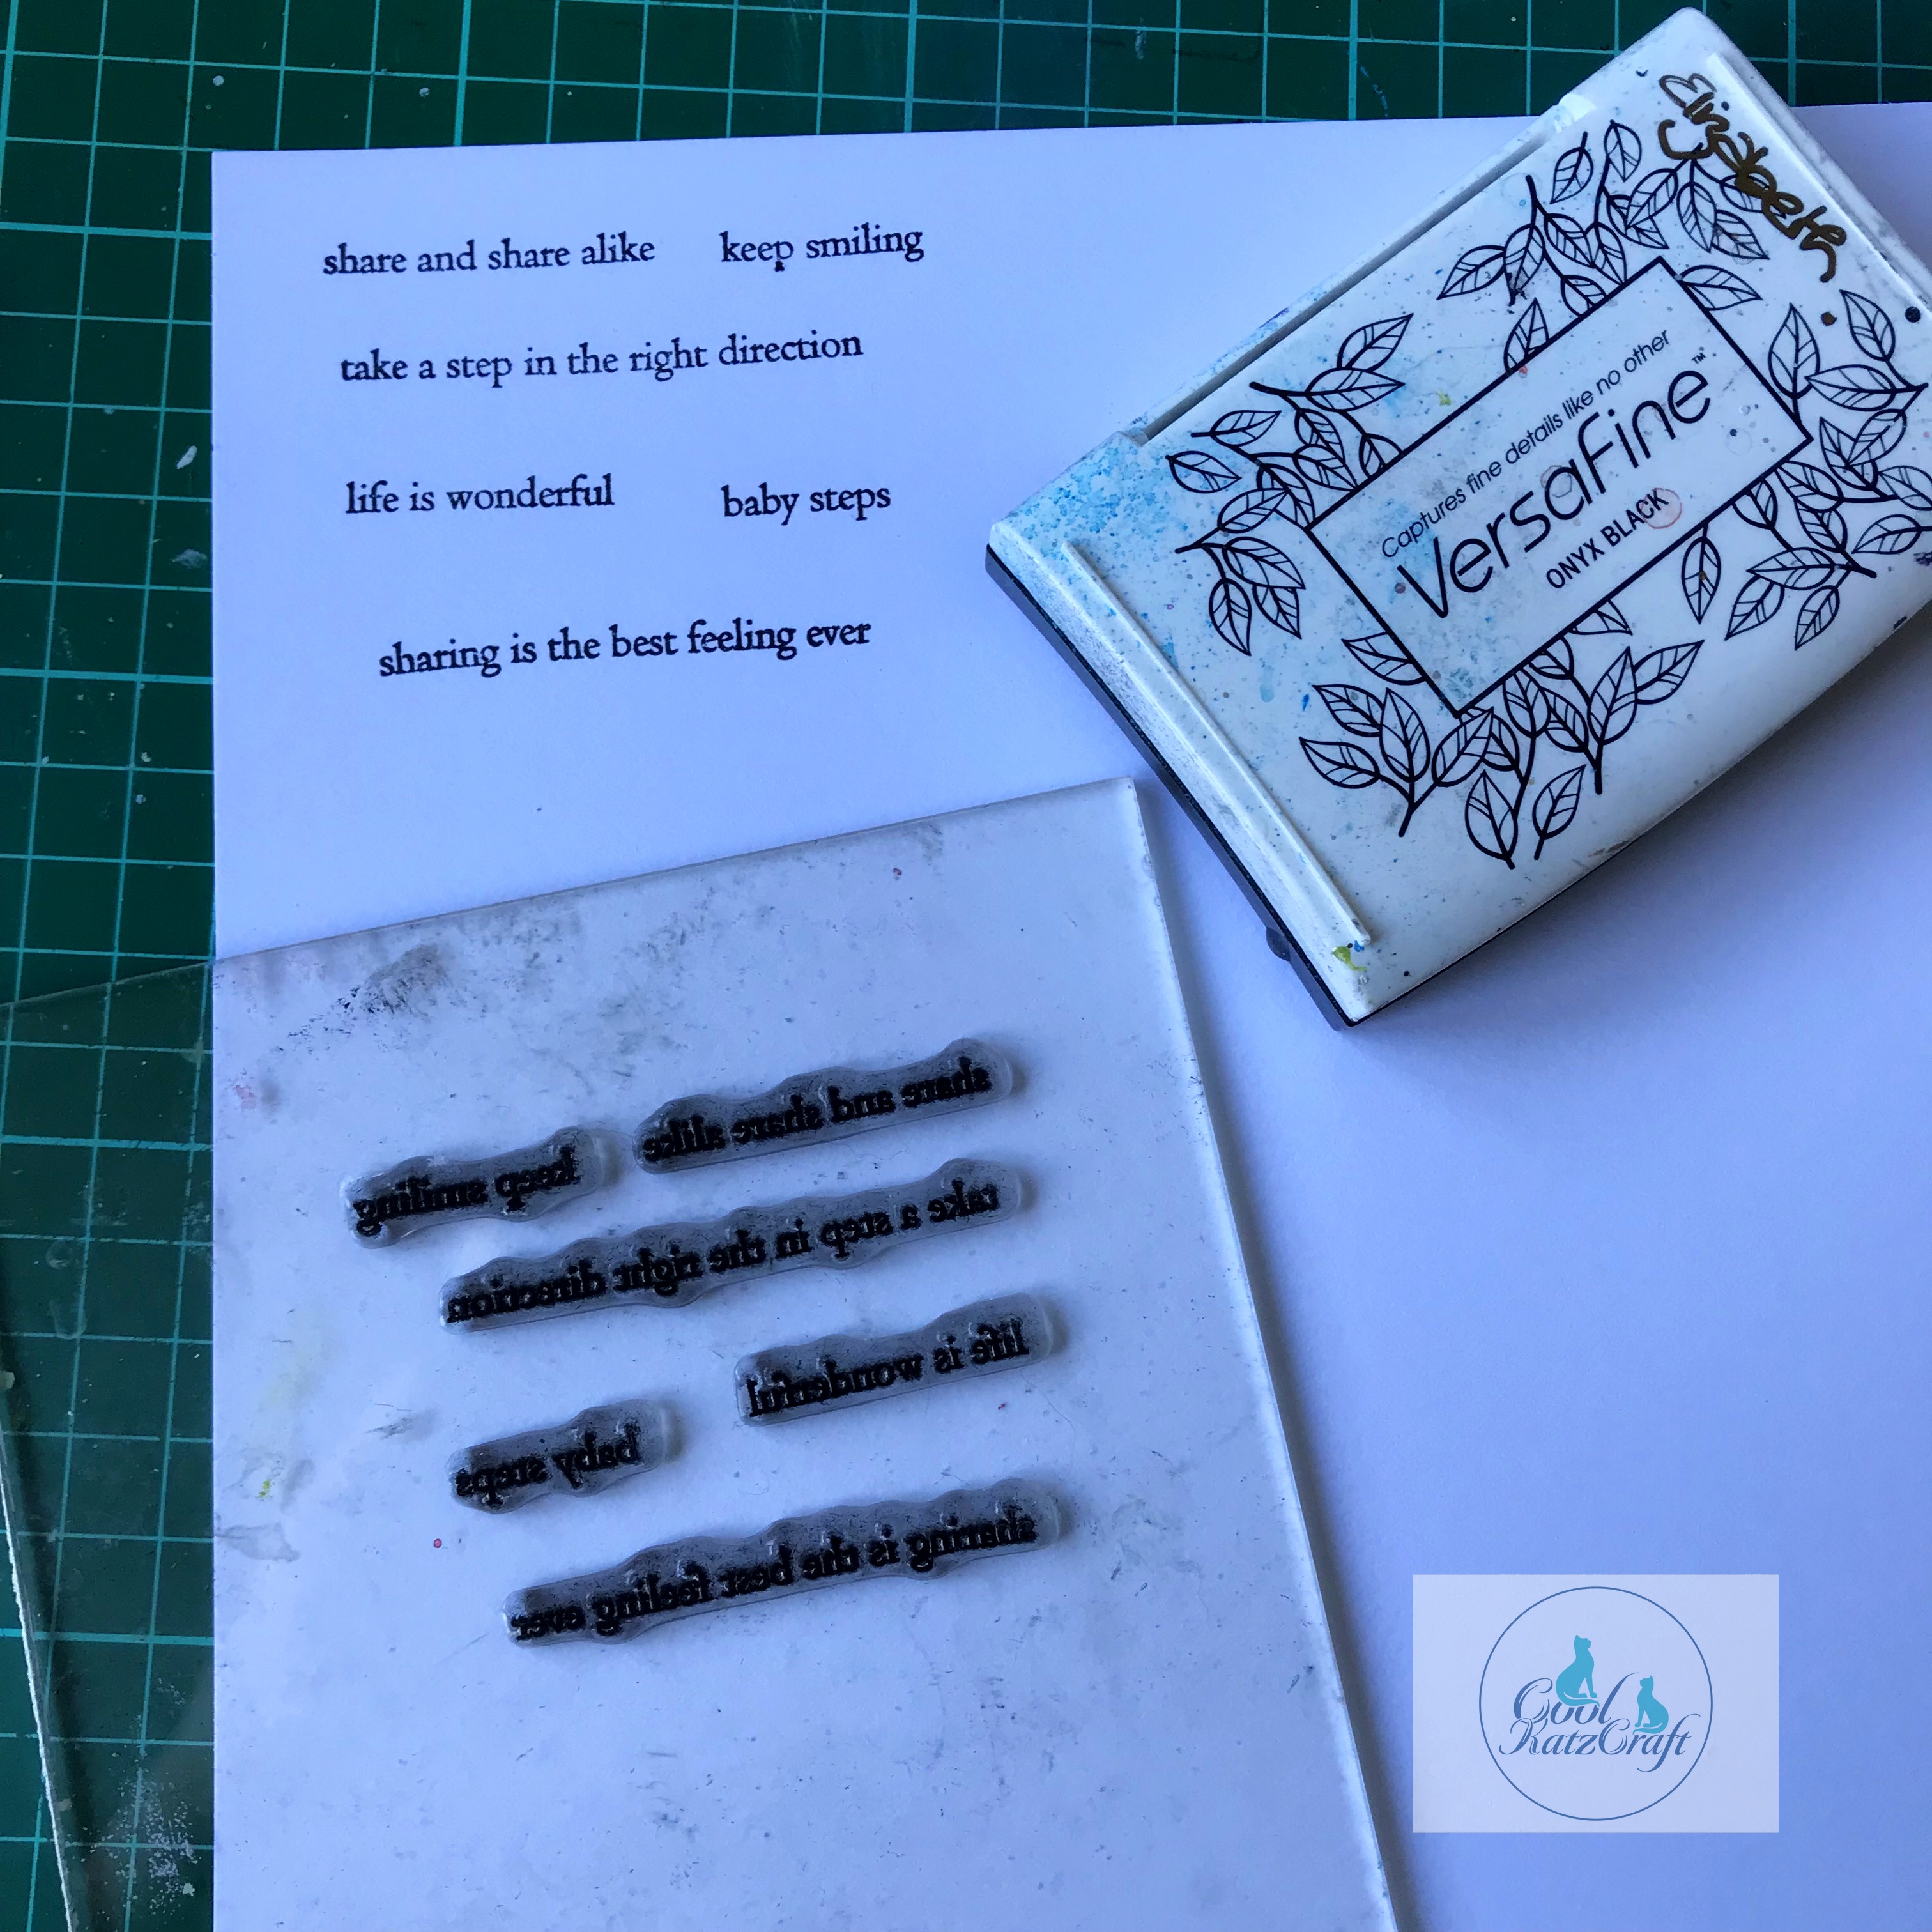
I chose to add torn strips of gel plate printed tissue to each page before stamping
over them with Sara Naumann design stamps from PaperArtsy using grey
permanent ink. For reference the colours used for the gel prints included Fresco
Finish ‘Peppermint’, ‘Frosty’ and ‘Verdigris’, all from PaperArtsy.
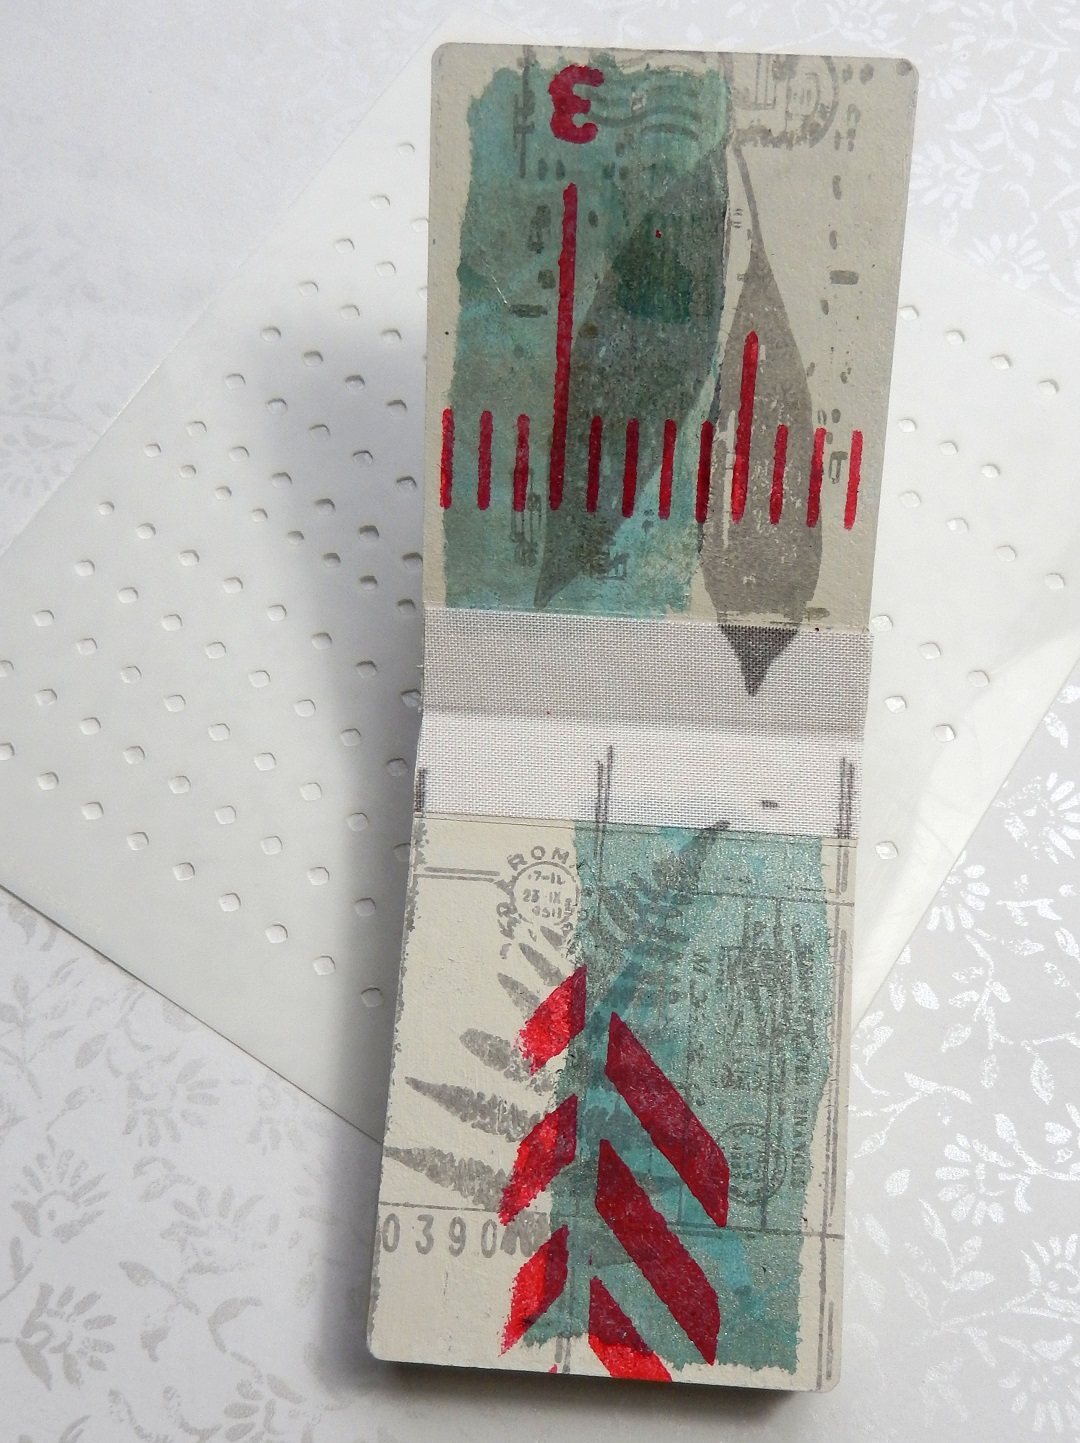 Over the stamping I chose to add contrasting stencilling, again done with Sara
Naumann designs and this time using ‘London Bus’ Fresco Finish paint, all from
PaperArtsy.
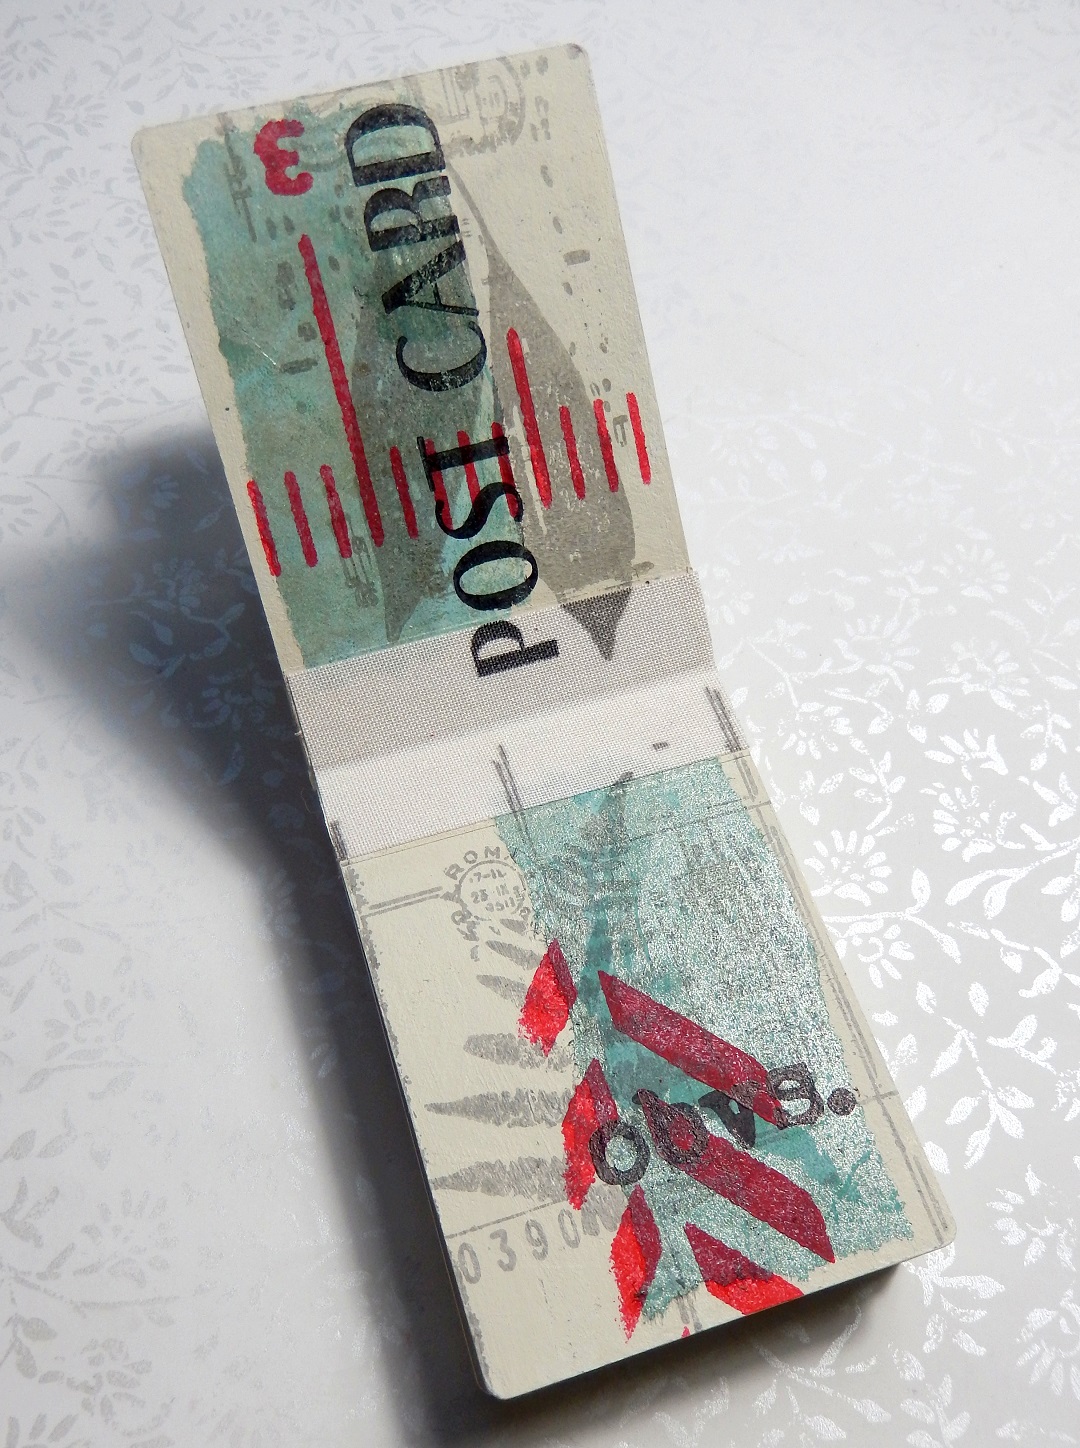
To make sure the focal points and writing would stand out against the background I
chose to add more of Sara Naumann’s designs using black permanent ink. At this
stage you could choose to add your own writing, pictures, ephemera etc instead.
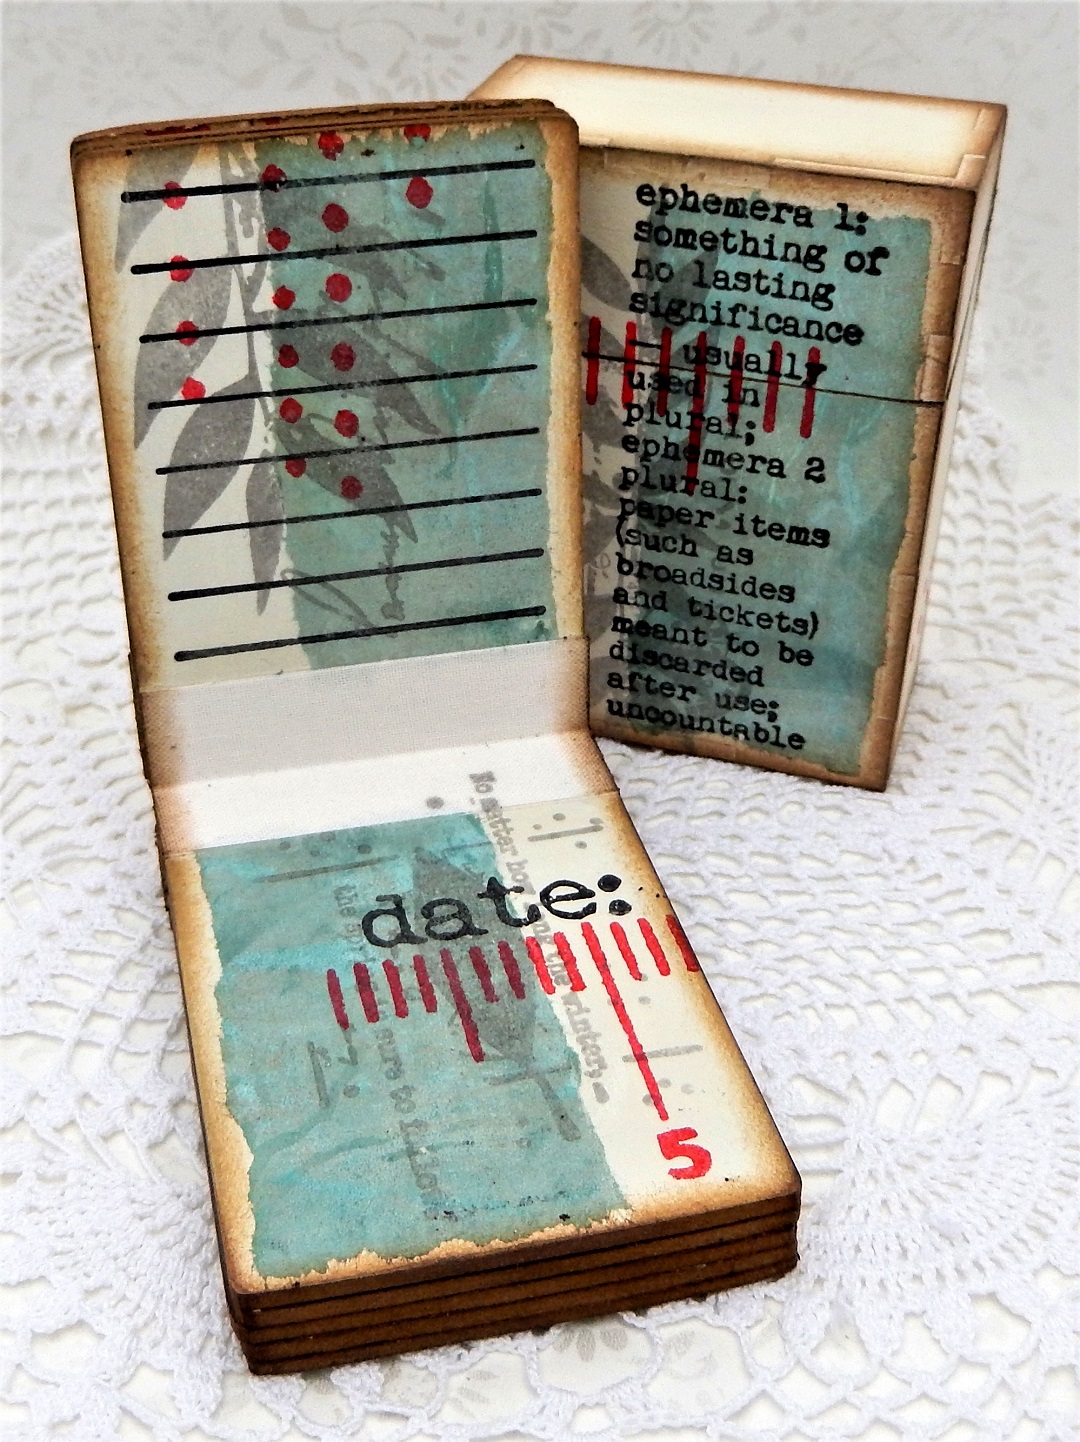
Here’s a final reminder of the finished book and ATC Box when the stamping had
been completed and some brown permanent ink had been applied to all of the
edges.
Hopefully you have found these instructions and hints helpful for creating your own
Mini Book and ATC Box using the new CoolKatz kit. Make sure to share your
finished projects in the Cool Katz Facebook Group – we’d love to see them.