free UK postage
over £40.00
Search


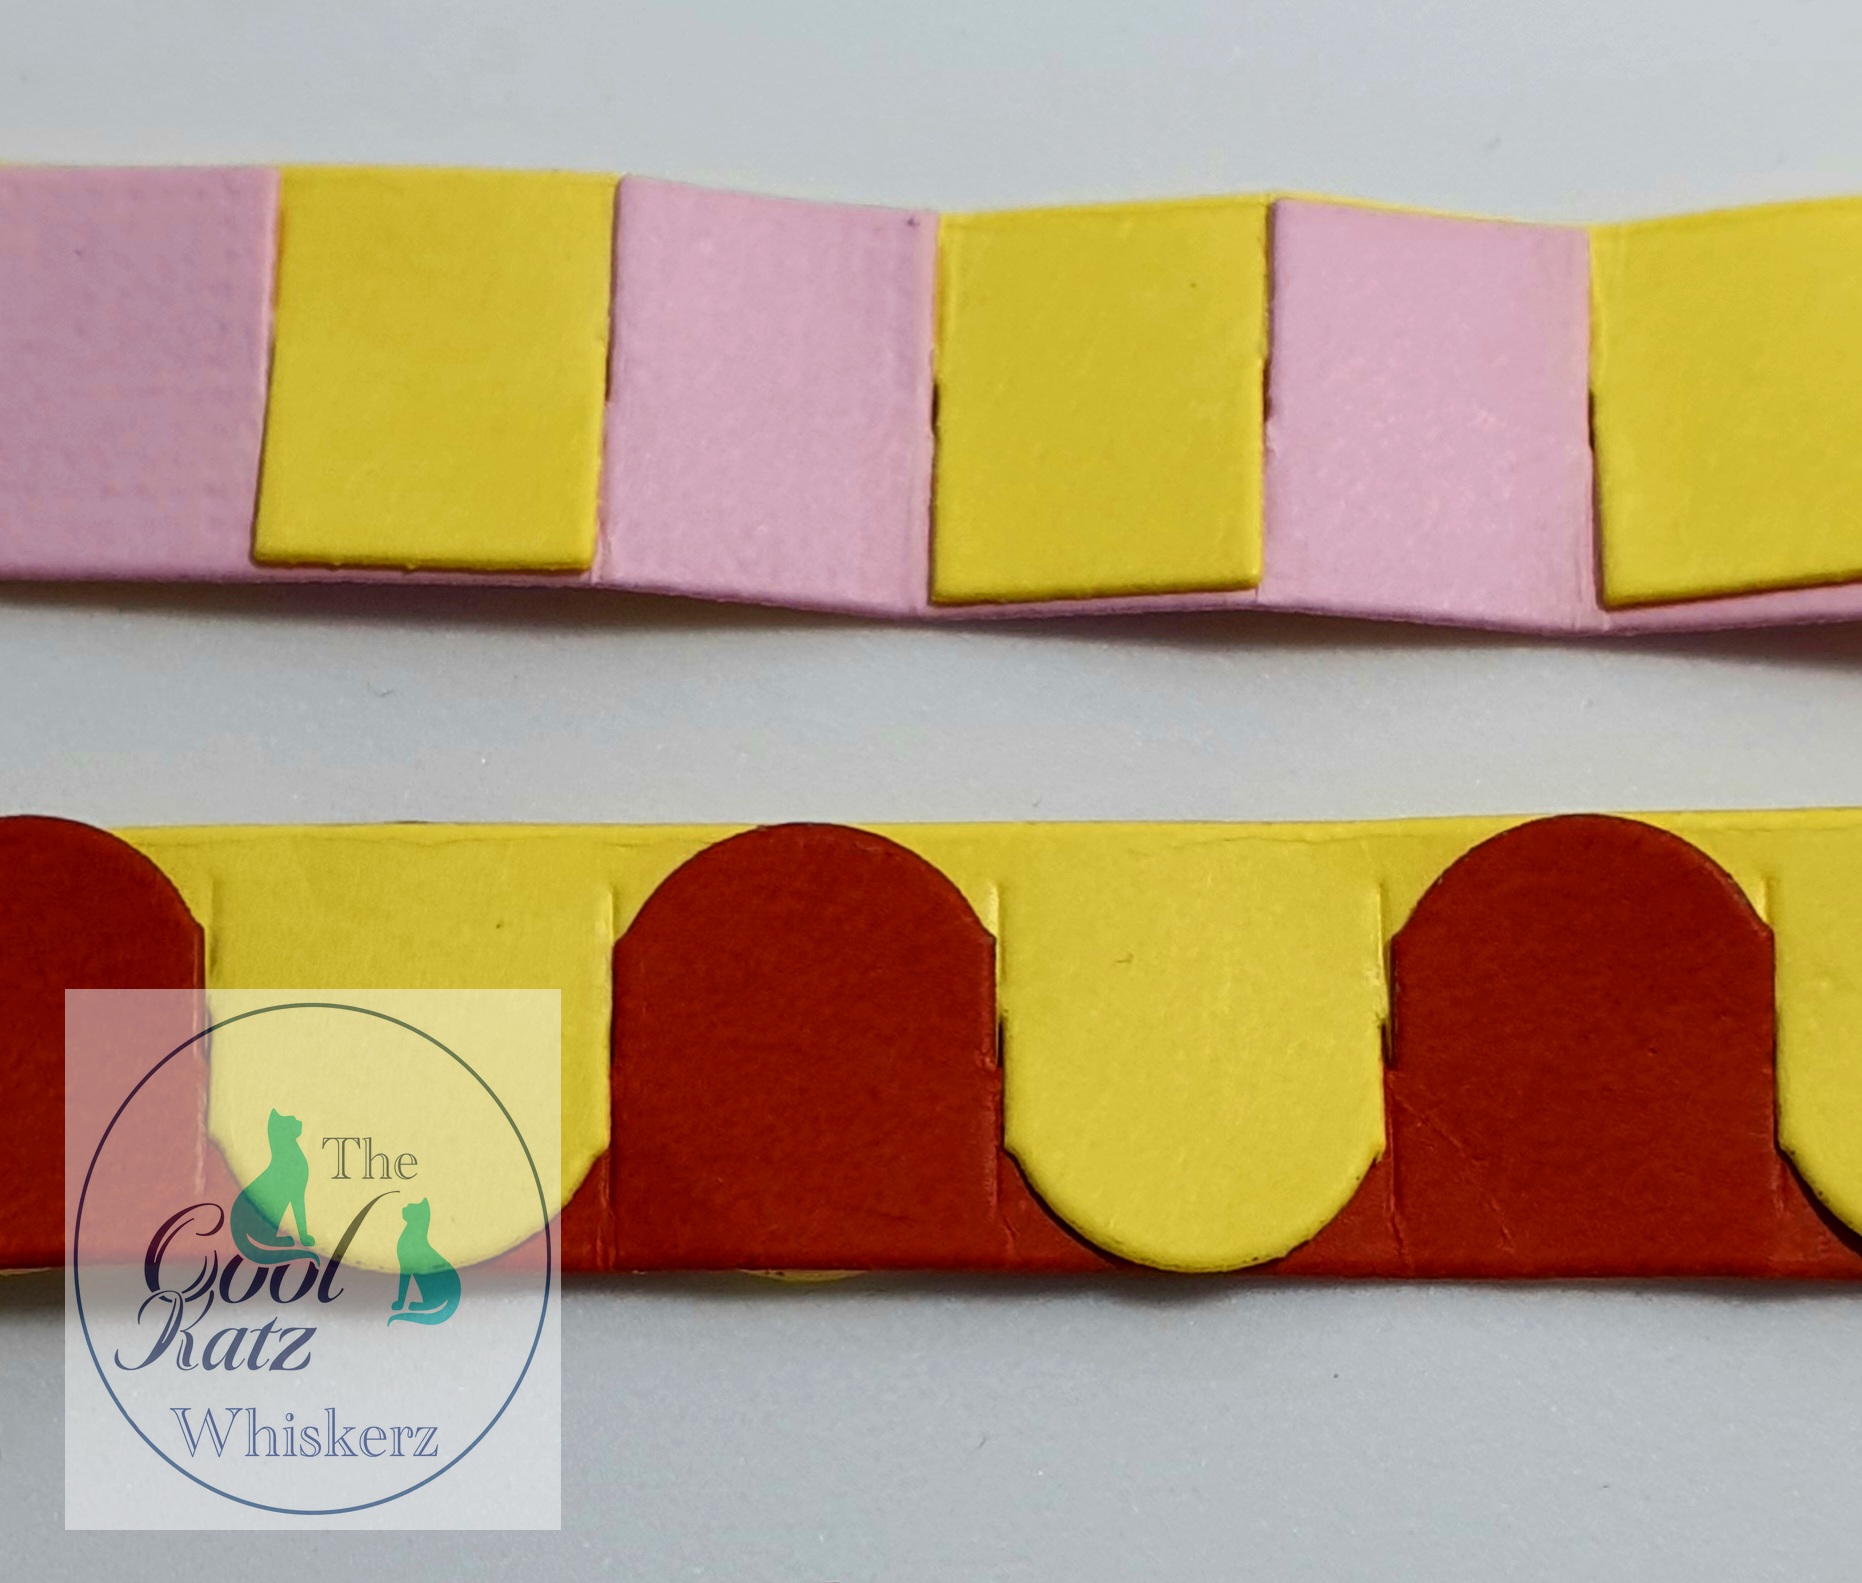
CoolKatz Mini Roof Tile Die Strips
Today I had a play with the new Mini Roof Tile Die Strips dies from CoolKatz.
These are going to make such fabulous roof tiles for my MDF Intrigues, but how else could I use them?
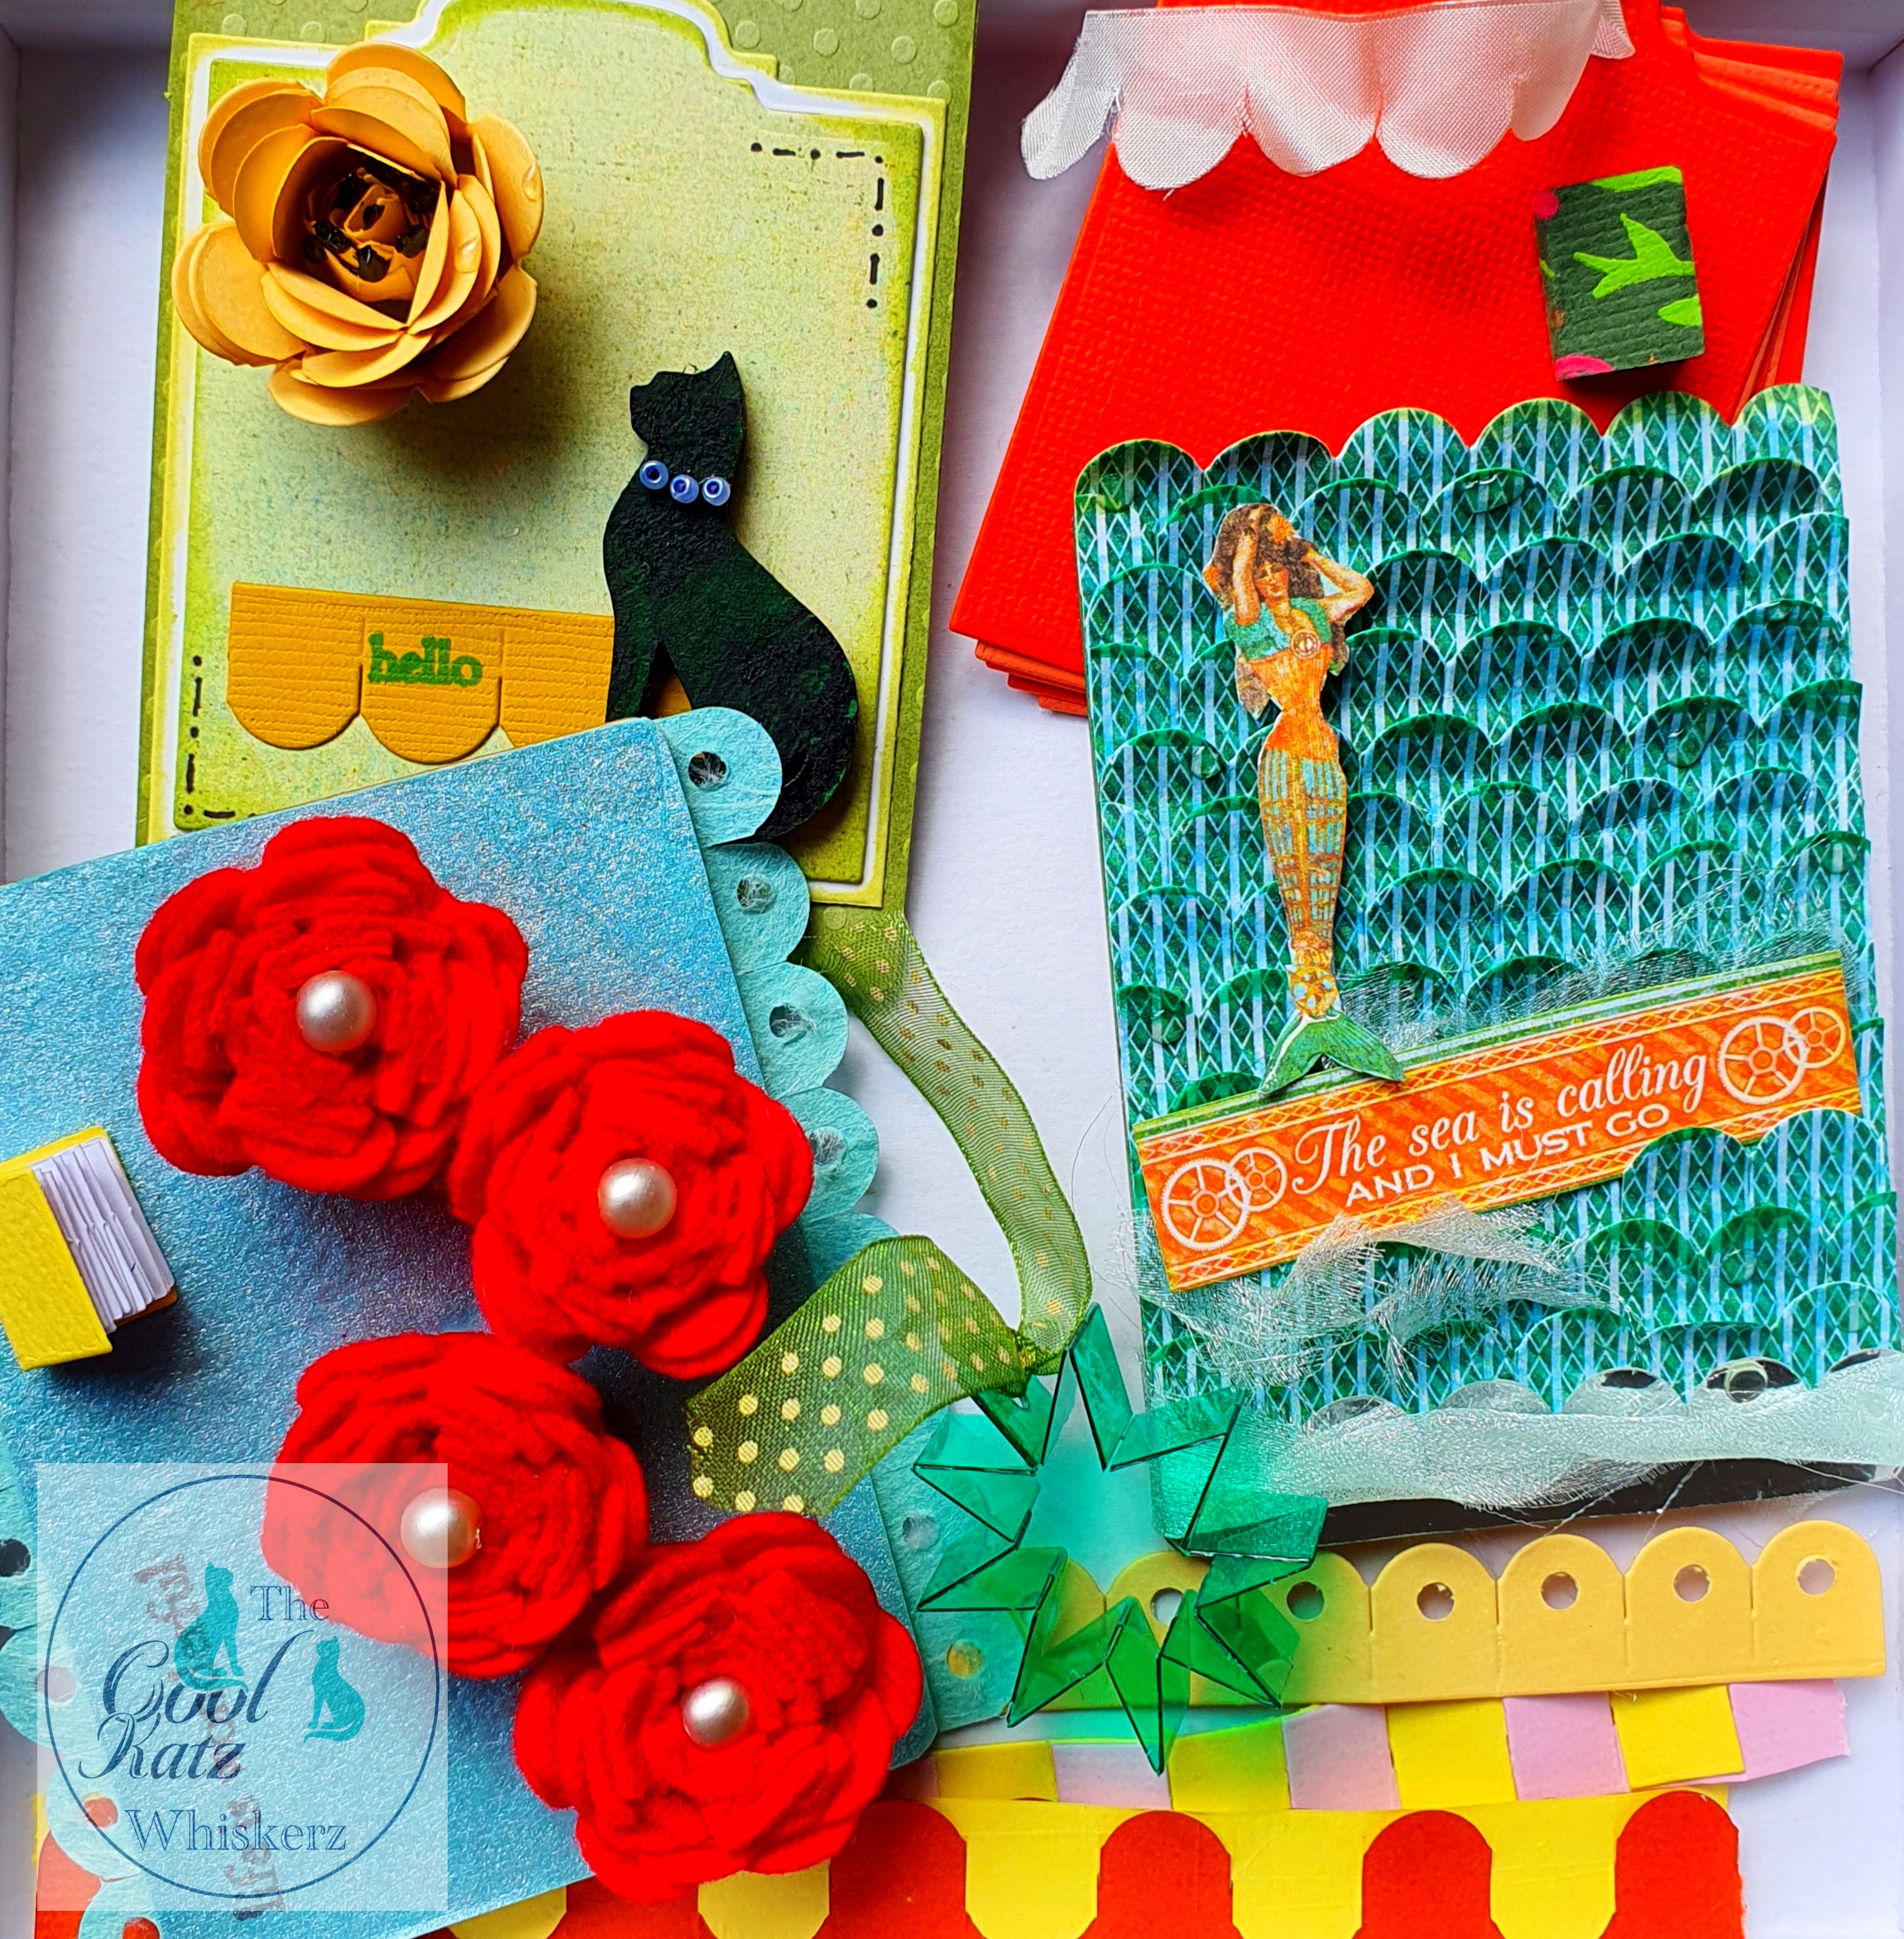
My first thought was flowers. Quilled flowers. So I started cutting out different materials to give it a go.
The little red flower was made from both dies out of a red felt sheet. The square strip was curled up tightly then surrounded by the rounded strip, the ‘petals’ of which I teased out a little to make them curl backwards. I made a little dent in the middle (with the end of a Teflon Pencil Tool) and popped in a pearl. I used just a little bit of glue to keep it all in place, but the end of the flower could have been stitched instead.
It was at this point that I thought it would be nice to make some ATCs with the flowers. So I found the greyboard ATC blanks that come with the ATC Stamp and Storage Bundle and set to work.
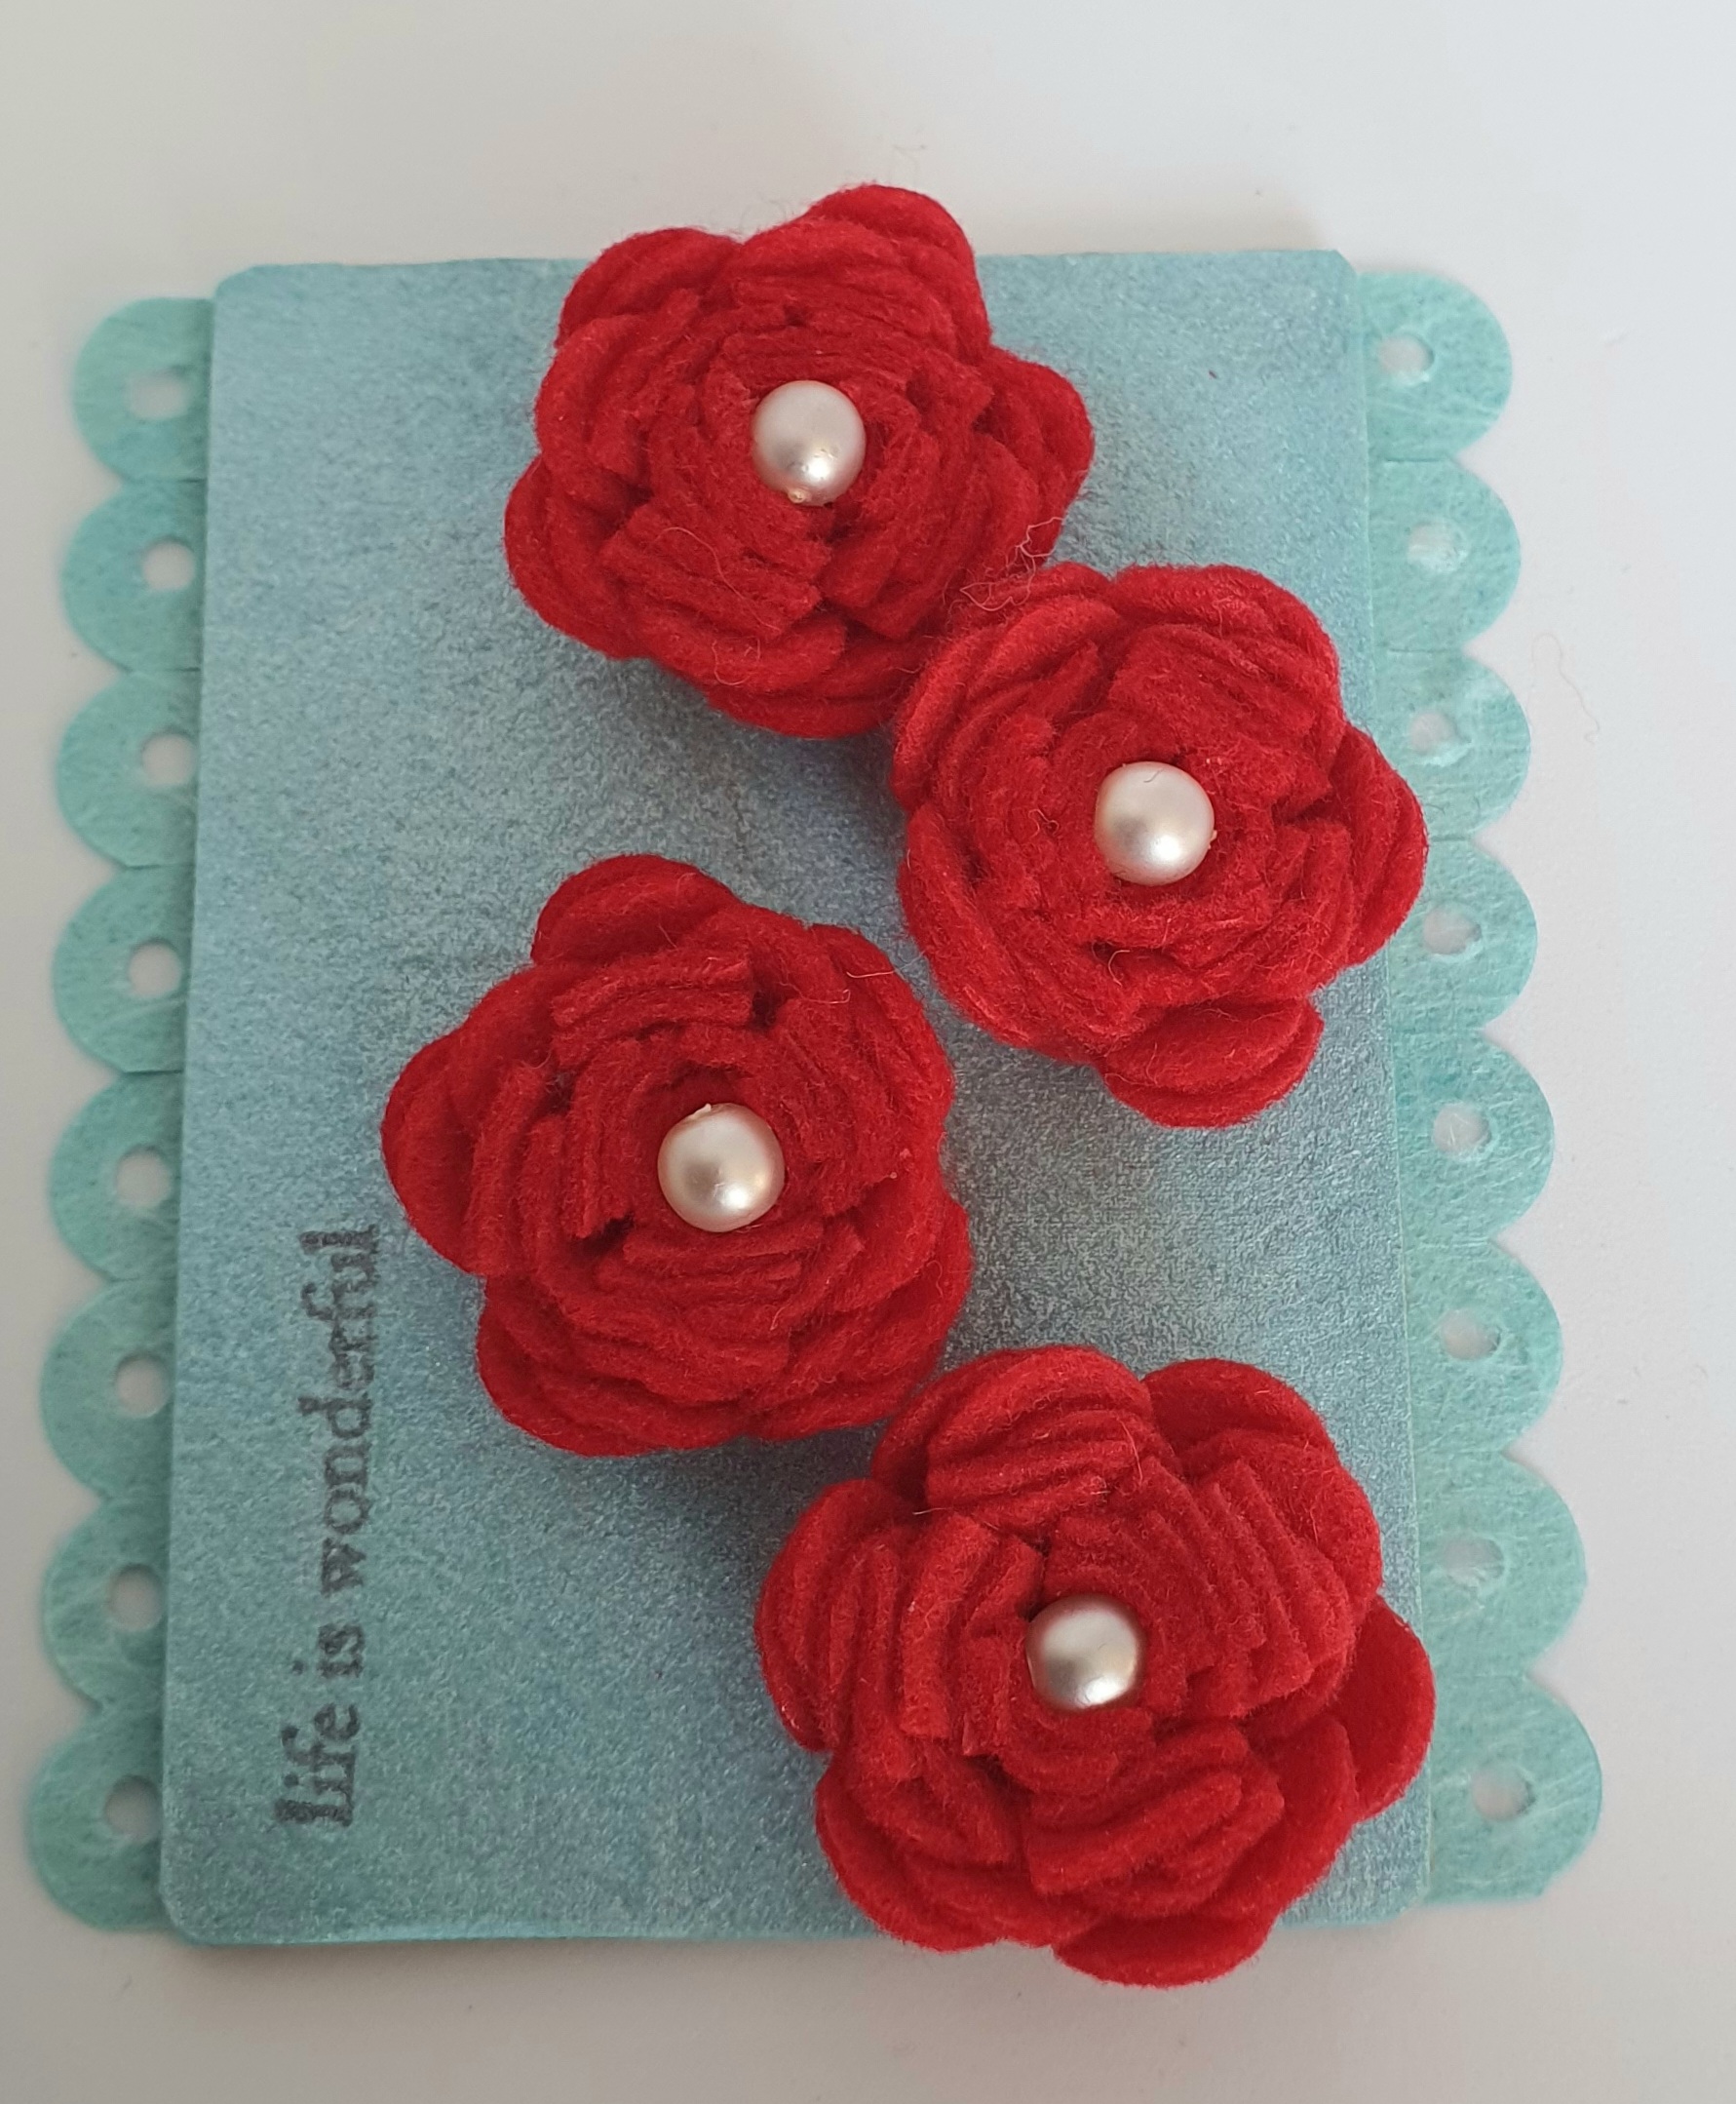
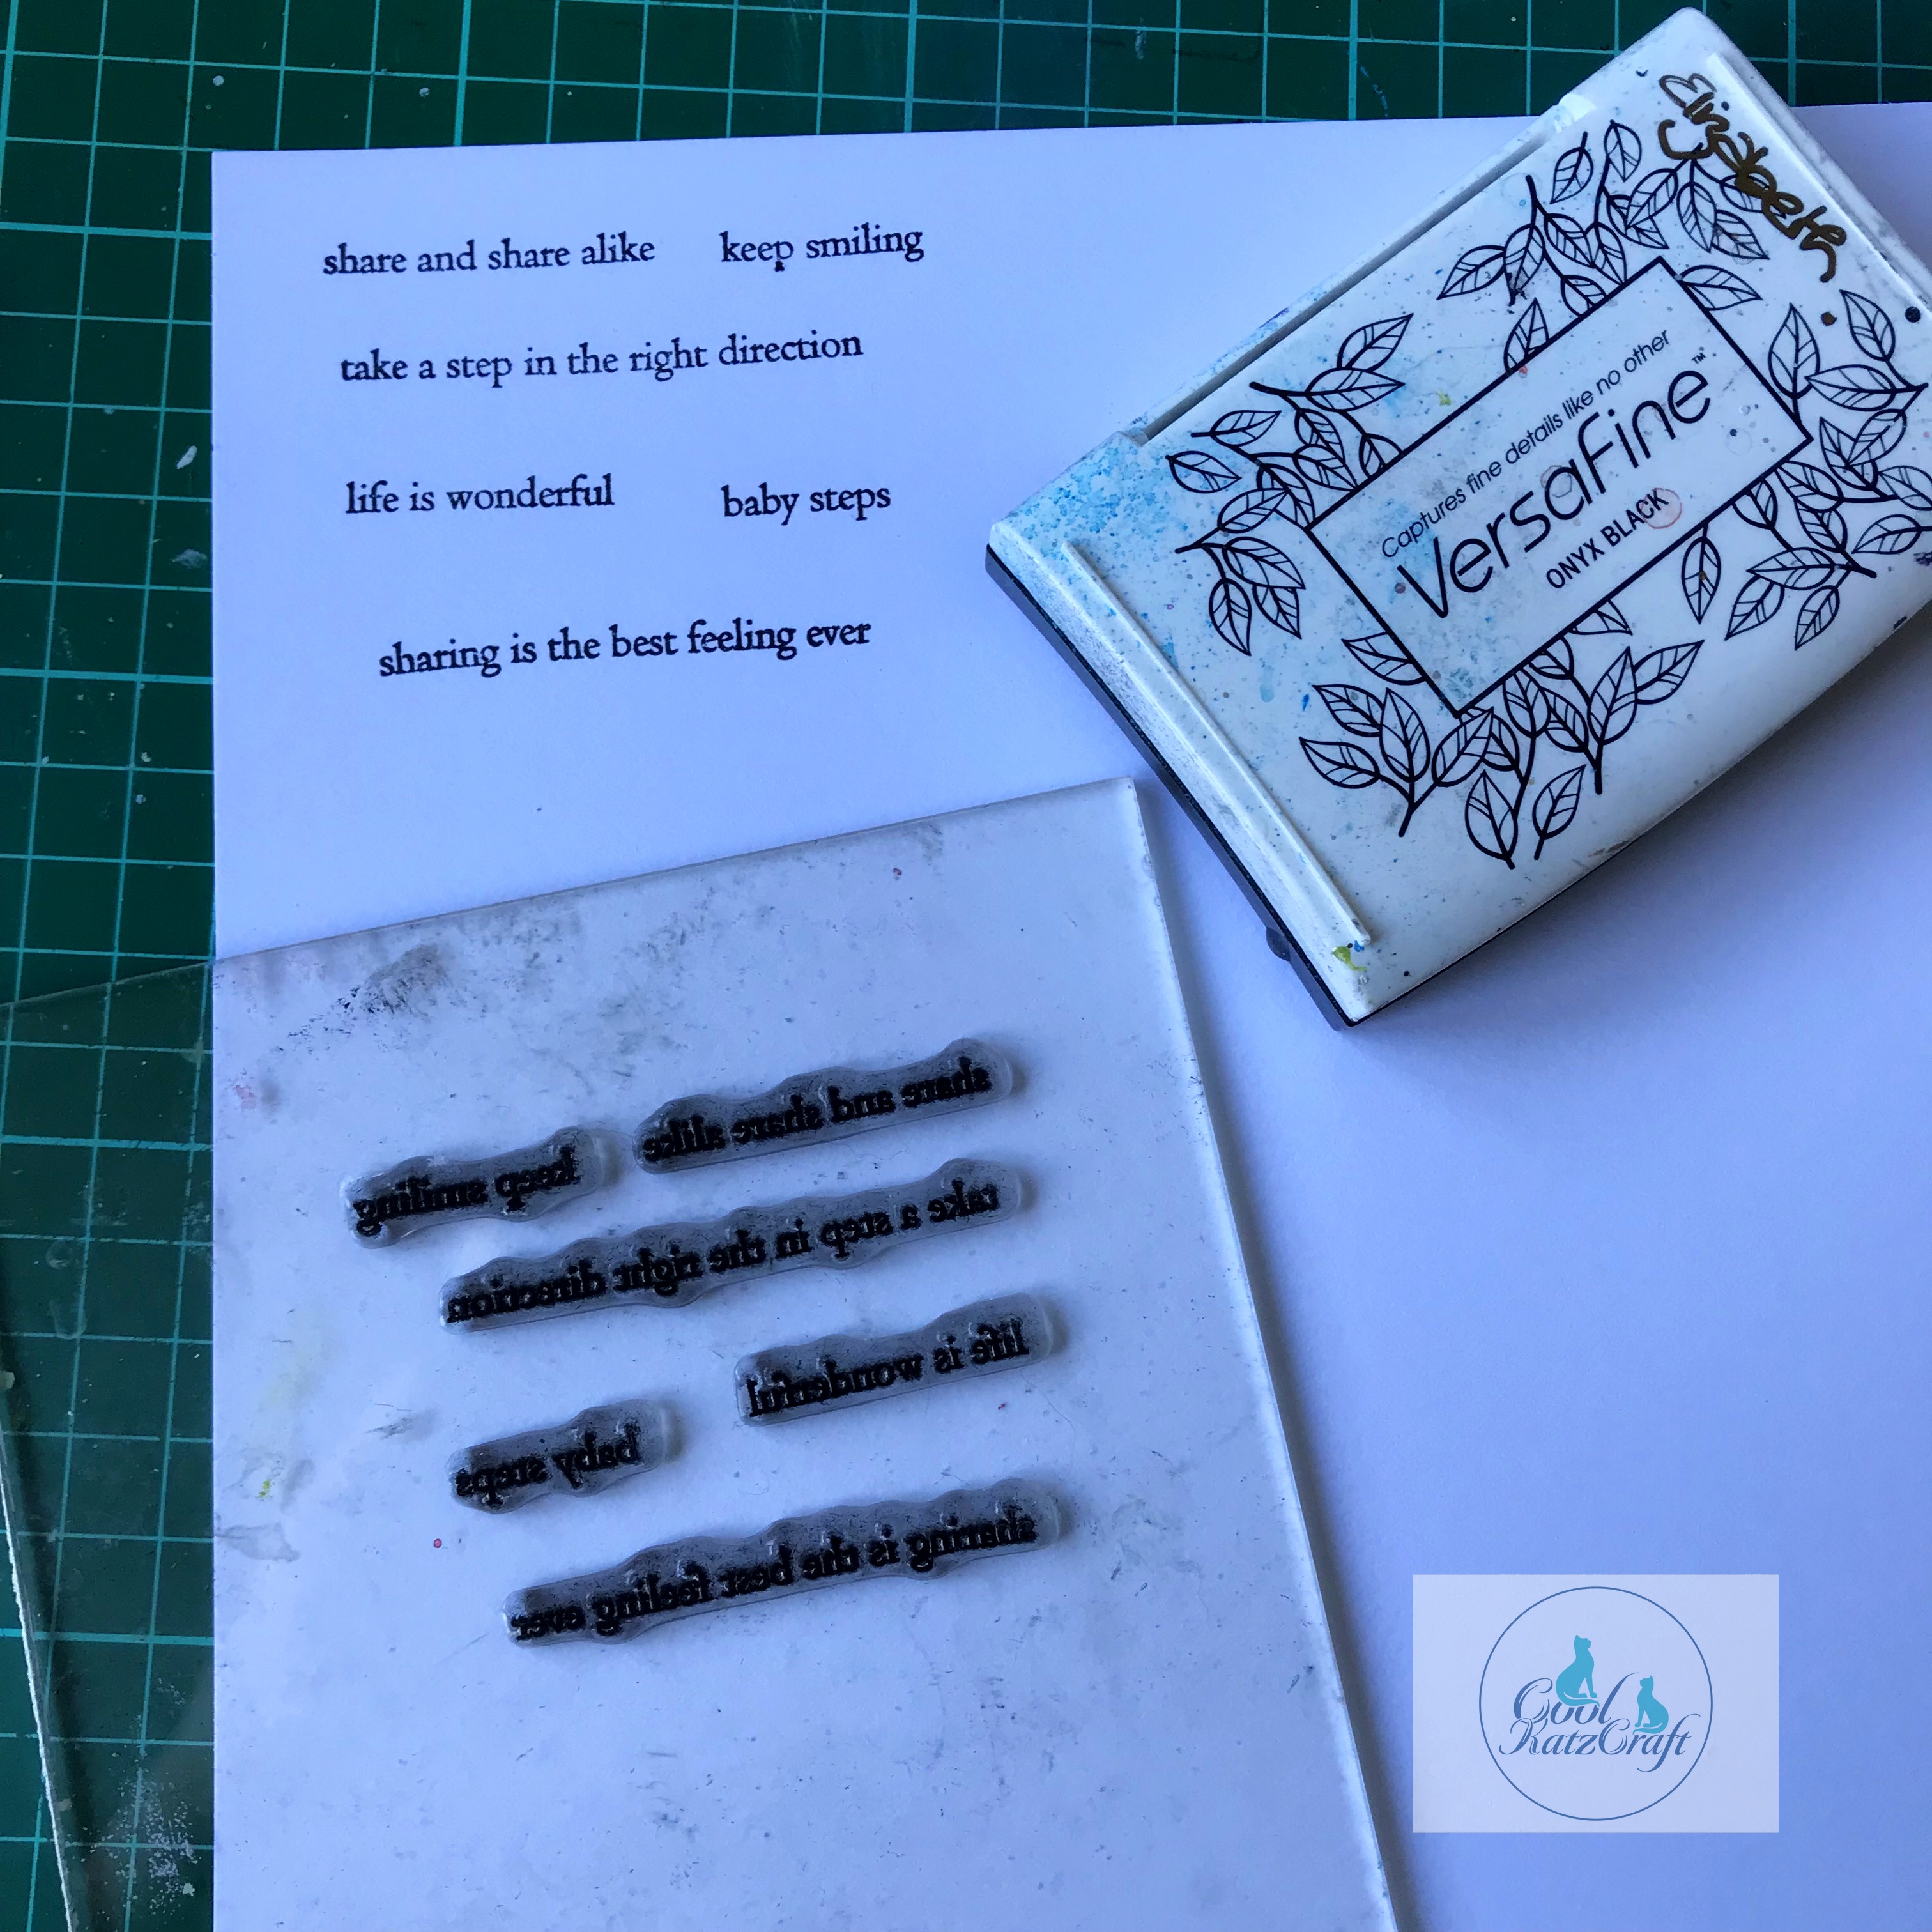
This first ATC uses 4 of the red felt flowers, two strips of the rounded tile strip glued to the back with the circles poking around the side, which I punched with holes for more decoration and a sentiment ‘Life is beautiful’ from the CoolKatz Inspirational Words stamp set.
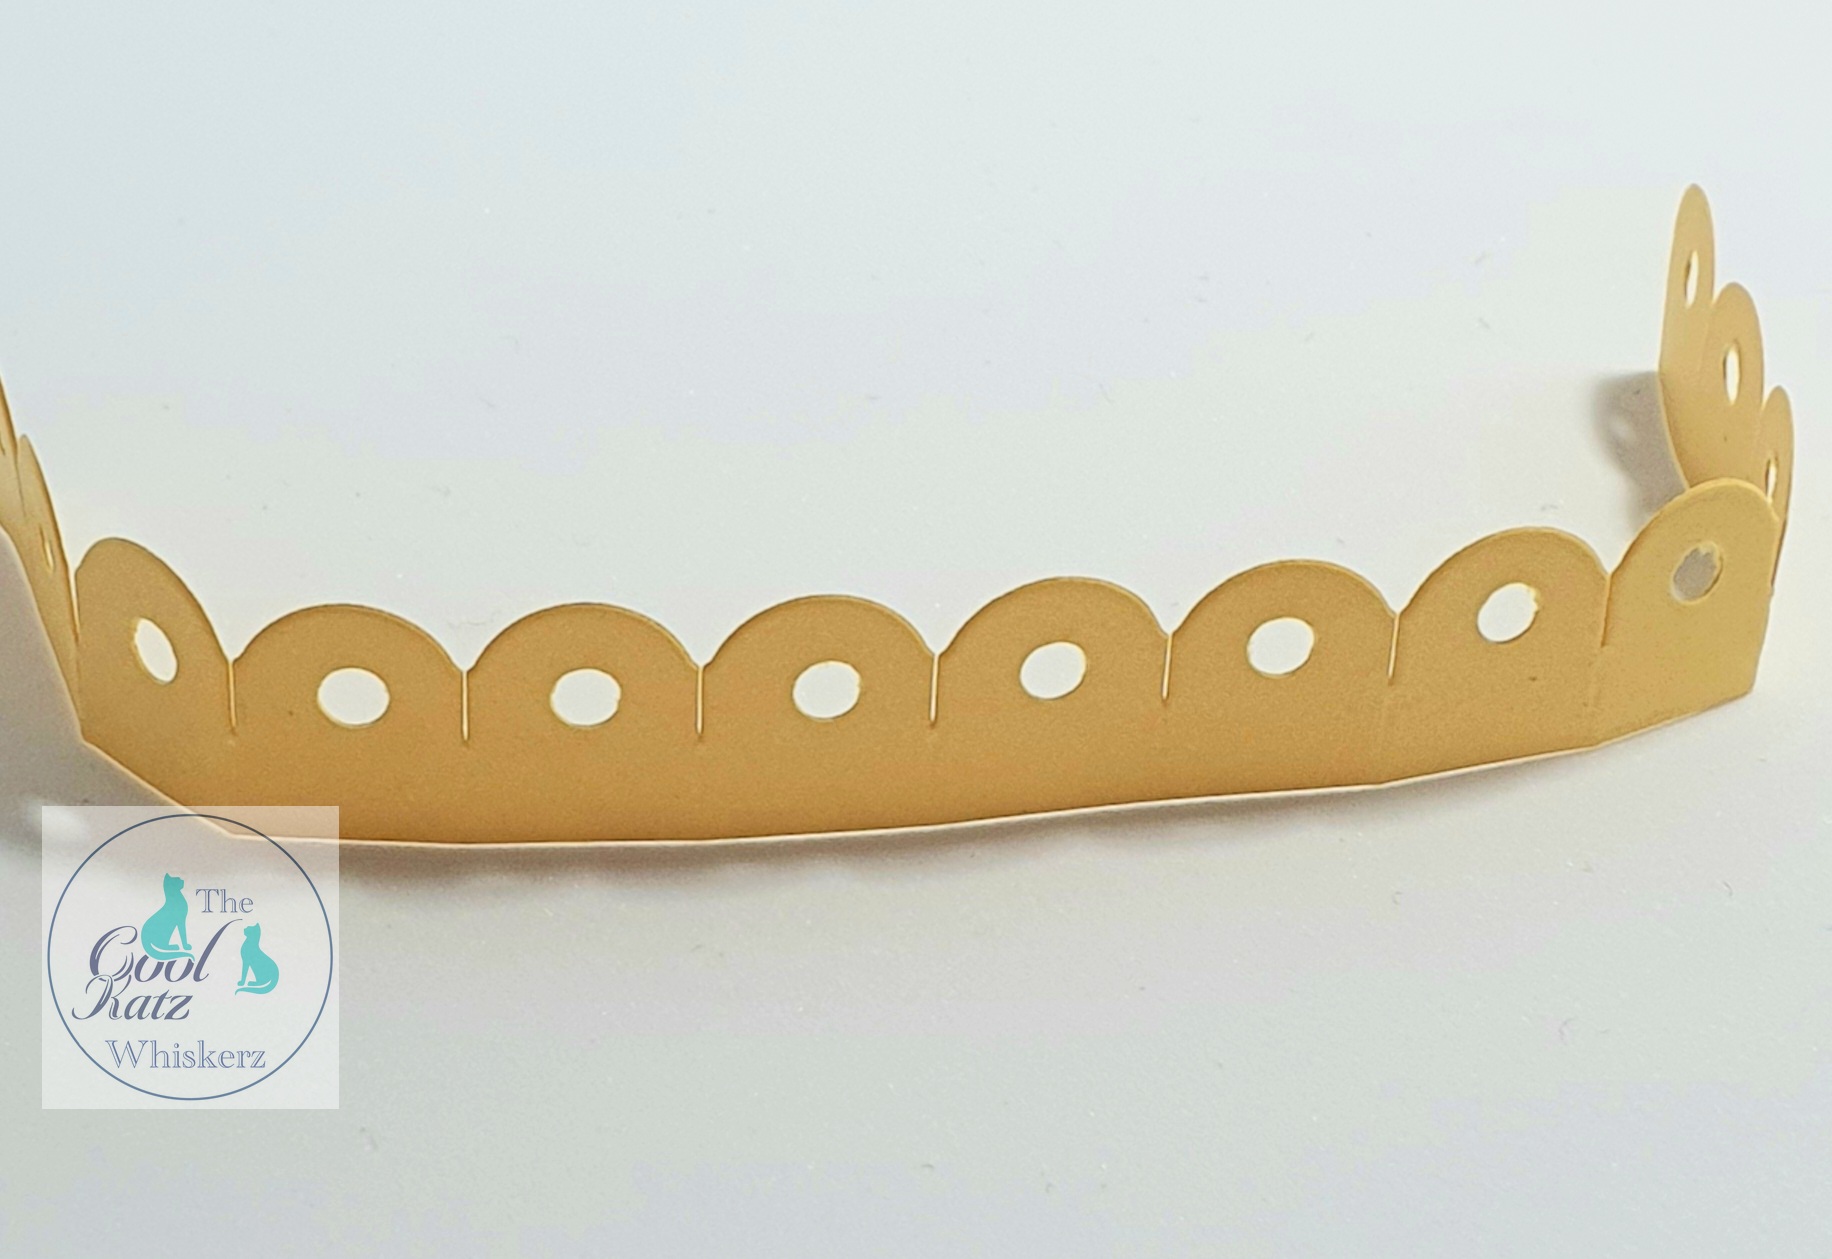
My next flower I made from yellow card using the rounded tile strip only. The card was stiff so it left a rather large gap in the middle so I used the offcuts of spiky card (that were parts of the negative left when two of the rounded tile strips were cut next to each other) to fill in the middle part. I gave the middle some accents using dots of enamel and used some Glossy Accents for little droplets of dew.
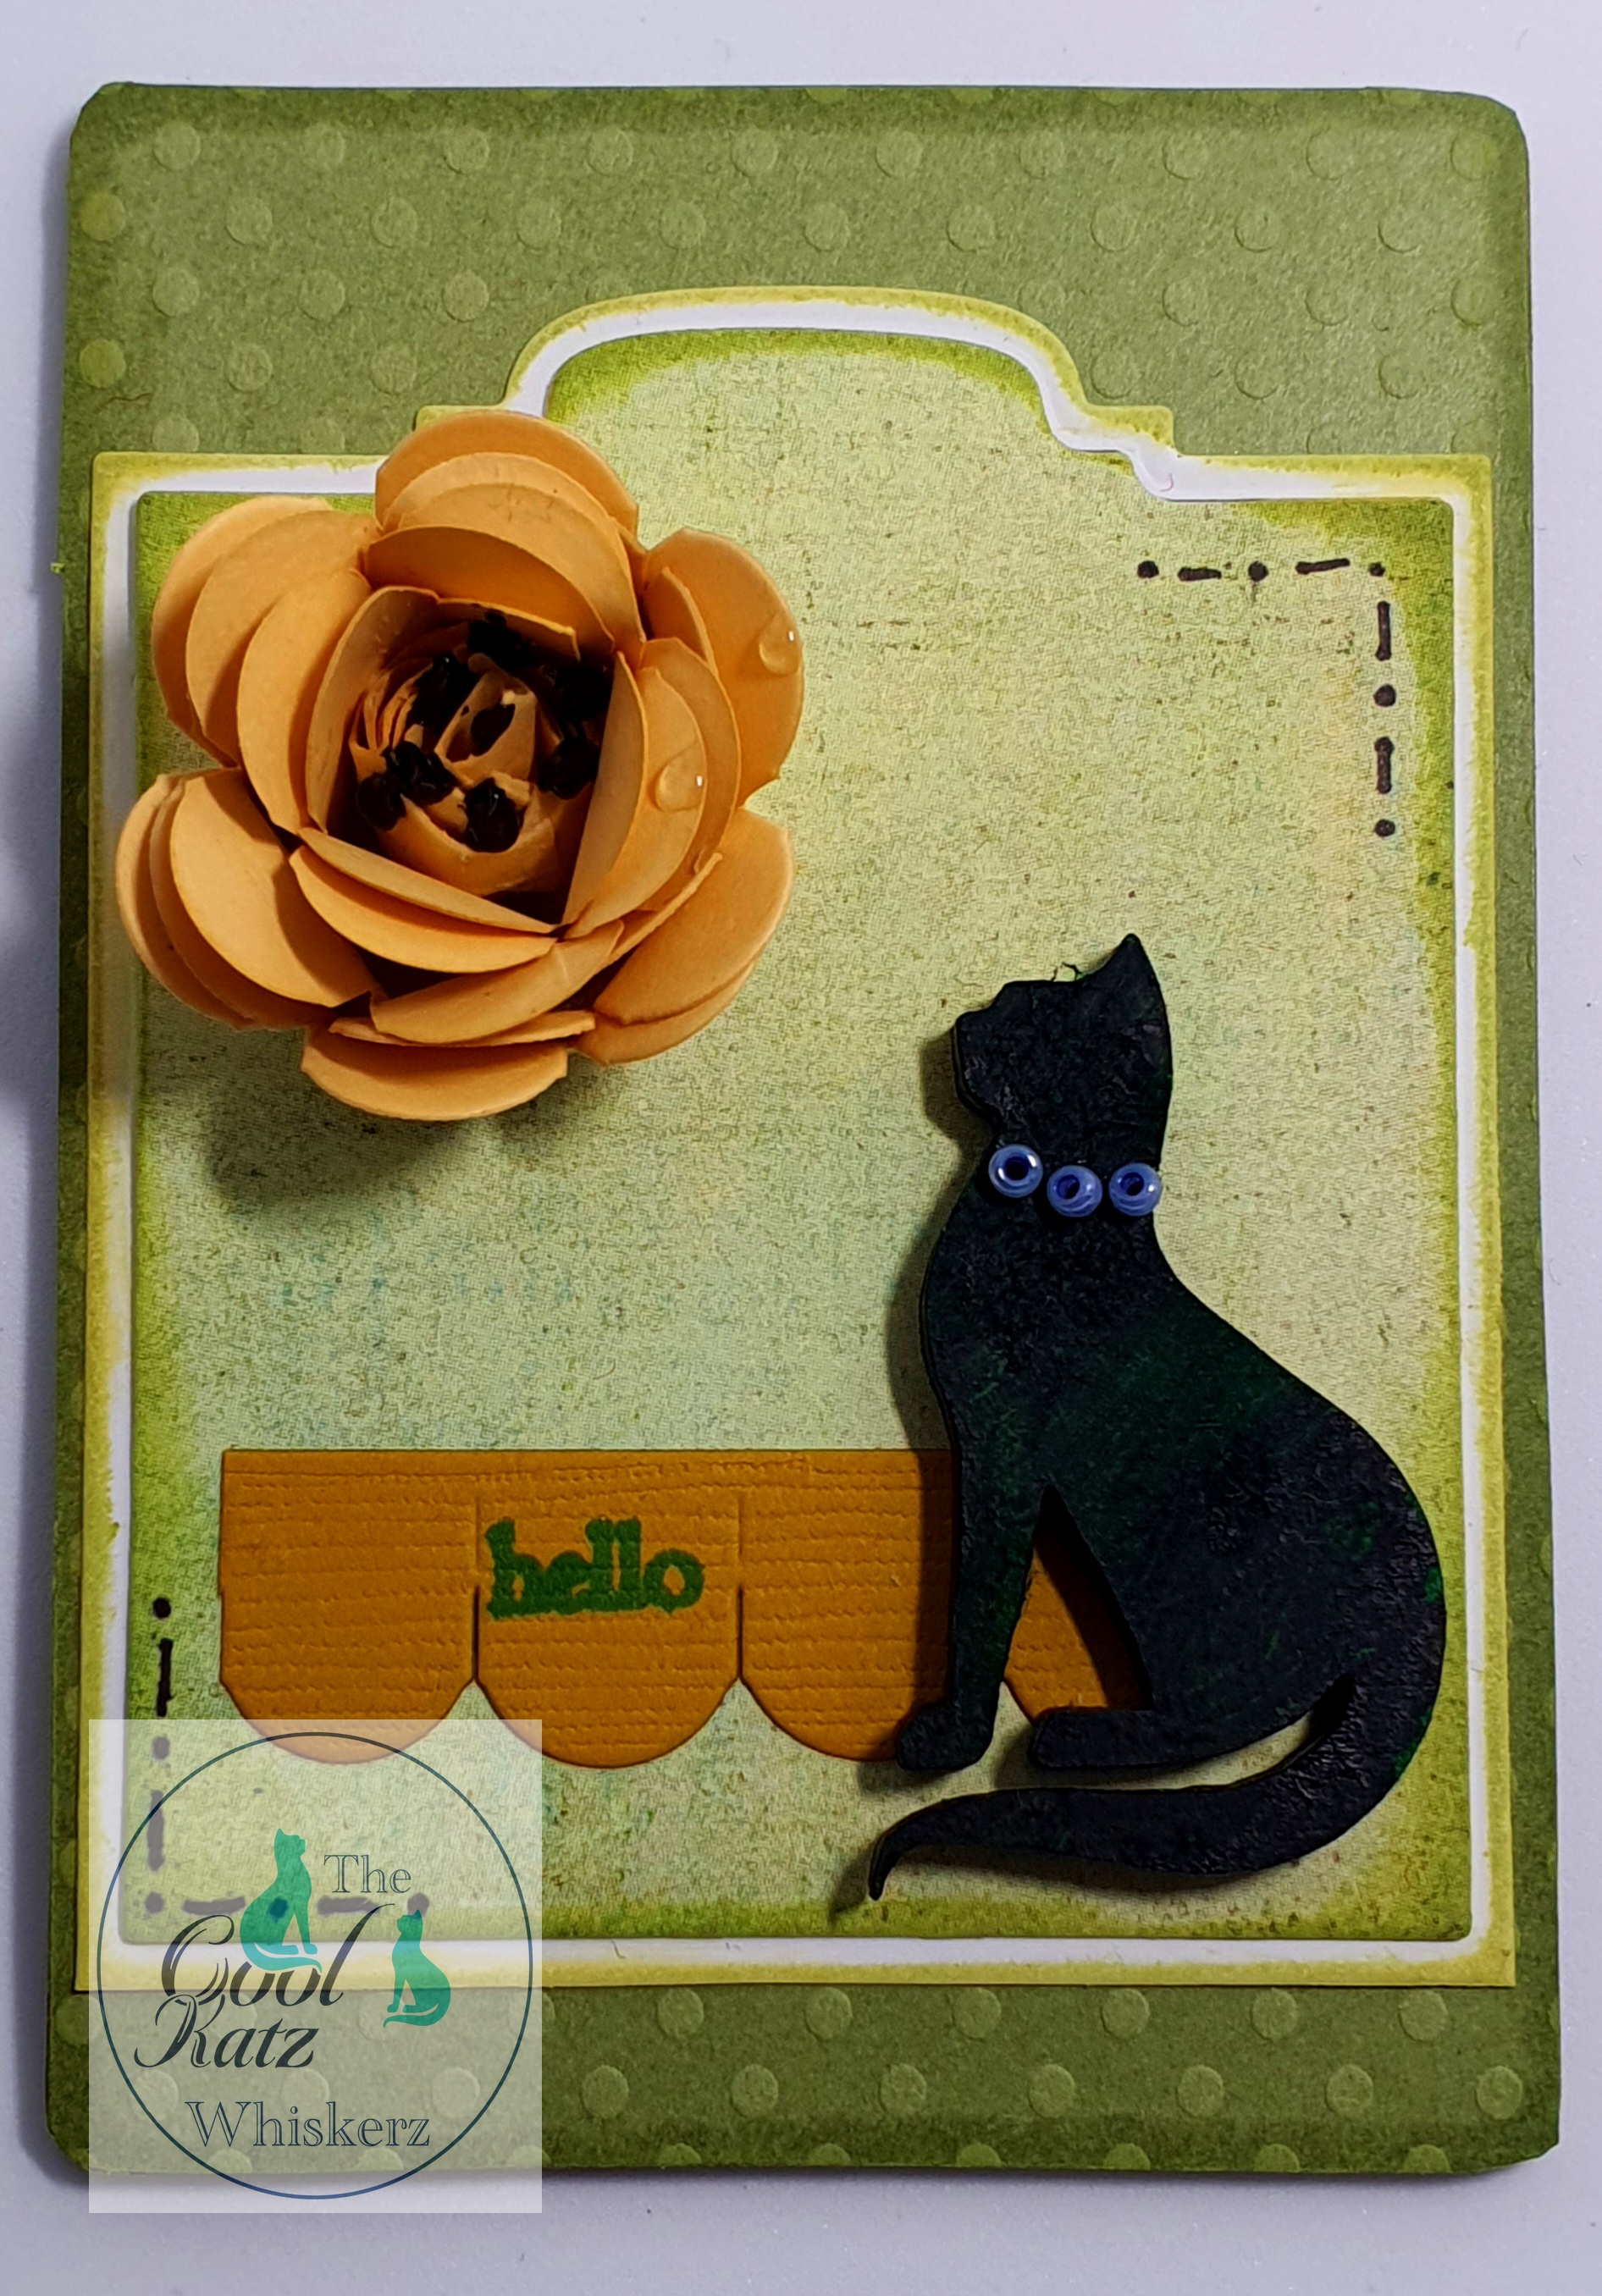
This green ATC again used a blank greyboard ATC, the ‘tags’ are cut from the Victorian and Walrus Mini Flip Flap Die Set, the Inspirational Words stamp was stamped onto a small strip of the rounded tile die and there is, of course, a CoolKatz cat MDF cat looking on with a little beaded collar.
The idea that the rounded tile die looks like the sea and definitely like fish/mermaid scales was nagging at me by this point. So I cut lots of strips from my Graphic 45 Voyage Beneath the Sea Collection of 8x8 papers from the CoolKatz shop and layered these all on one greyboard ATC. The quality of this paper is so good that I could lift the ‘waves’ individually and they stayed in place, giving a lovely 3D effect.
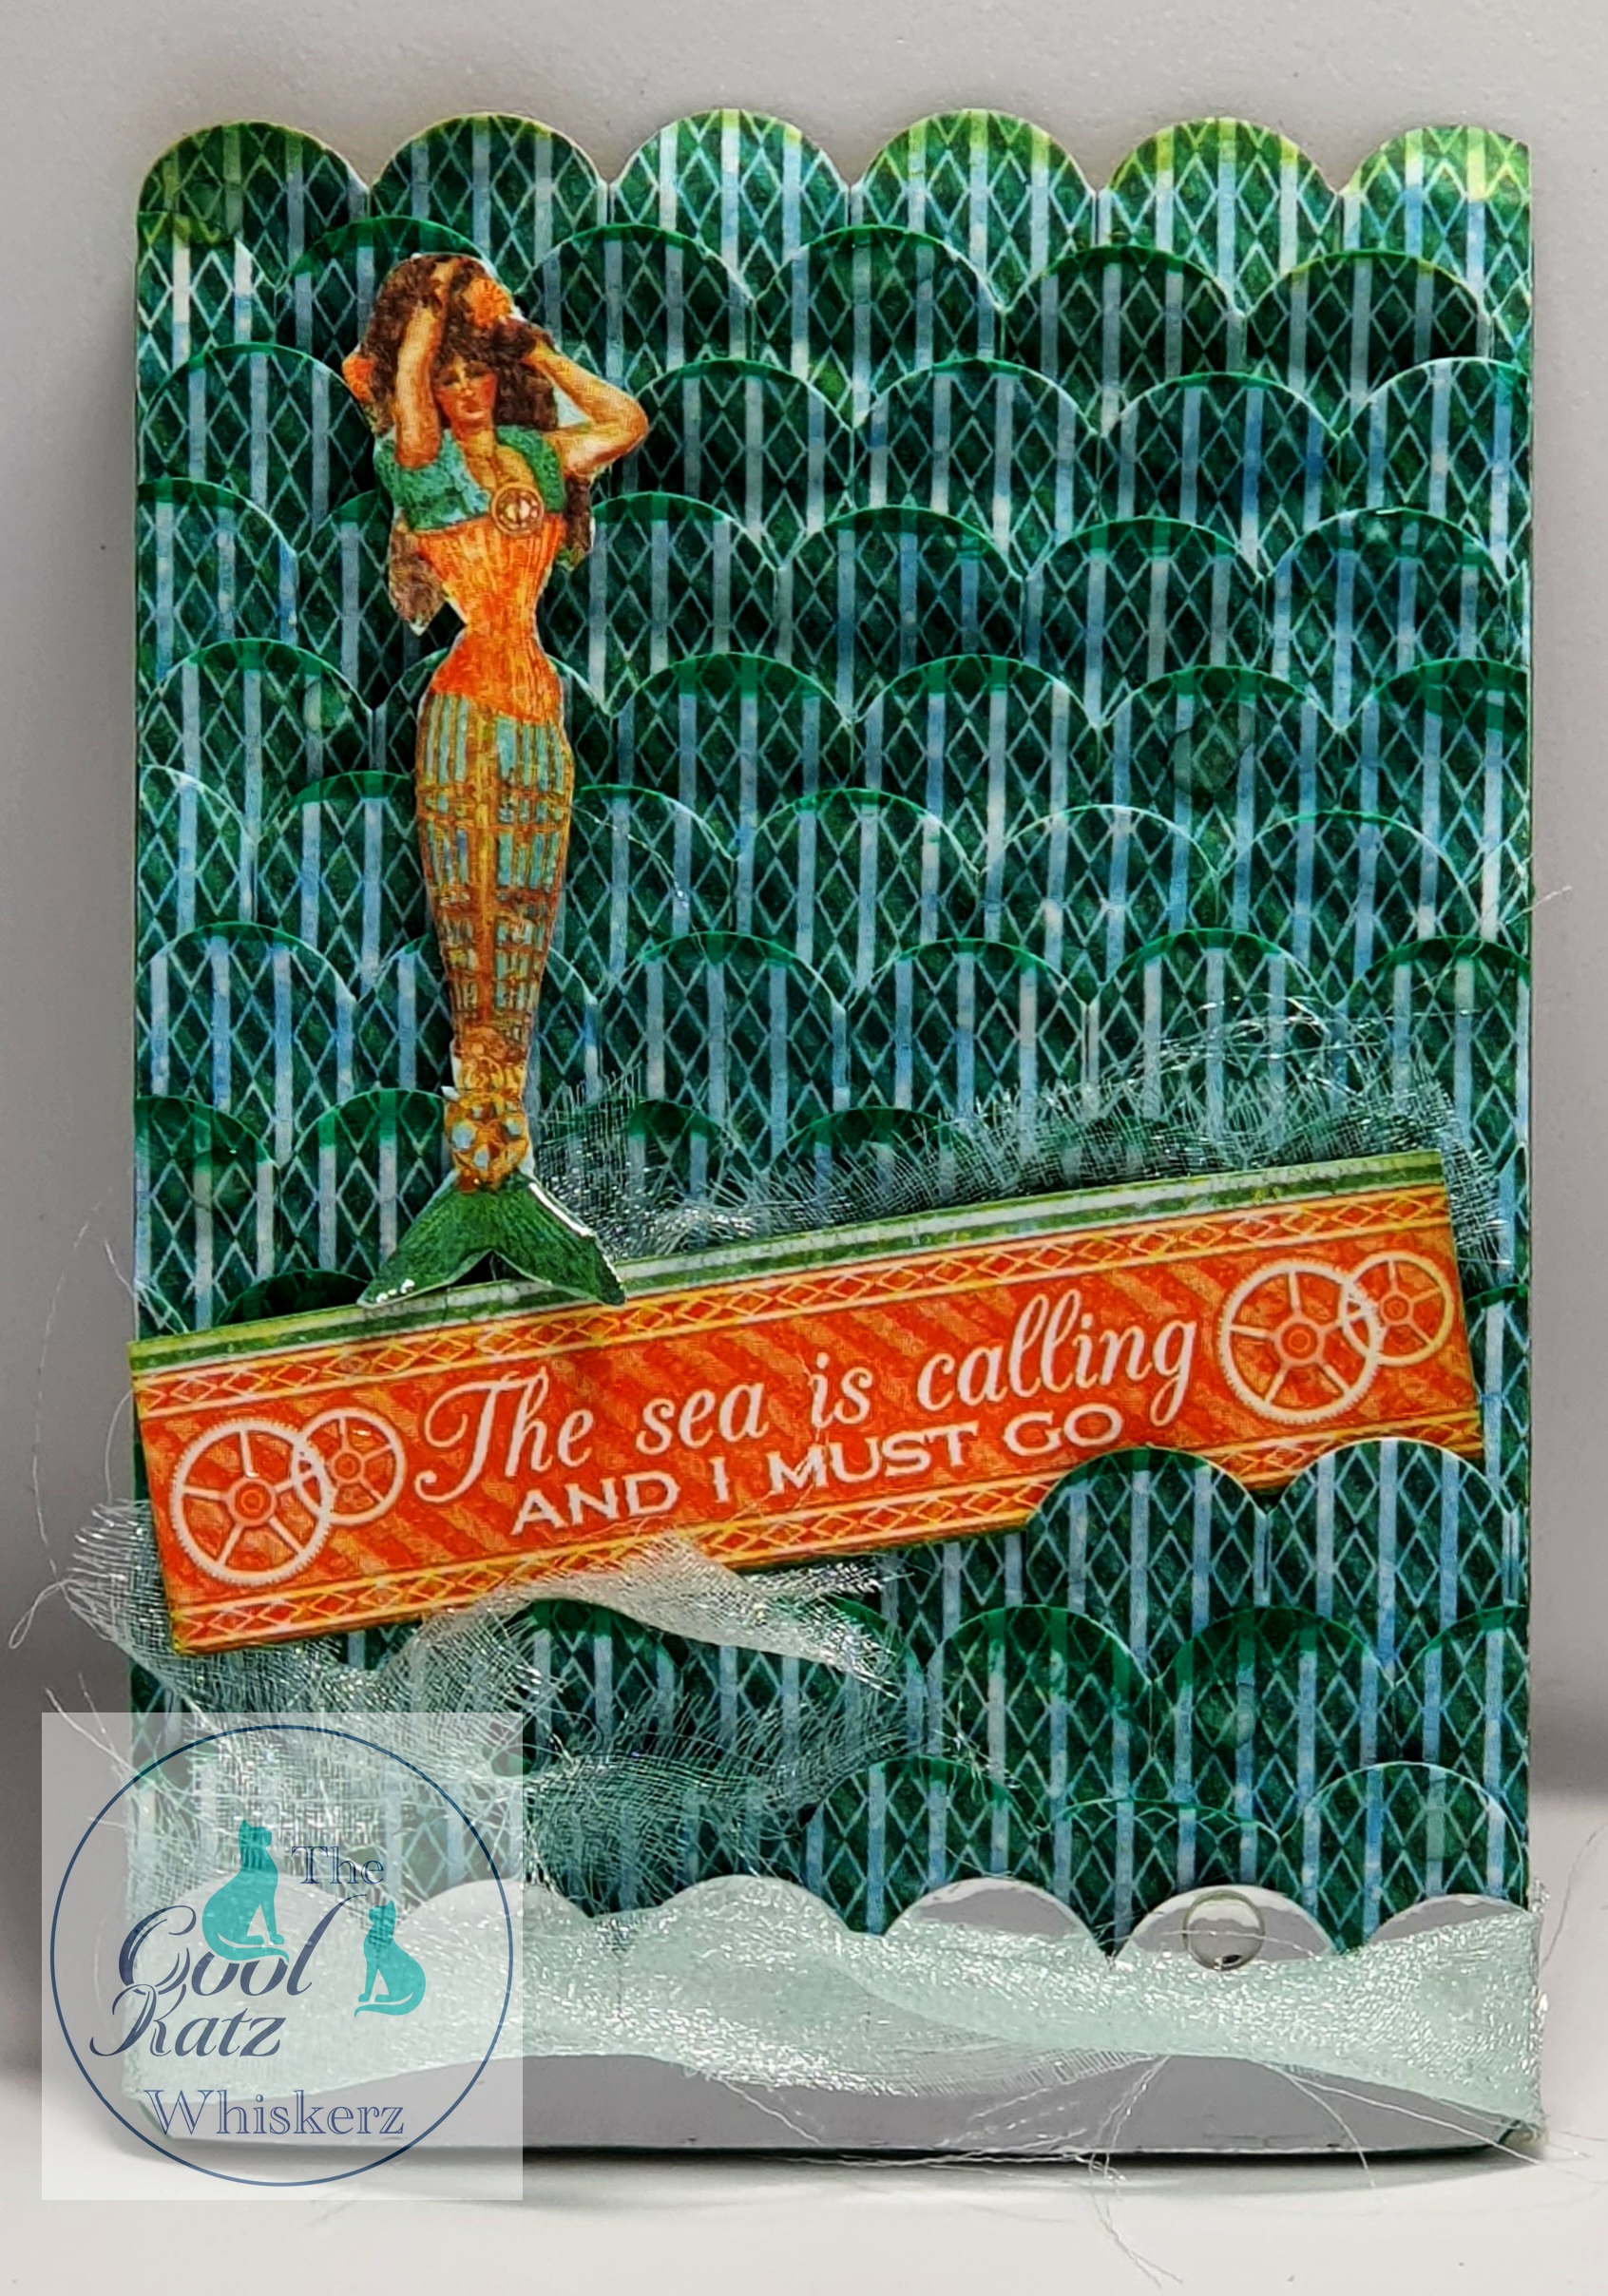
I fussy cut a mermaid from the same collection, gave her a Glossy Accents tail, chose a sentiment from the collection, highlighted with Glossy Accents and layered both on the waves. Underneath the sentiment I put a strip of organza I had cut out from the square tile die. It frayed a lot and gives a lovely ethereal feel to the piece. Another strip of organza was put over the bottom strip of rounded tiles which I had cut out of silver card. Confession time, I hadn’t quite enough of the green paper to fill the whole card and had some of the silver ones to hand, so decided to use that instead of the green. Lazy! The waves were edged with ink, as were the edges of the ATC and more Glossy Accents were used for a hint of water splash.
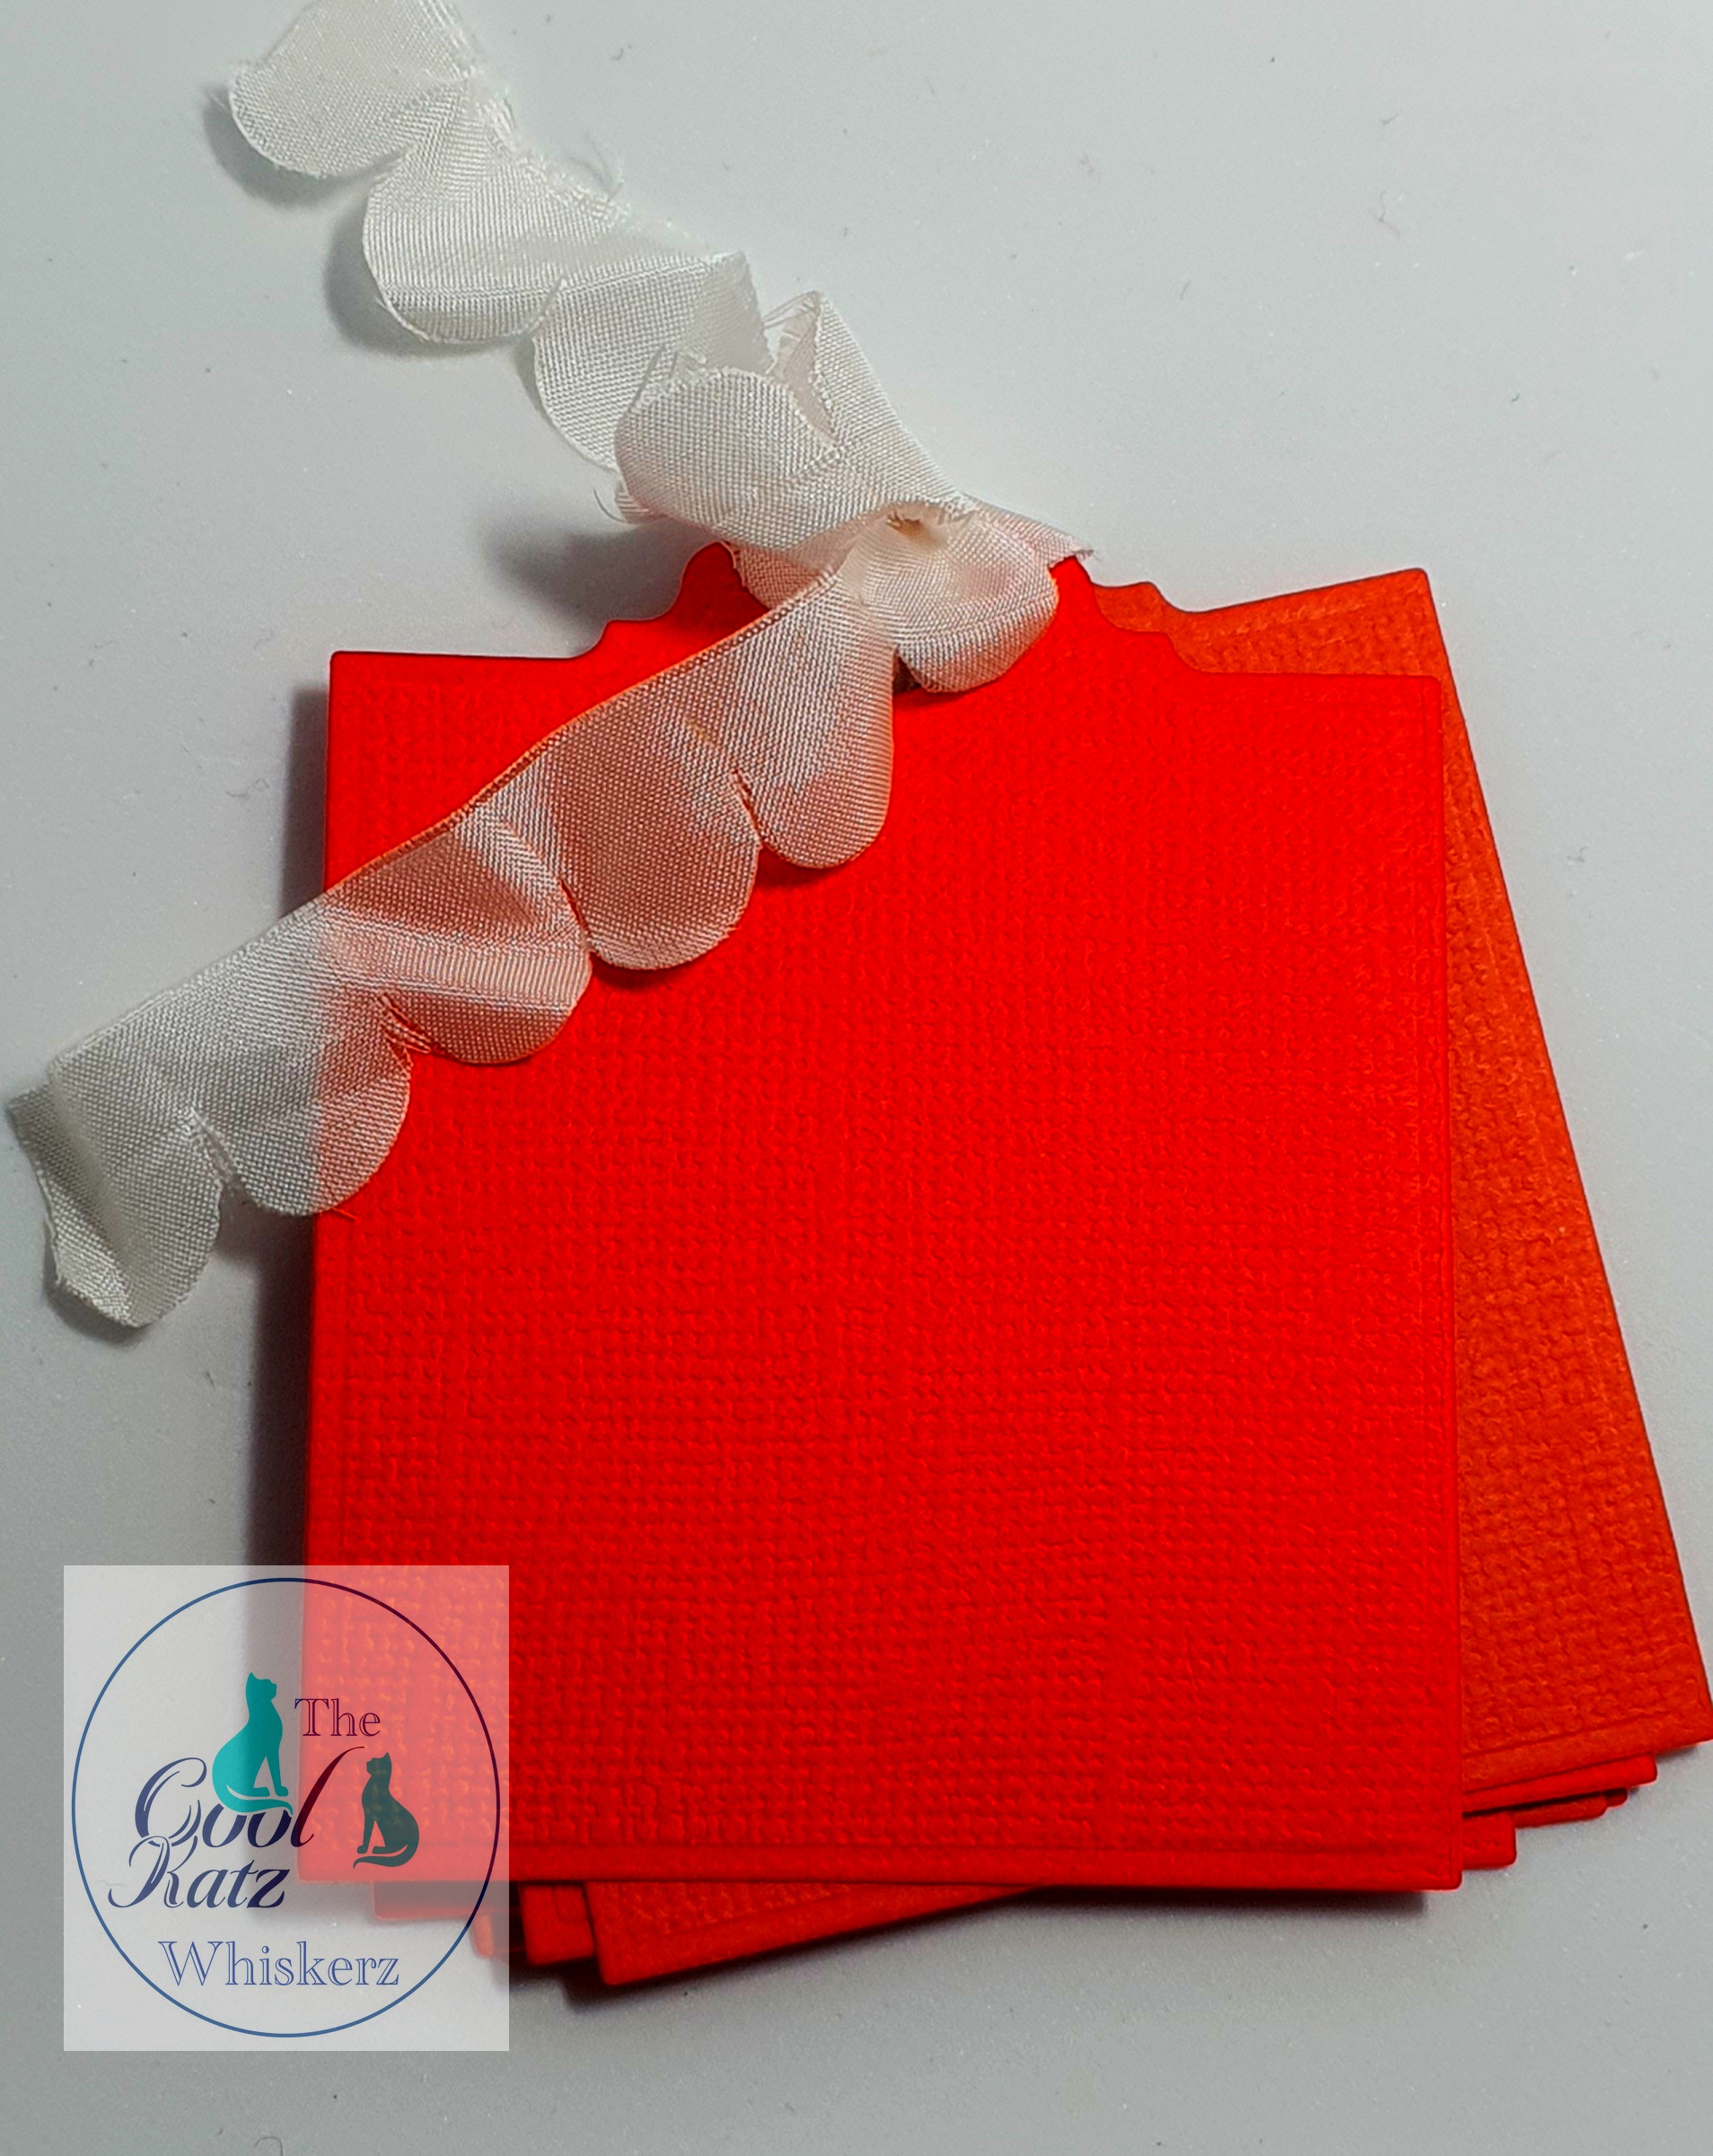
I tried cutting a few different materials and found that the best way to cut fabric was to layer a piece of paper between it and the die, then much less fraying occurs. This leads to the creation of your own pretty ribbons to go on any project, especially dangling from a CoolKatz album spine or, as here, as a pretty silk ribbon to tie up a Victorian flip flap die tag book.
So, playing with weaving and adding things was up next. This doesn’t look much, but you could use this die, with well-placed holes, as a garden fence. I love the look of the two dies woven with another strip of the same die but don’t, as yet, know what to do with them. Although the rounded tile die strip does look like the outside of a drum. The woven strips could, of course, in suitable colours, be bands etc. in your album.

The square tile die strip makes fabulous, quick pages that fit beautifully into one of the covers in the Mini Book and Album Die Set. These were done in seconds. Just cut from plain paper (or fancy paper if you wish, just make it thin enough), fold back and forth, then stick the pages at the ends to the inside covers of the book. You can add a little glue to the inside spine too, to keep it secure. I love making mini books with the sewn signatures but this makes a great alternative.
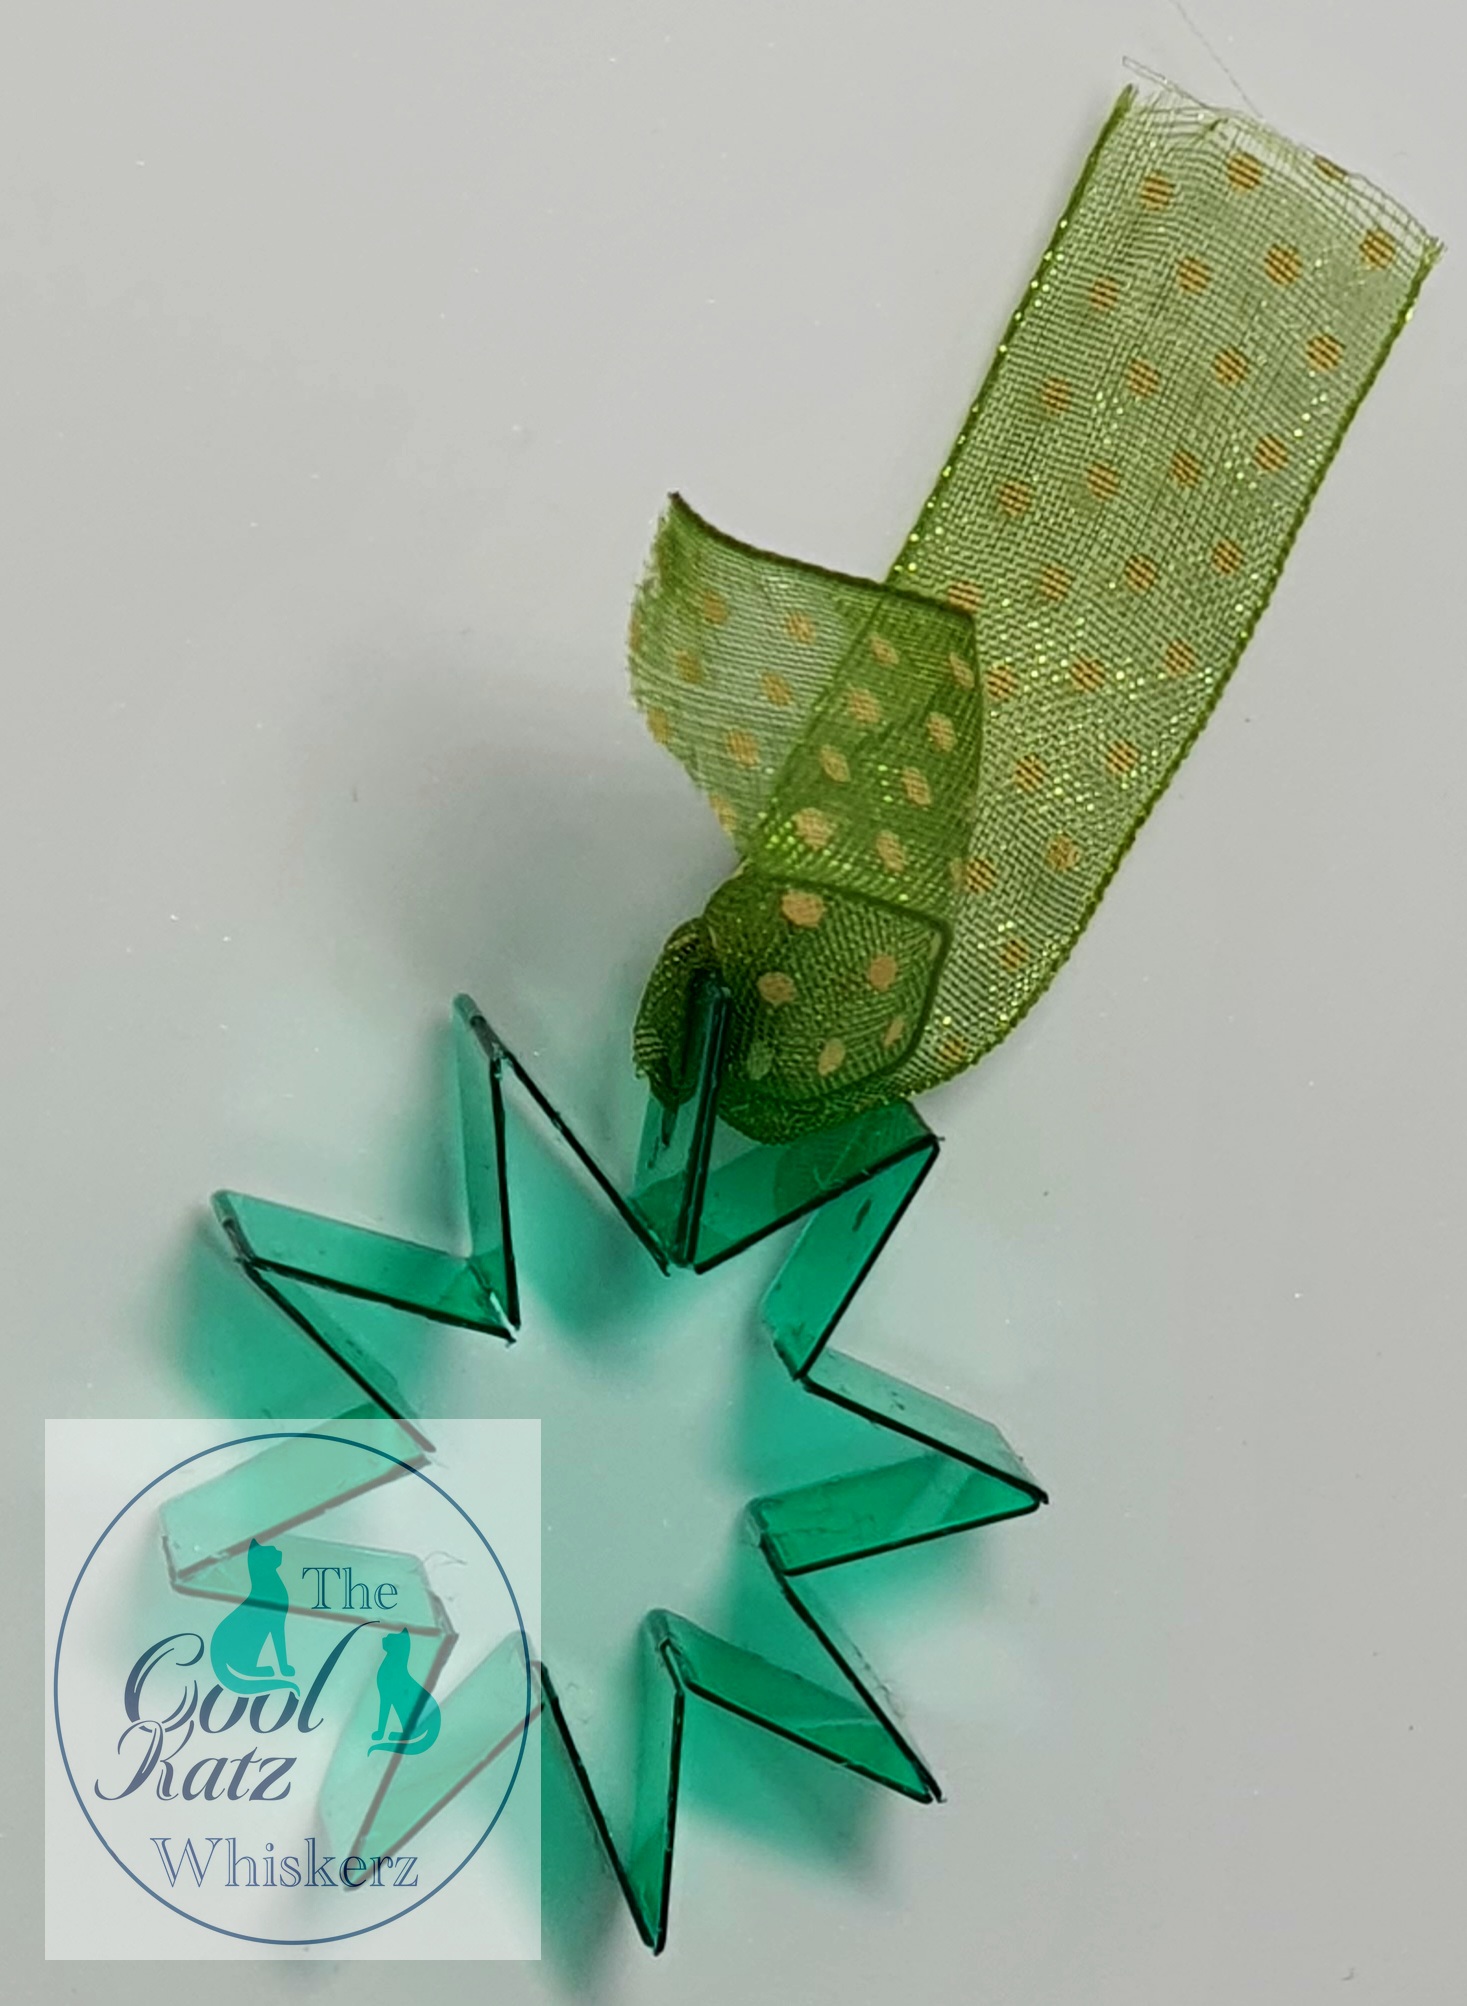
I cut the square die out of coloured acetate. What a great, sturdy Christmas decoration to hang from the tree! Add some ribbon, voila!
I’ve had a lot of fun doing these and once you start it is hard not to think of more things you can do with these.
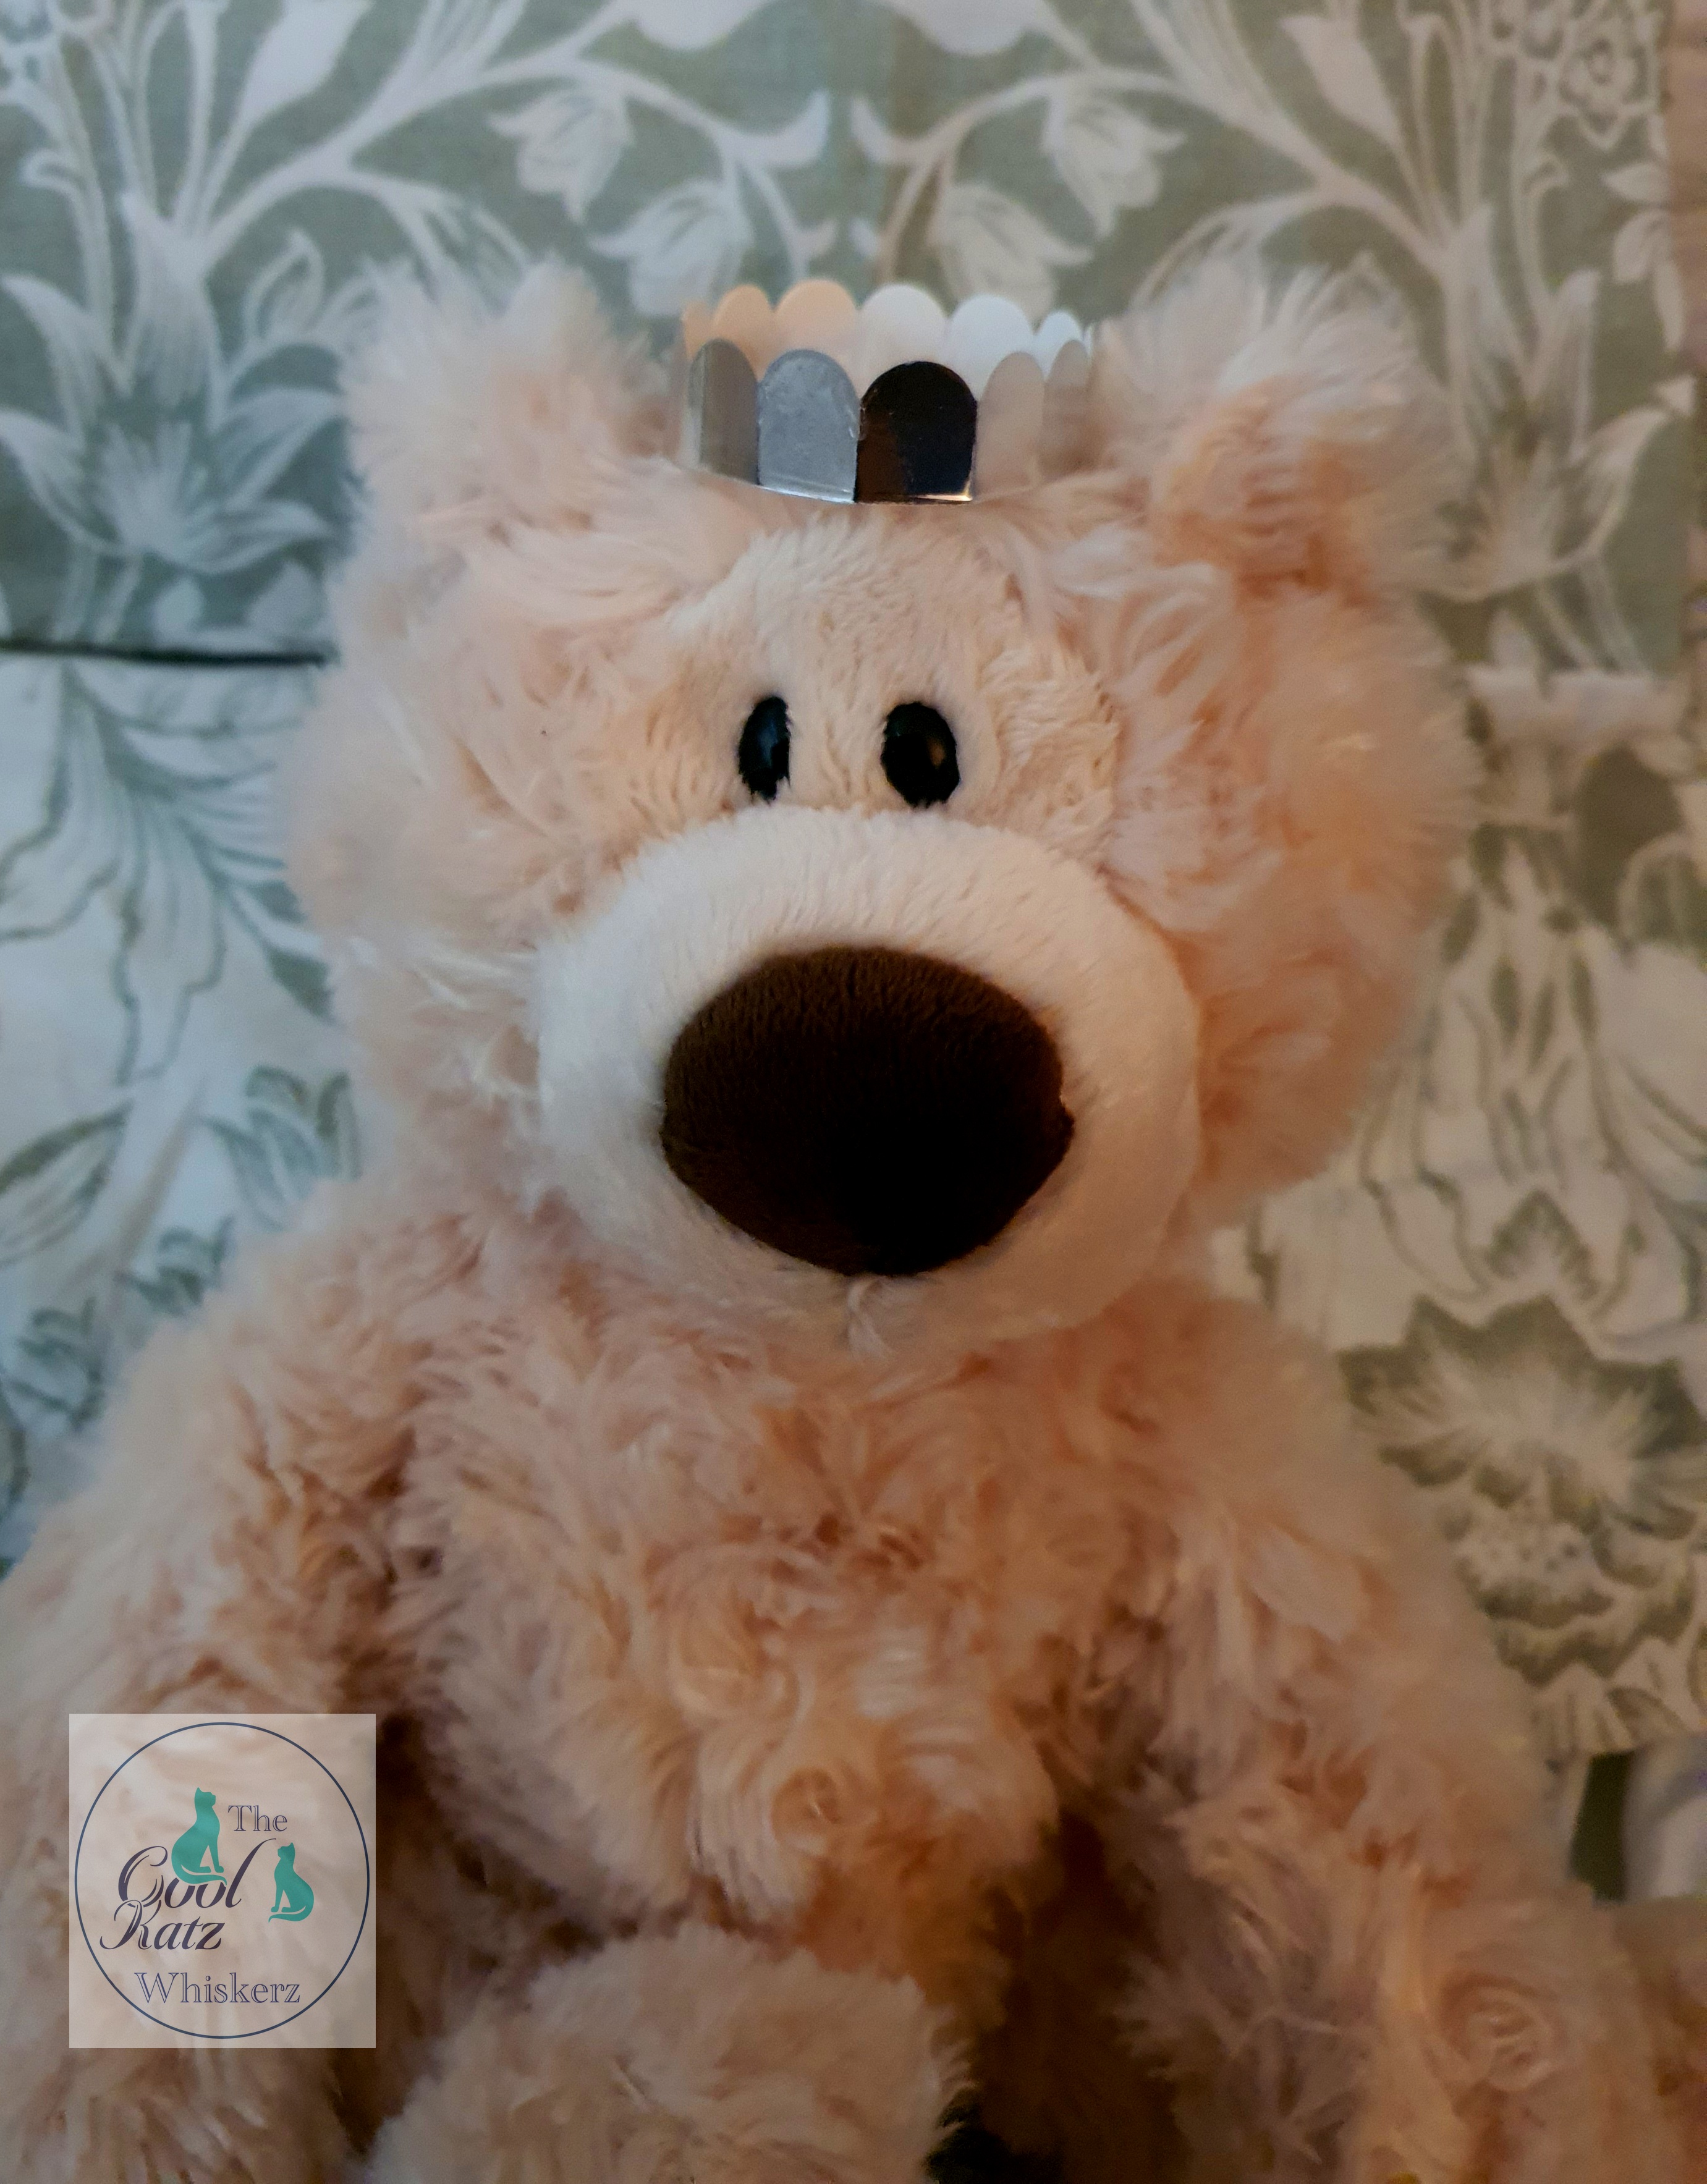
And Teddy is grateful for his new shiny crown.
Materials used:
CoolKatz Mini Roof Tile Die Strips
CoolKatz greyboard ATCs
CoolKatz Inspirational Words stamp sheet
CoolKatz Victorian and Walrus Mini Flip Flap Die Set
CoolKatz Teflon Pencil Tool
CoolKatz Mini Book and Album Die Set
Graphic 45 8x8 Voyage Beneath the Sea Collection
Ink pads
Die cutting machine
Glossy Accents
Enamel Accents
Ribbon
Fabric
Card
Acetate
Hole punch
Happy Crafting
The CoolKatz Team xhttps://www.coolkatzcraft.com/
https://www.youtube.com/channe
https://www.facebook.com/group