free UK postage
over £40.00
Search


Landscape Merlin Album with Photo Wallet Pockets
Lynne is back with us today showing how to create a beautiful Landscape Merlin Album containing Photo Wallet pockets and Bat Matting Tags.
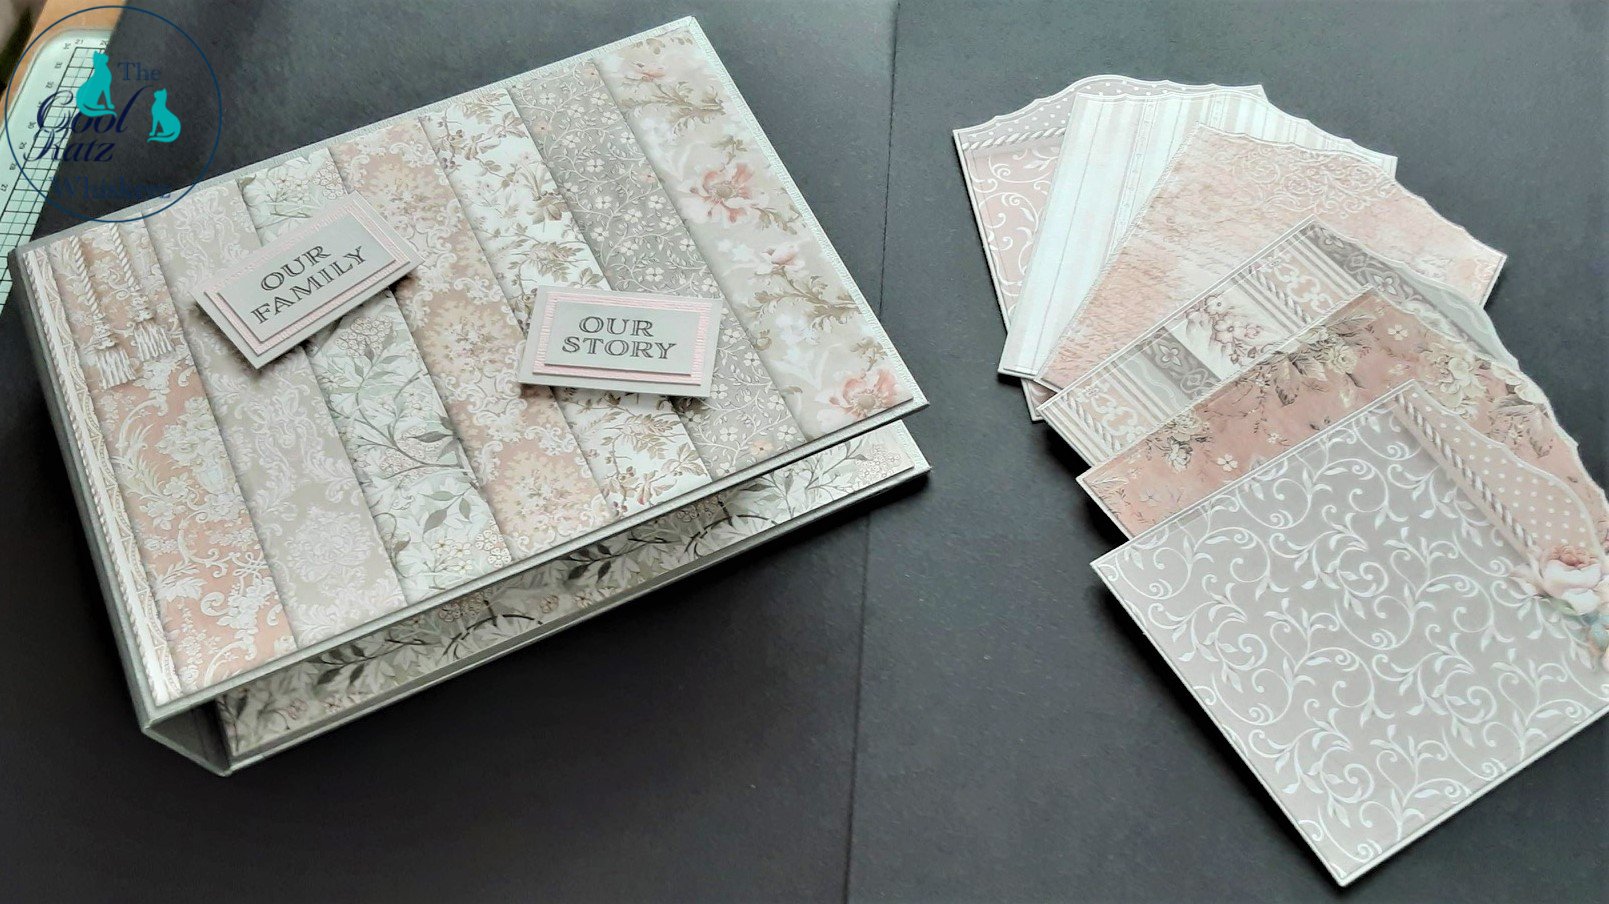
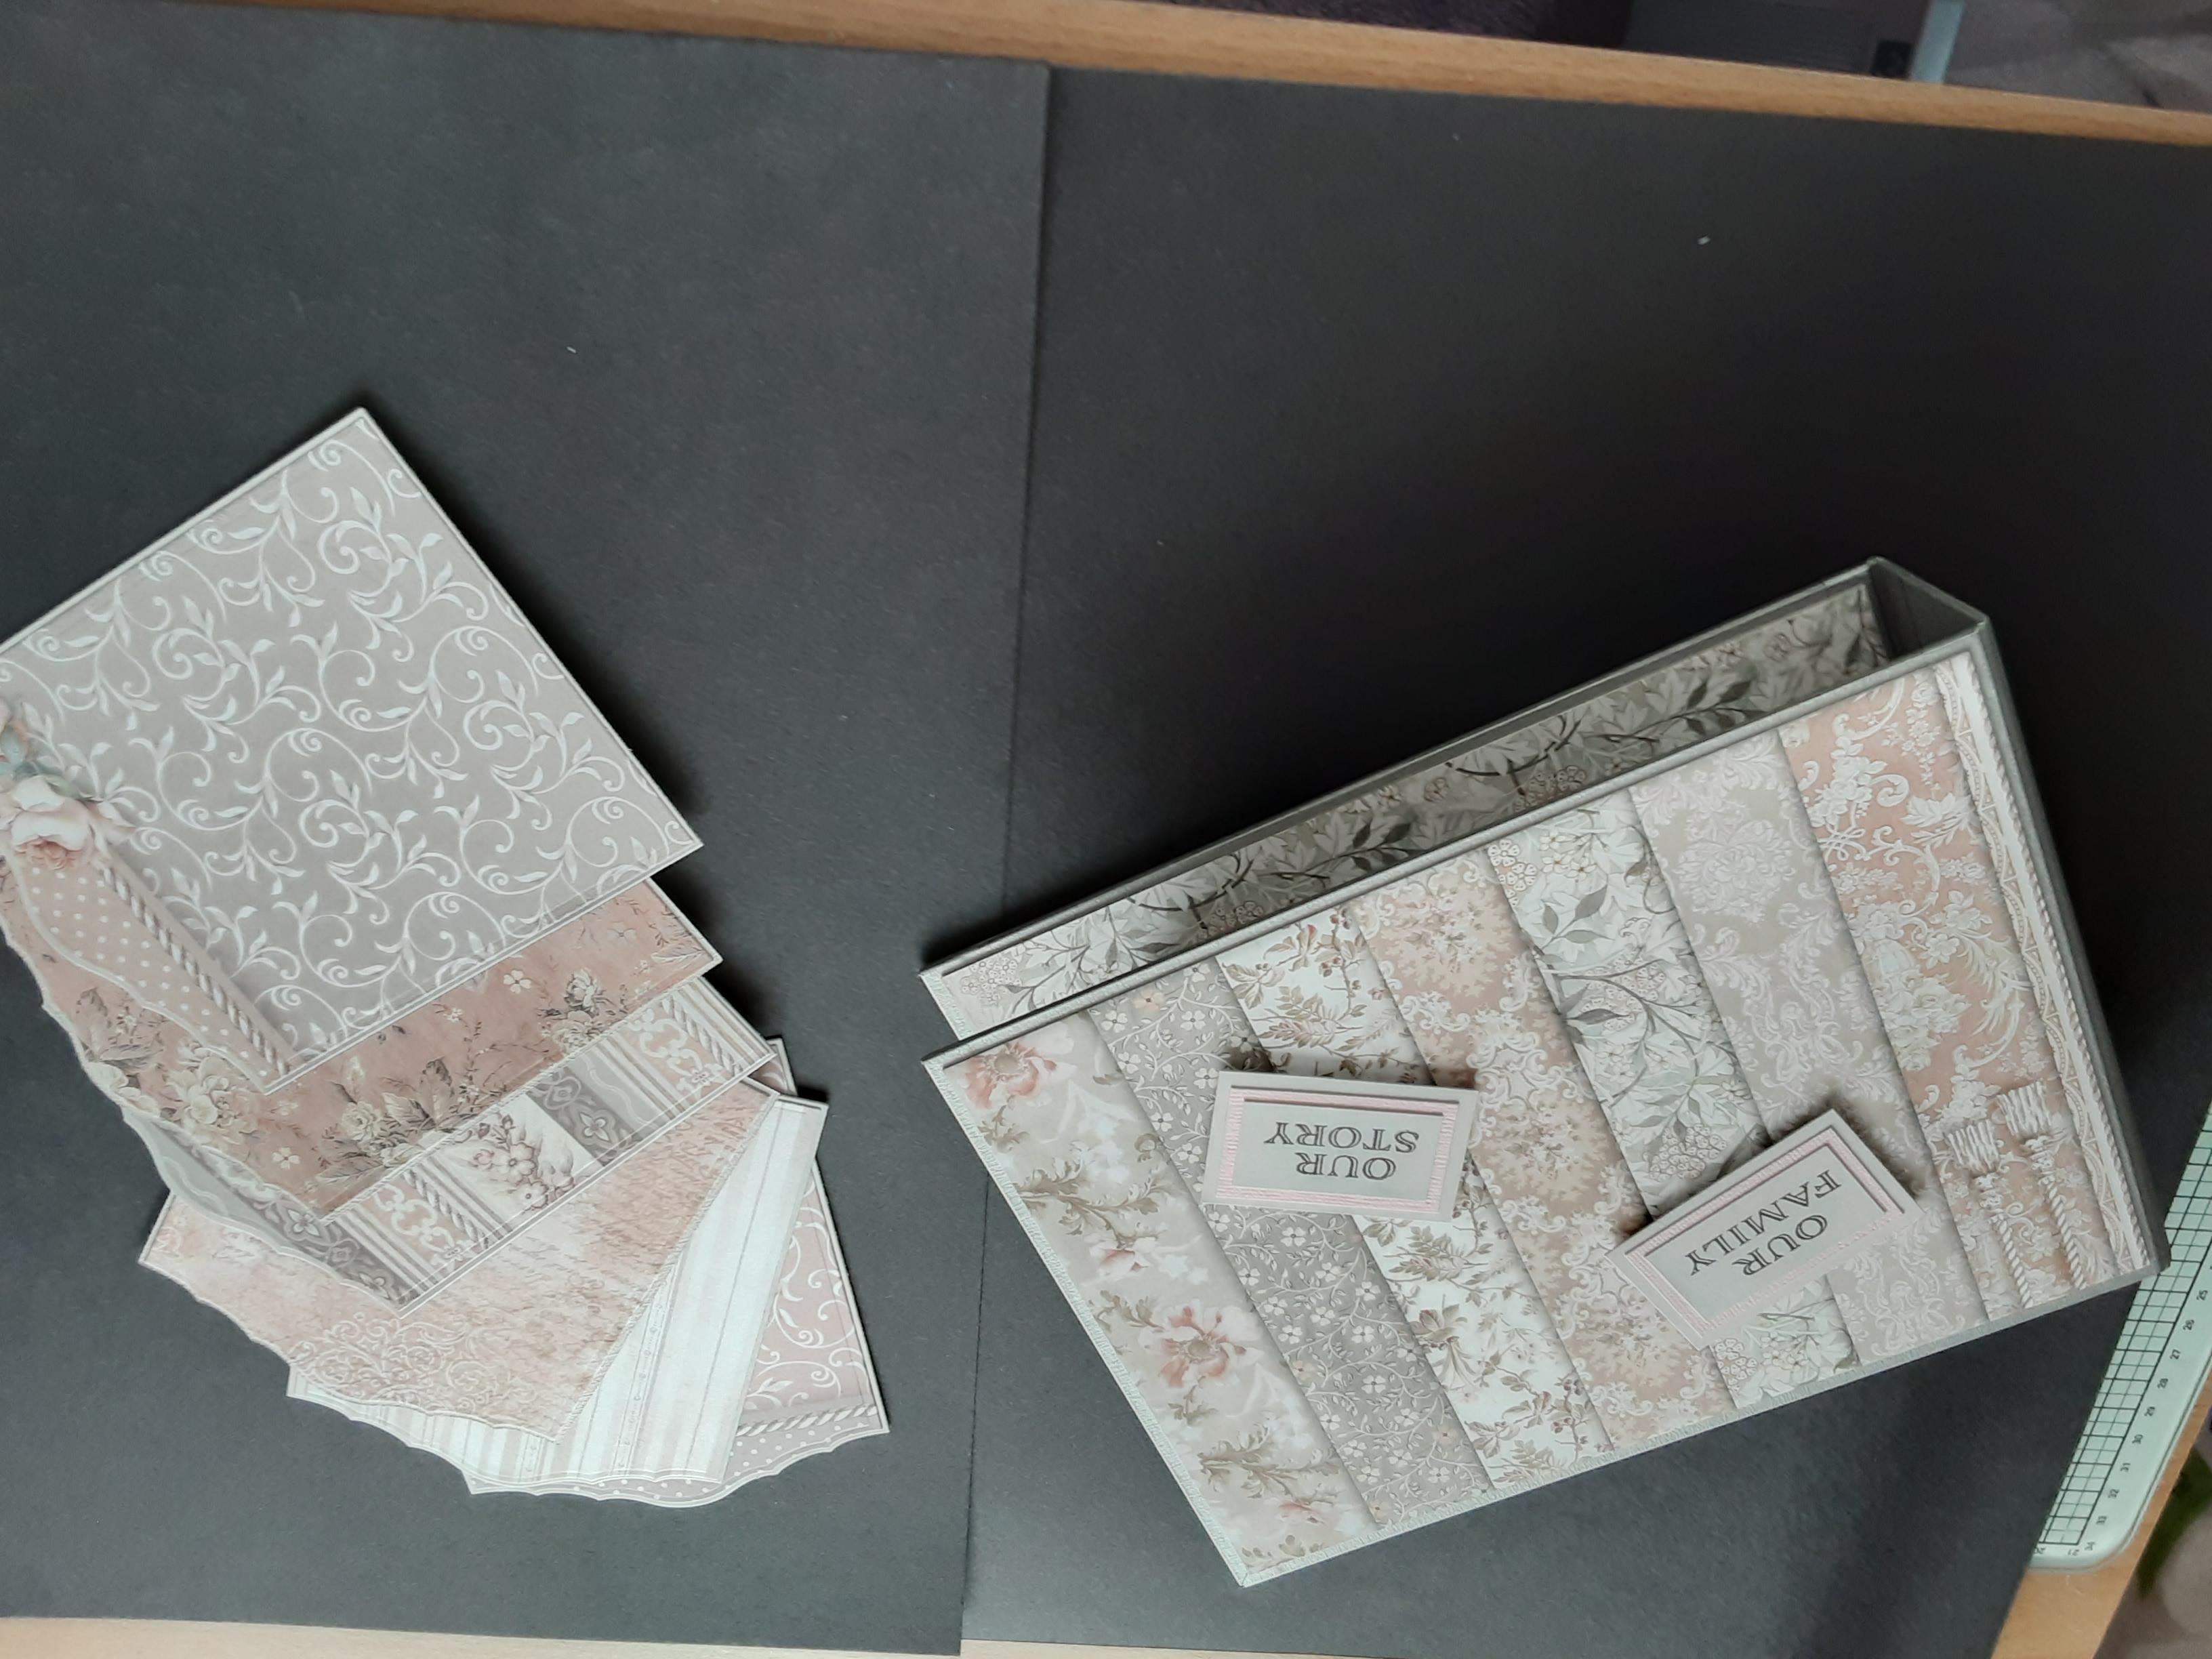
Here’s the front of the album and the Bat Matting Tags.
There’s a list of all the items you’ll need to create the album at the end of this tutorial.Now it’s over to Lynne to give you all the instructions…
Start by creating the Merlin Landscape Album cover and spine
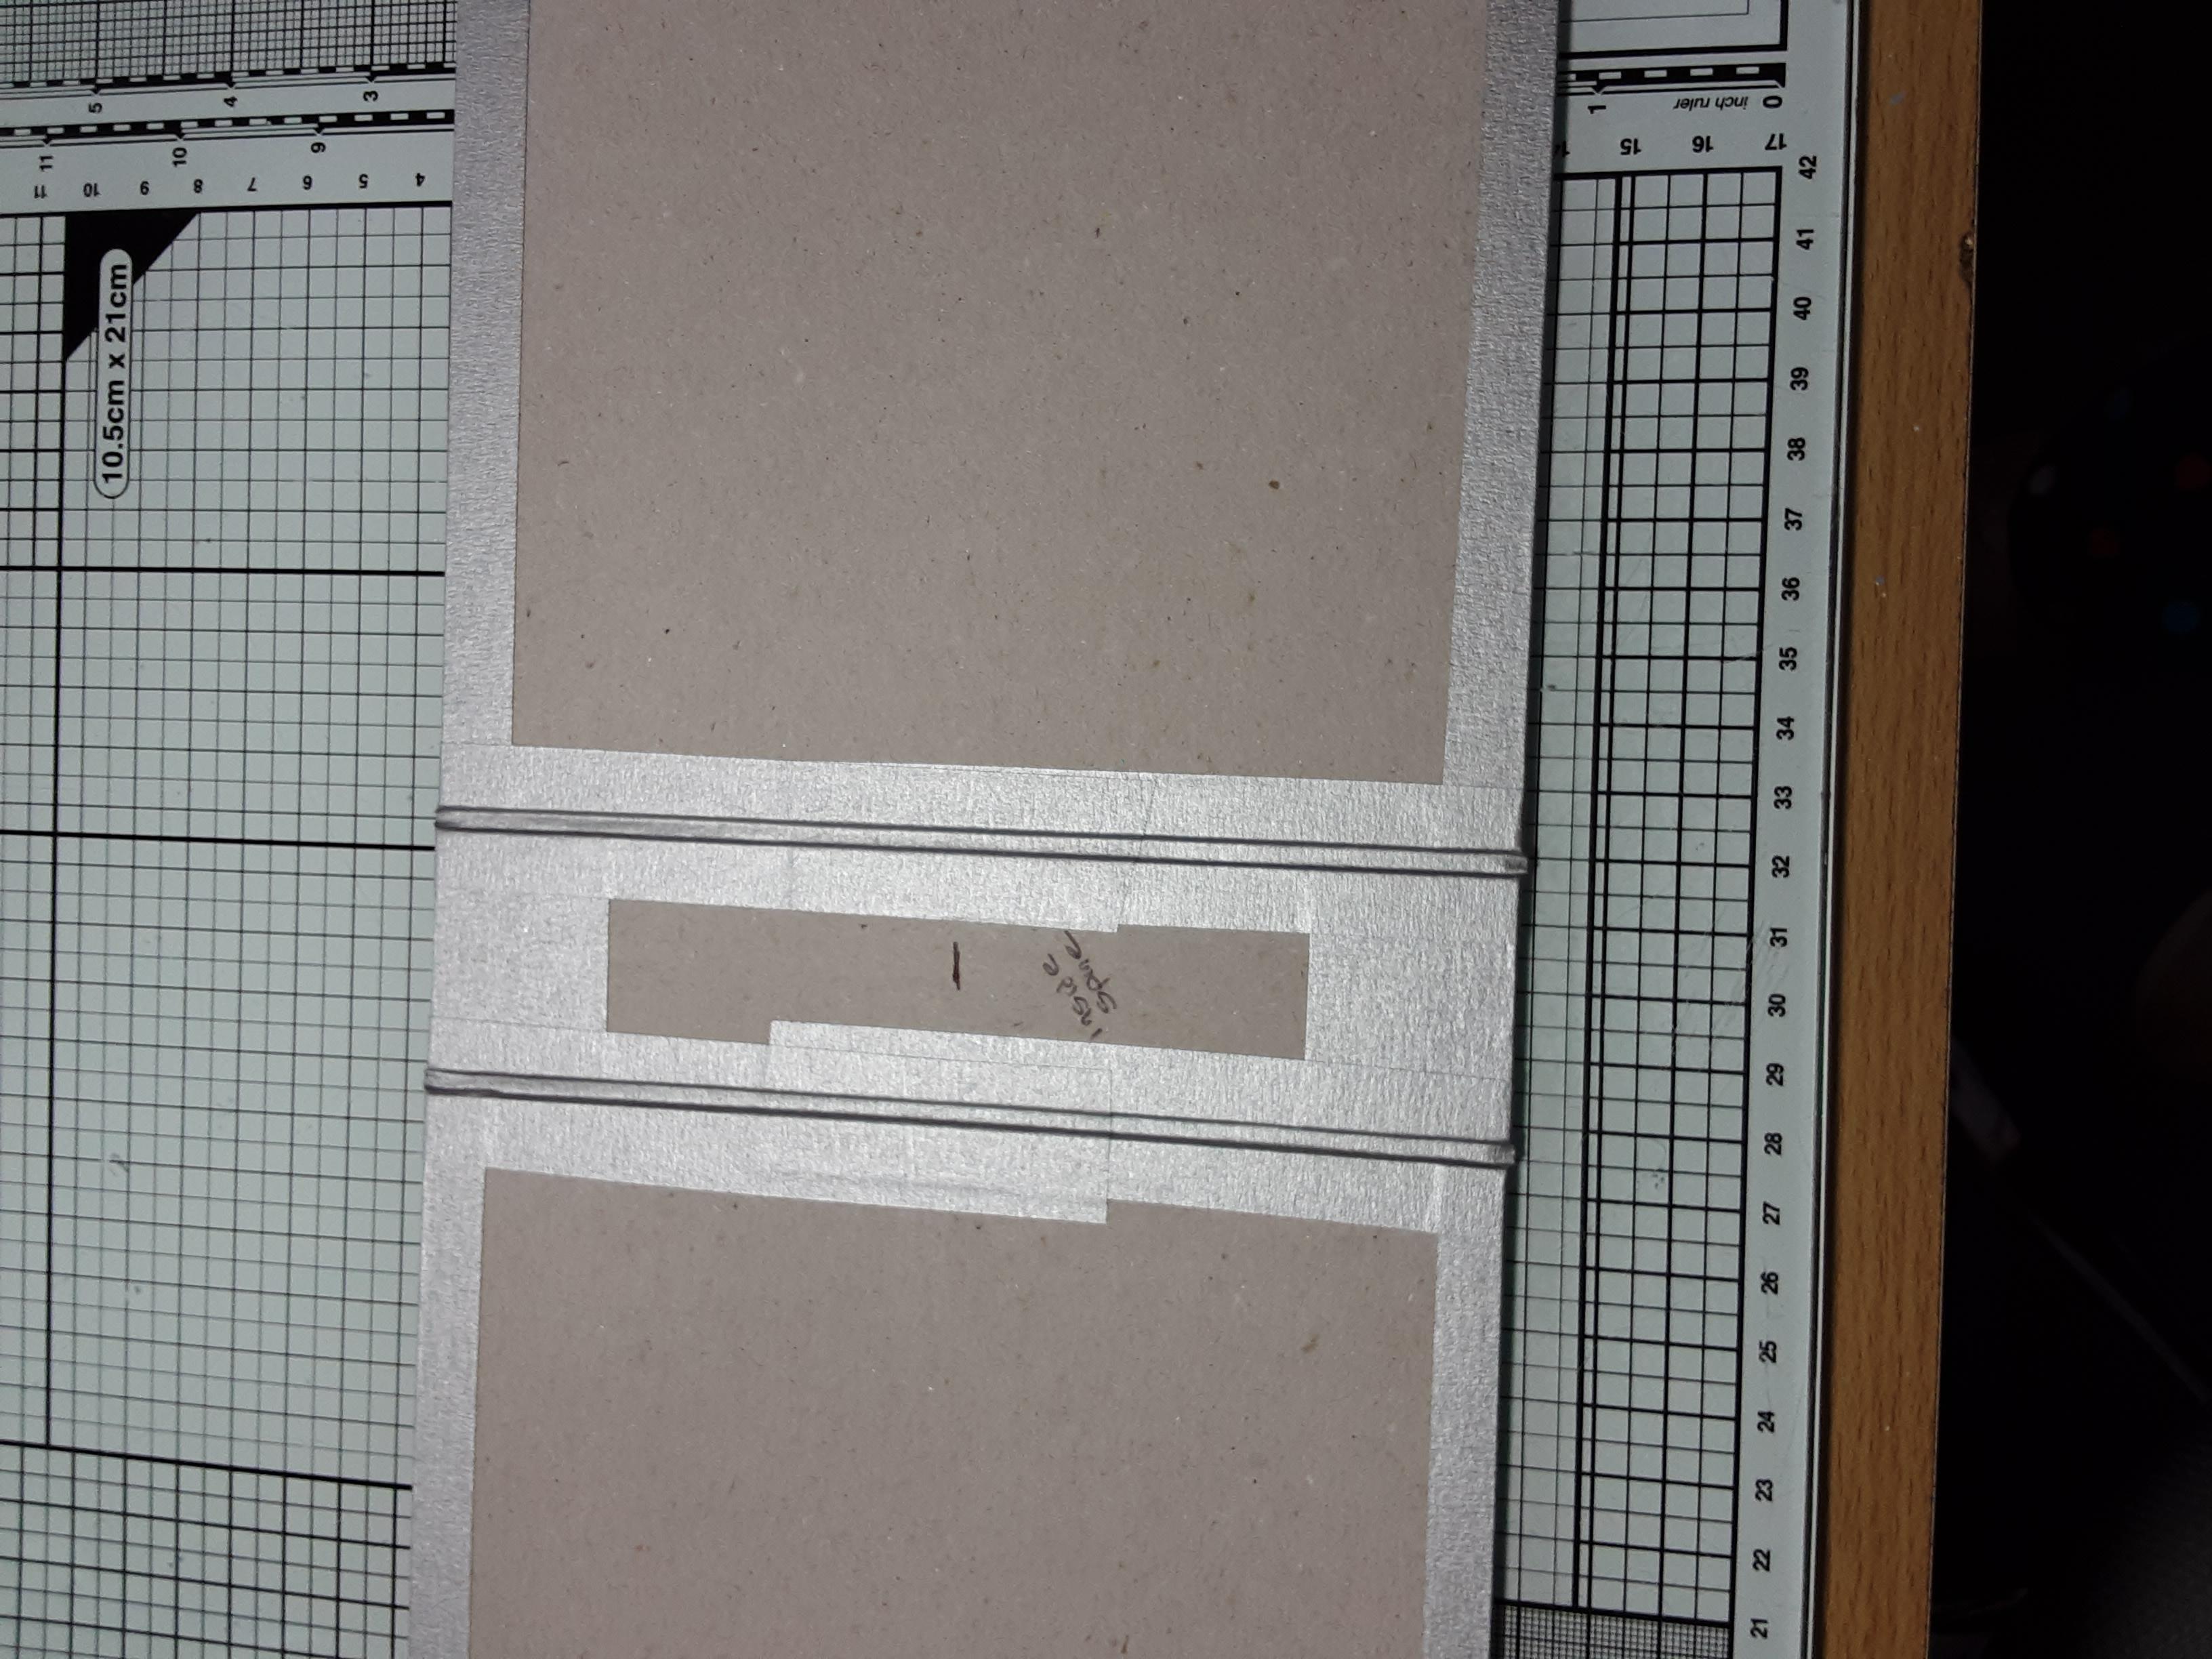
I used the wide Silver Frame Tape to cover the spine piece 1 1/8 inches in from short sides. It helps to mark the centre of the spine. When using Silver Frame Tape to join covers to spine you need to ensure the joins of the tape are near the centre so they can be hidden by the spine extension.
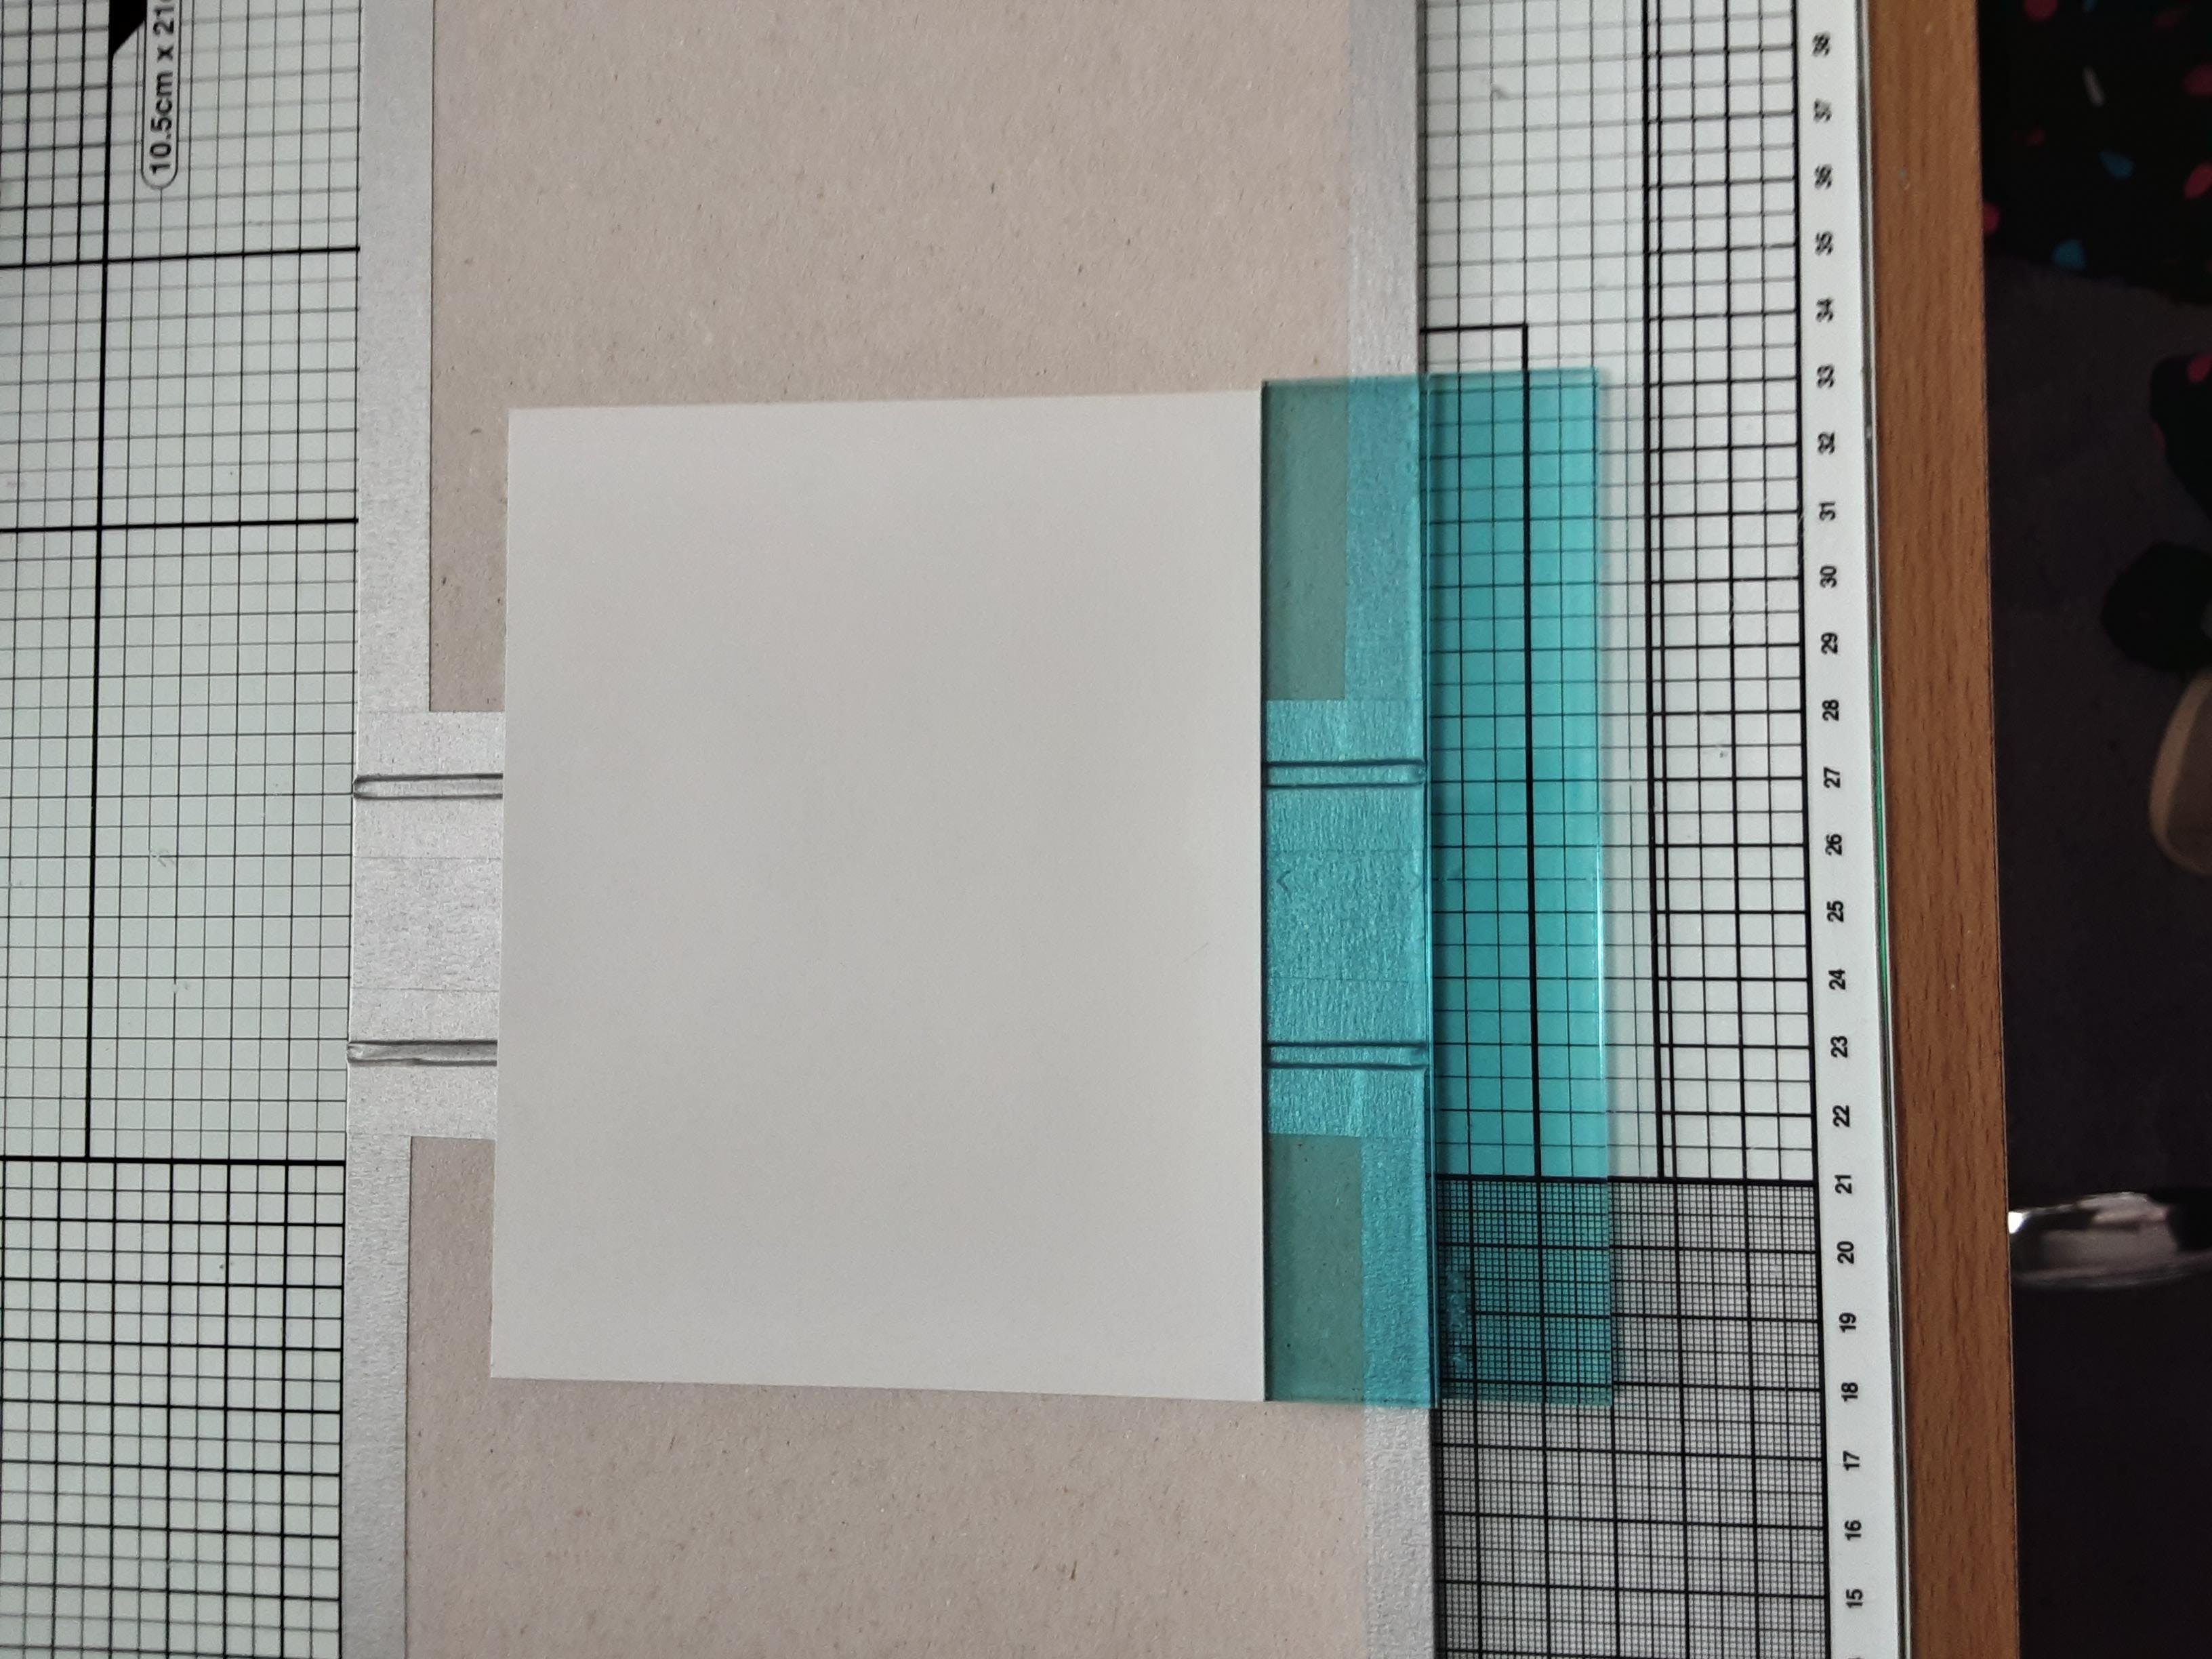
Place the spine extension over the spine and part of front/back inside covers, 1 inch up from bottom edge of album.
Spine stack - 1 at 4 3/4 inches x 2 1/4 inches (height x width)
1 at 4 3/4 inches x 2 3/4 inches
Score at 1/2", 1" on the 4 long sides
Spine extension - 1 at 4 3/4 inches x 6 inches
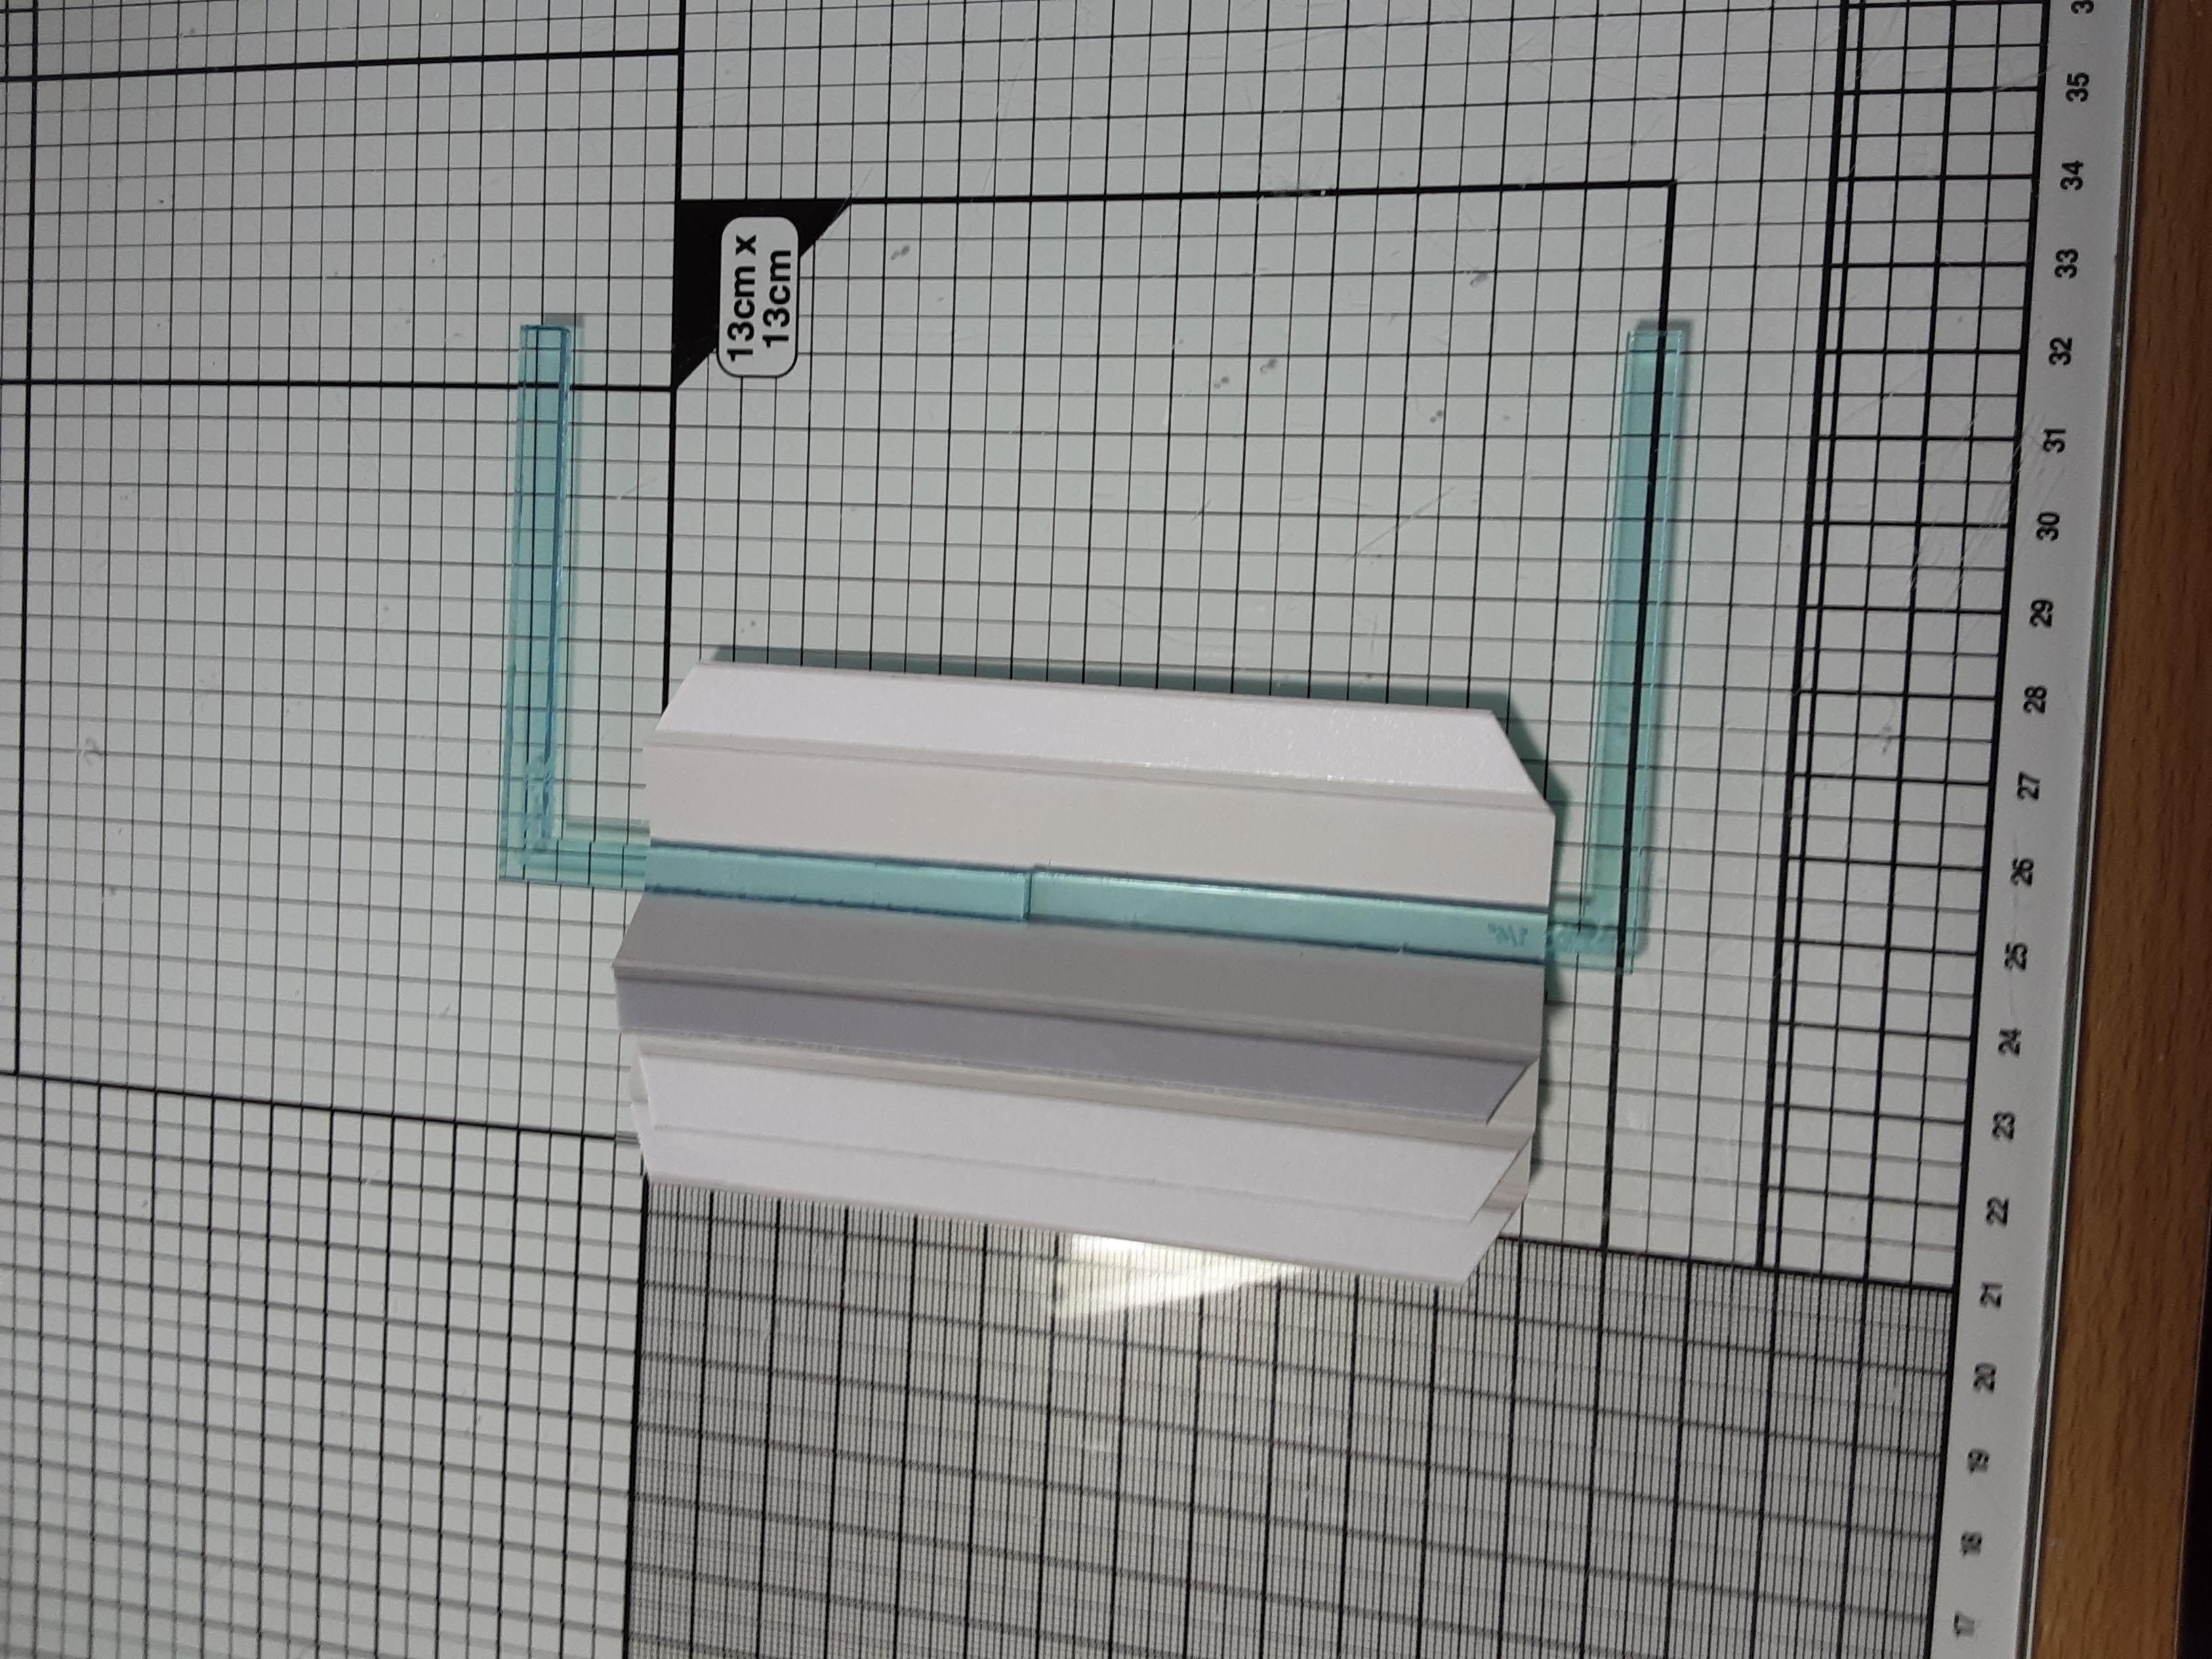
Use the 1/4 inch corner spacer to line up the stacking spine.
To cover front/ back (inside & out) 4 sheets of patterned paper at 6 7/16 inches x 8 5/8 inches
To cover the outside of the spine 1 at 6 7/16 inches x 1 1/4 inches
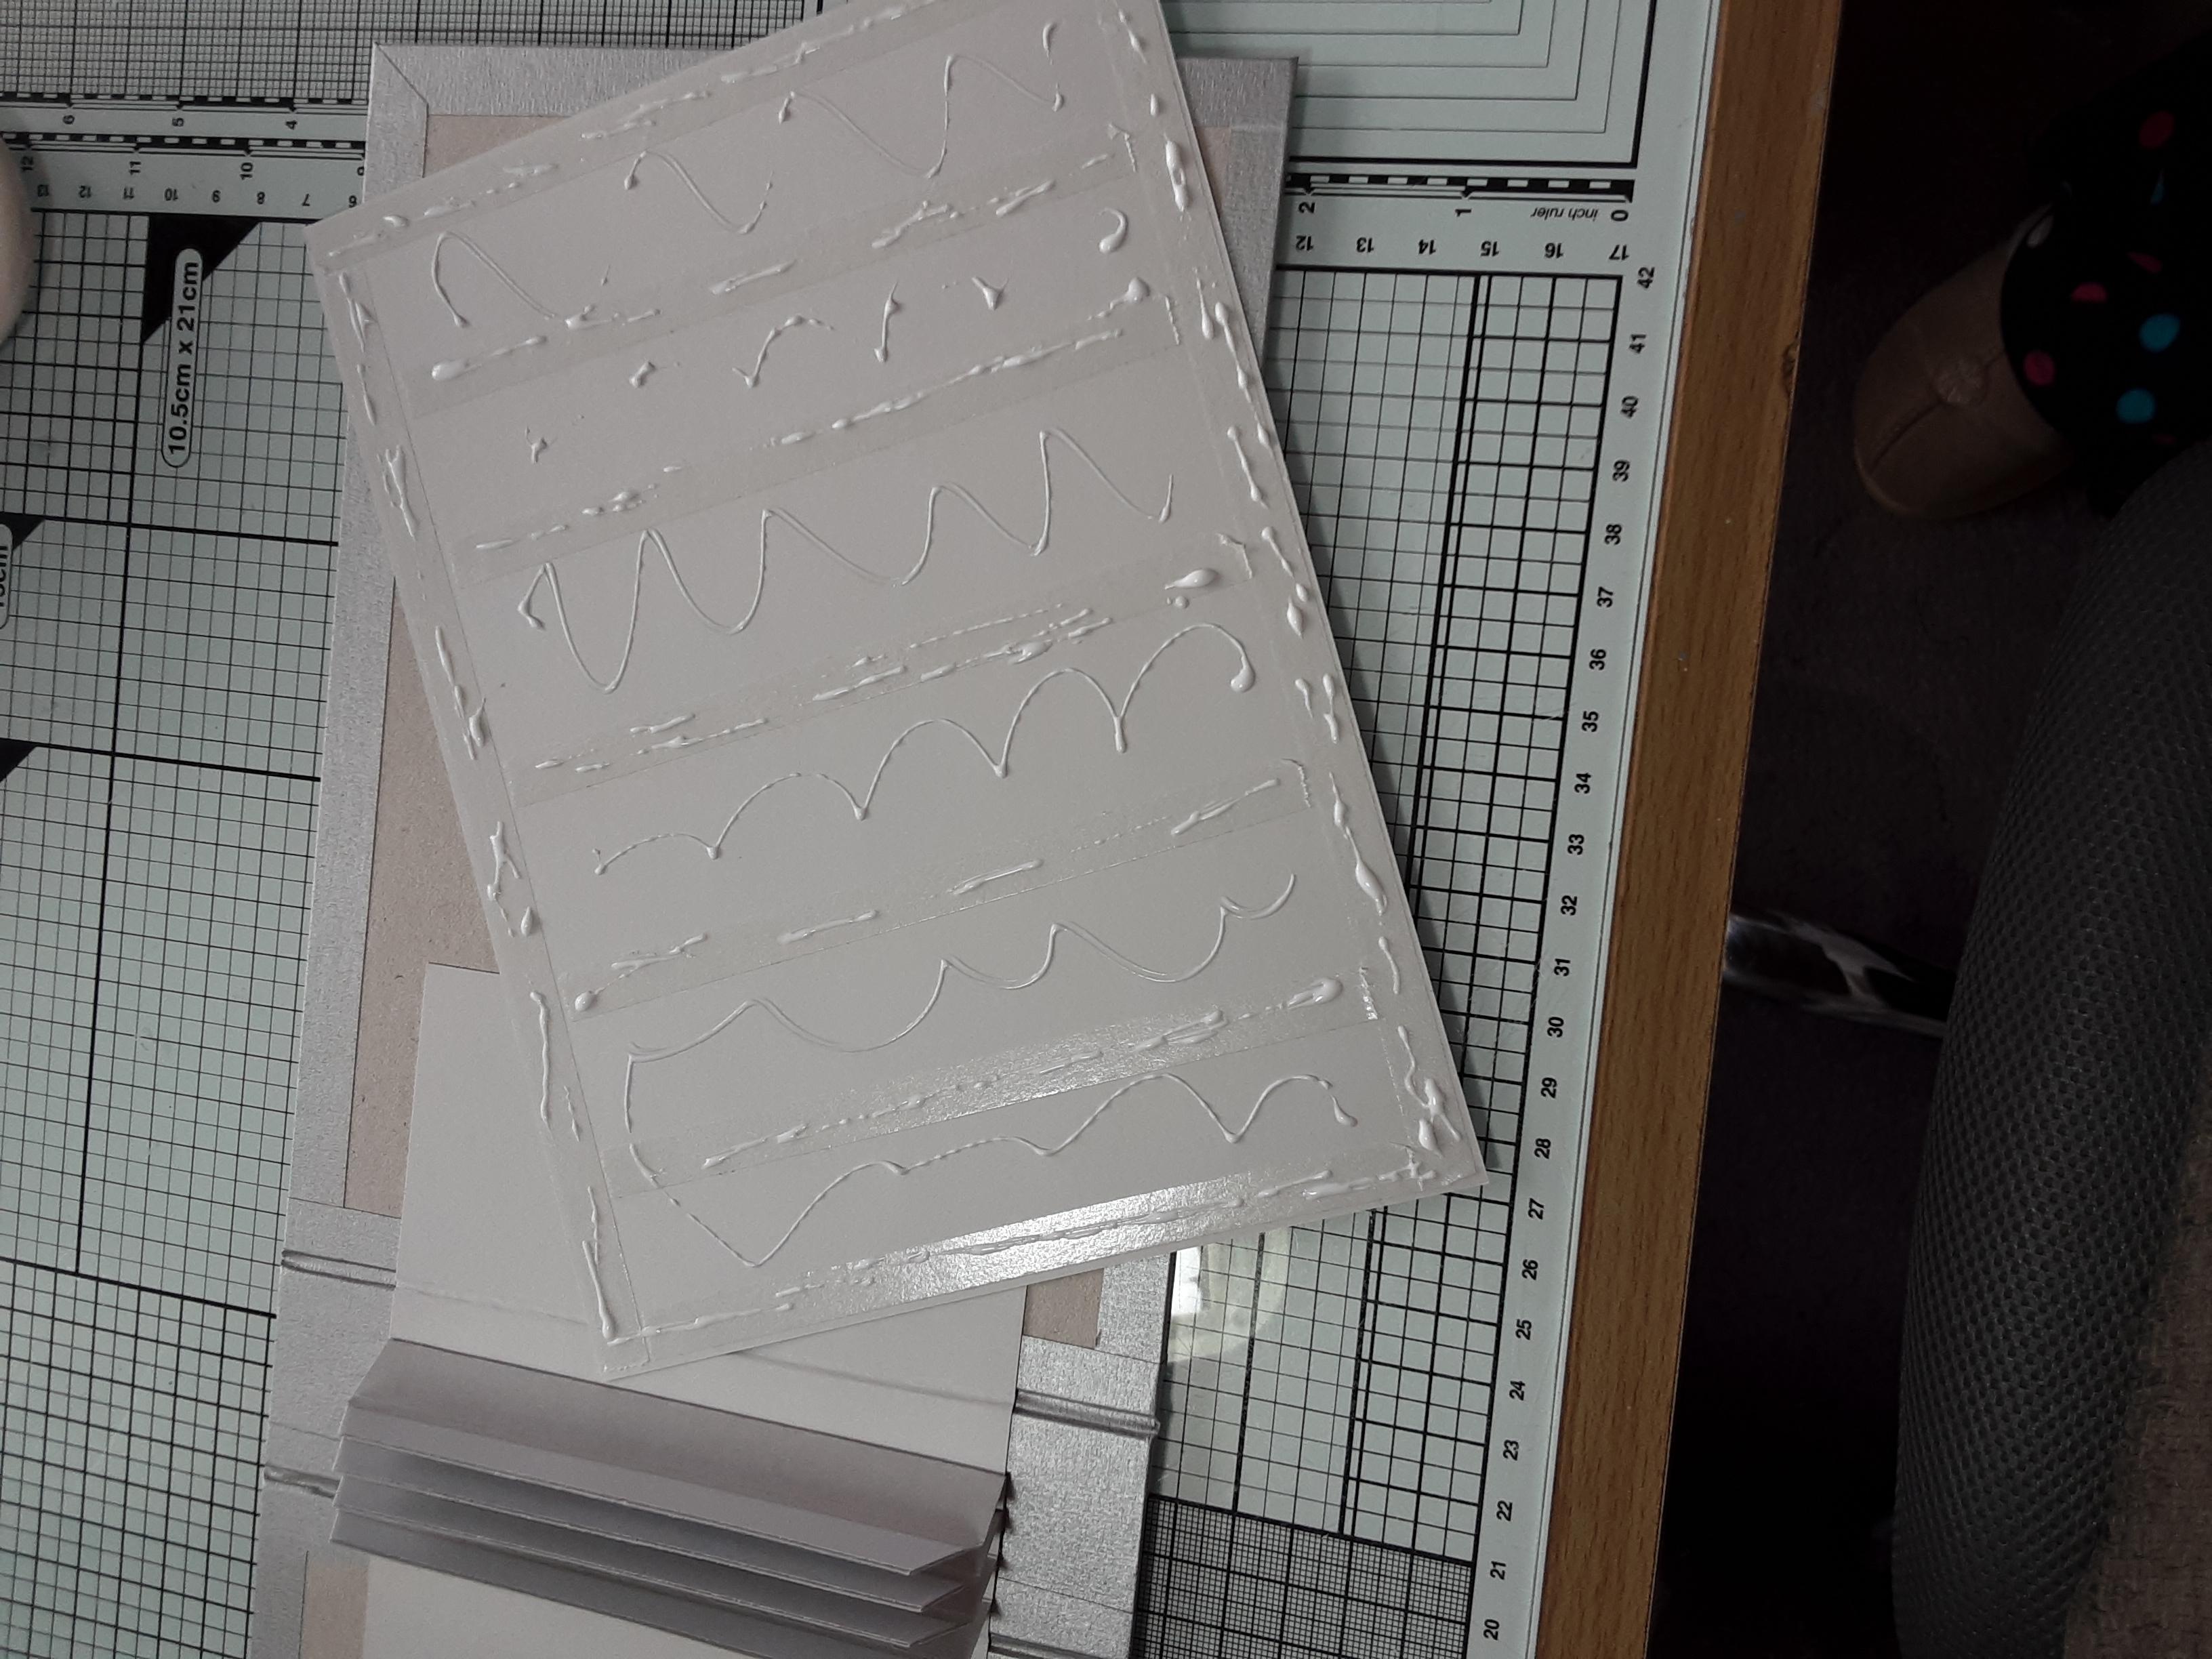
Use CoolKatz Sticky Paws Pro Tape and glue to adhere the card to the album covers; I found this stops the card from lifting when I place patterned paper on top. The paper will cover up the spine extension.
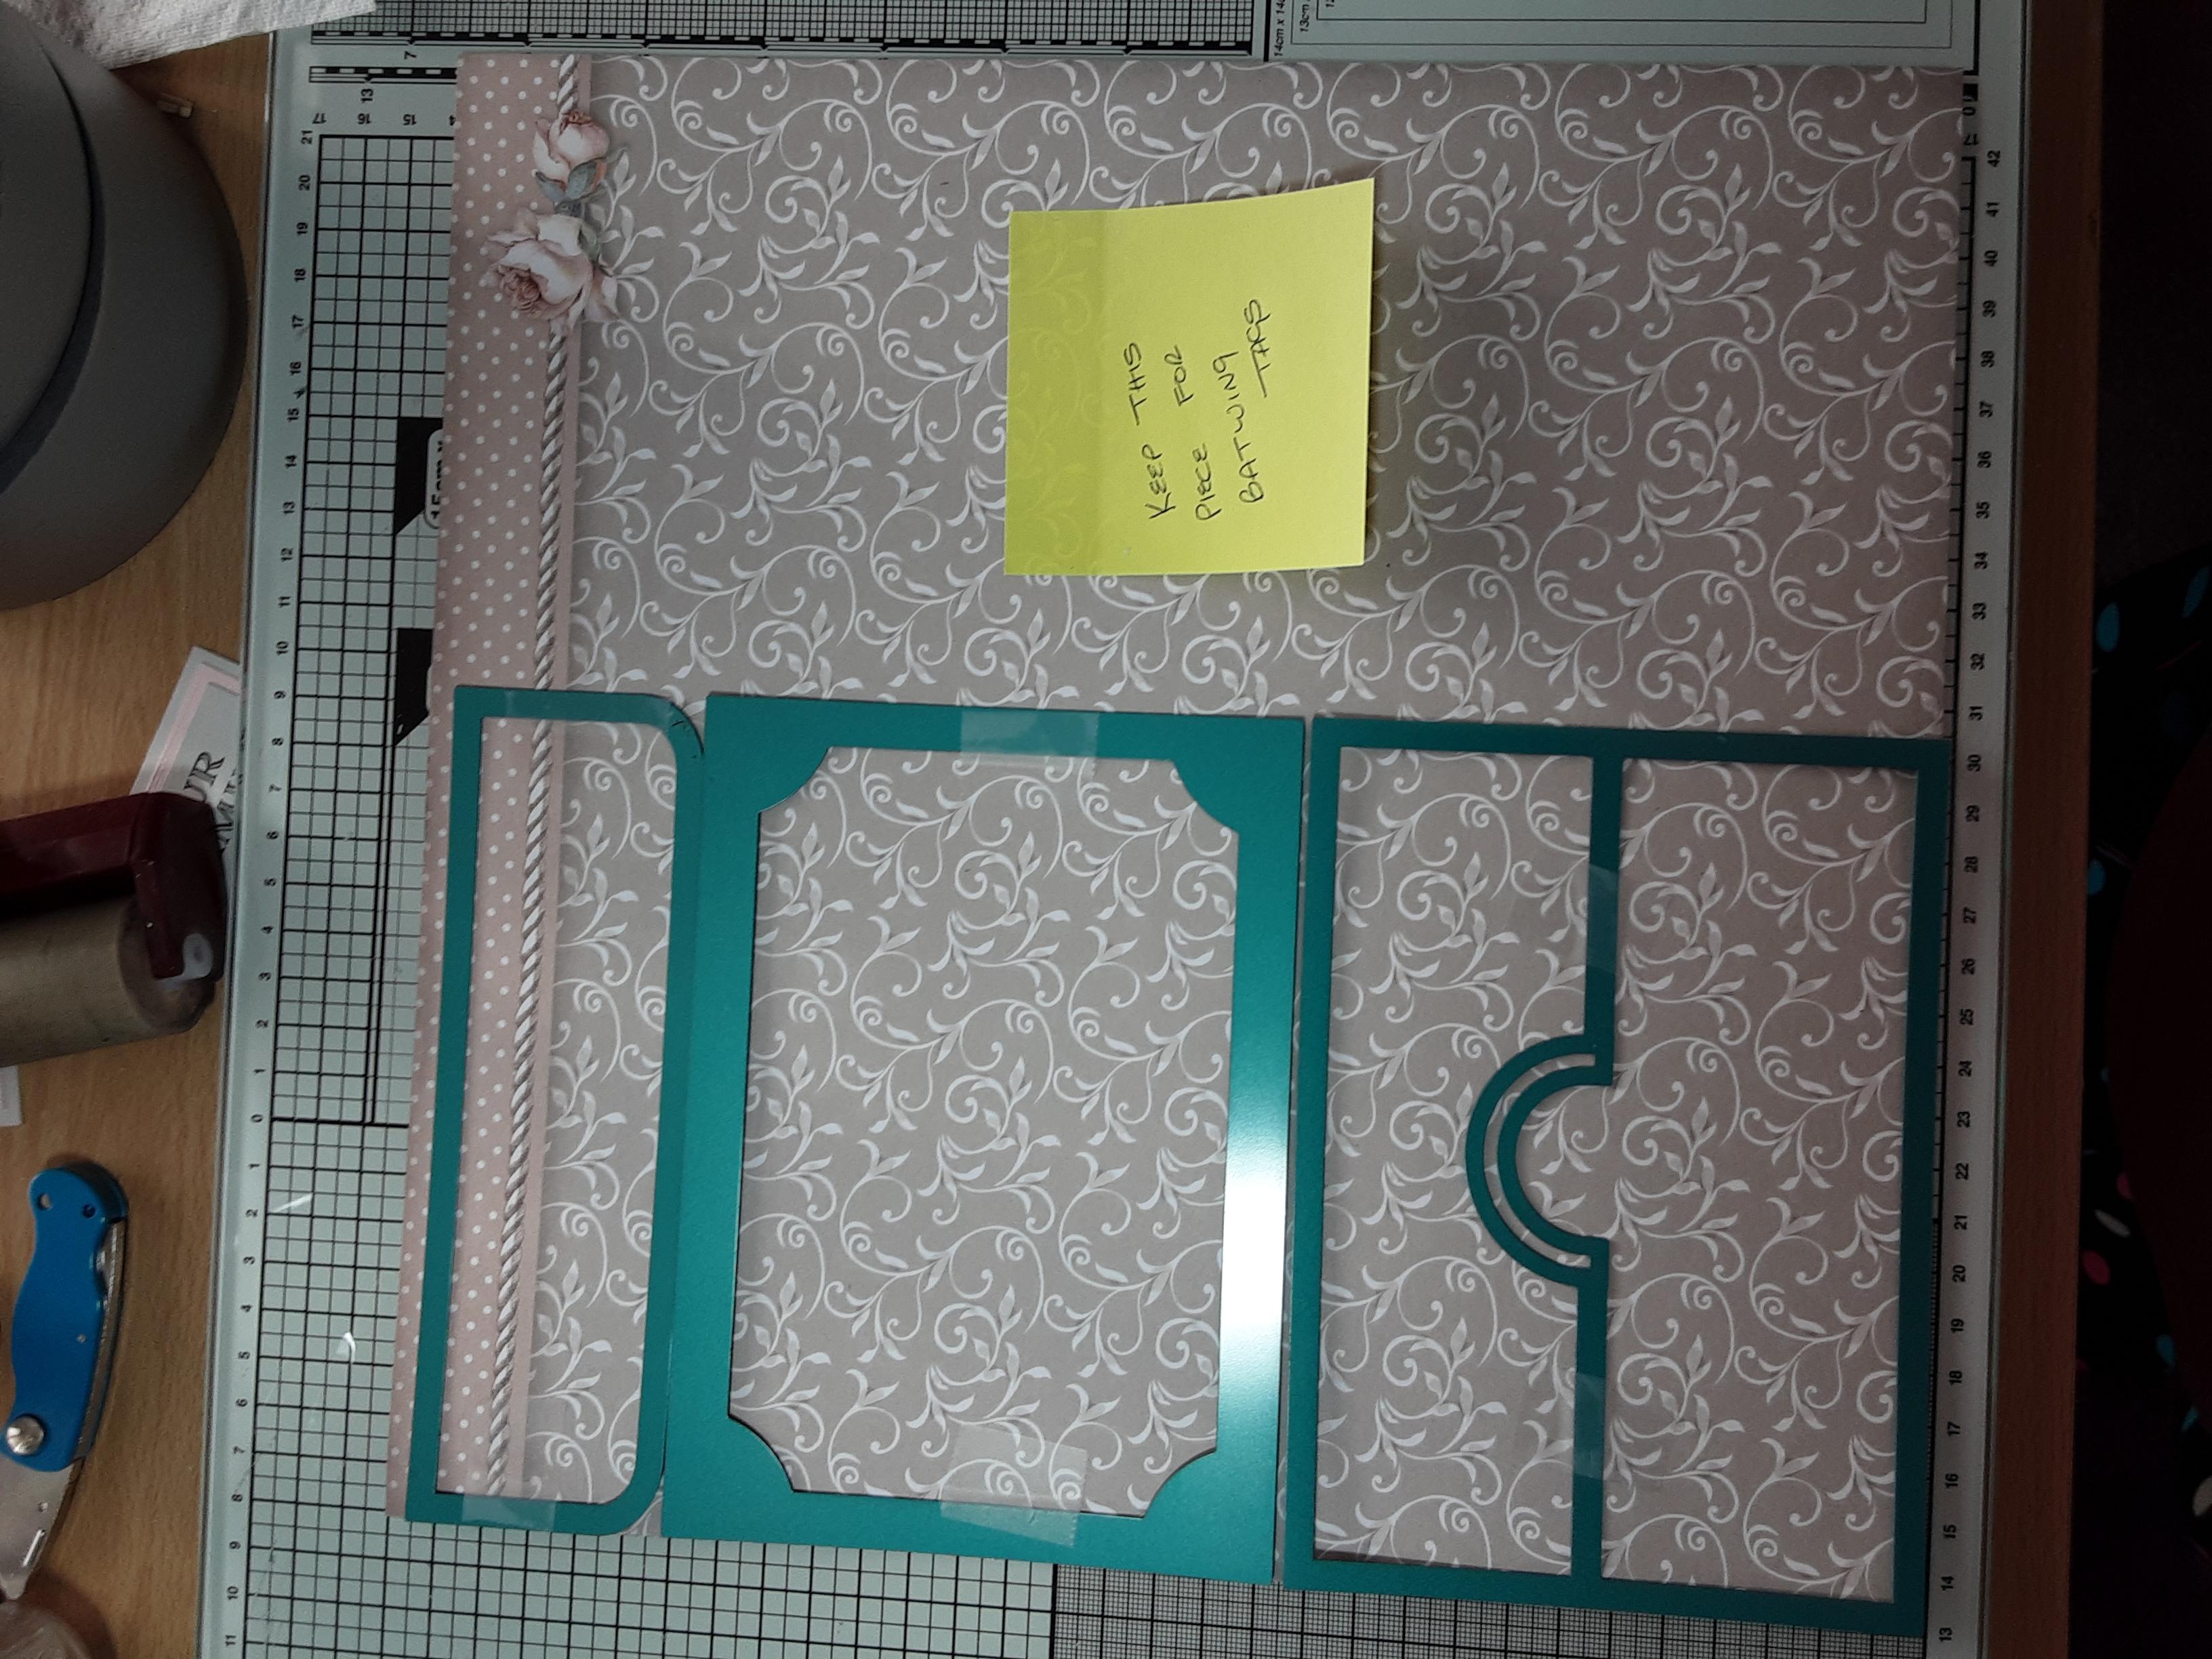
Die cut 10 Photo Wallets from A4 card before decorating them. Here is the layout for cutting mats for the Photo Wallets; I used the leftovers for making mats for the Bat Matting Tags.
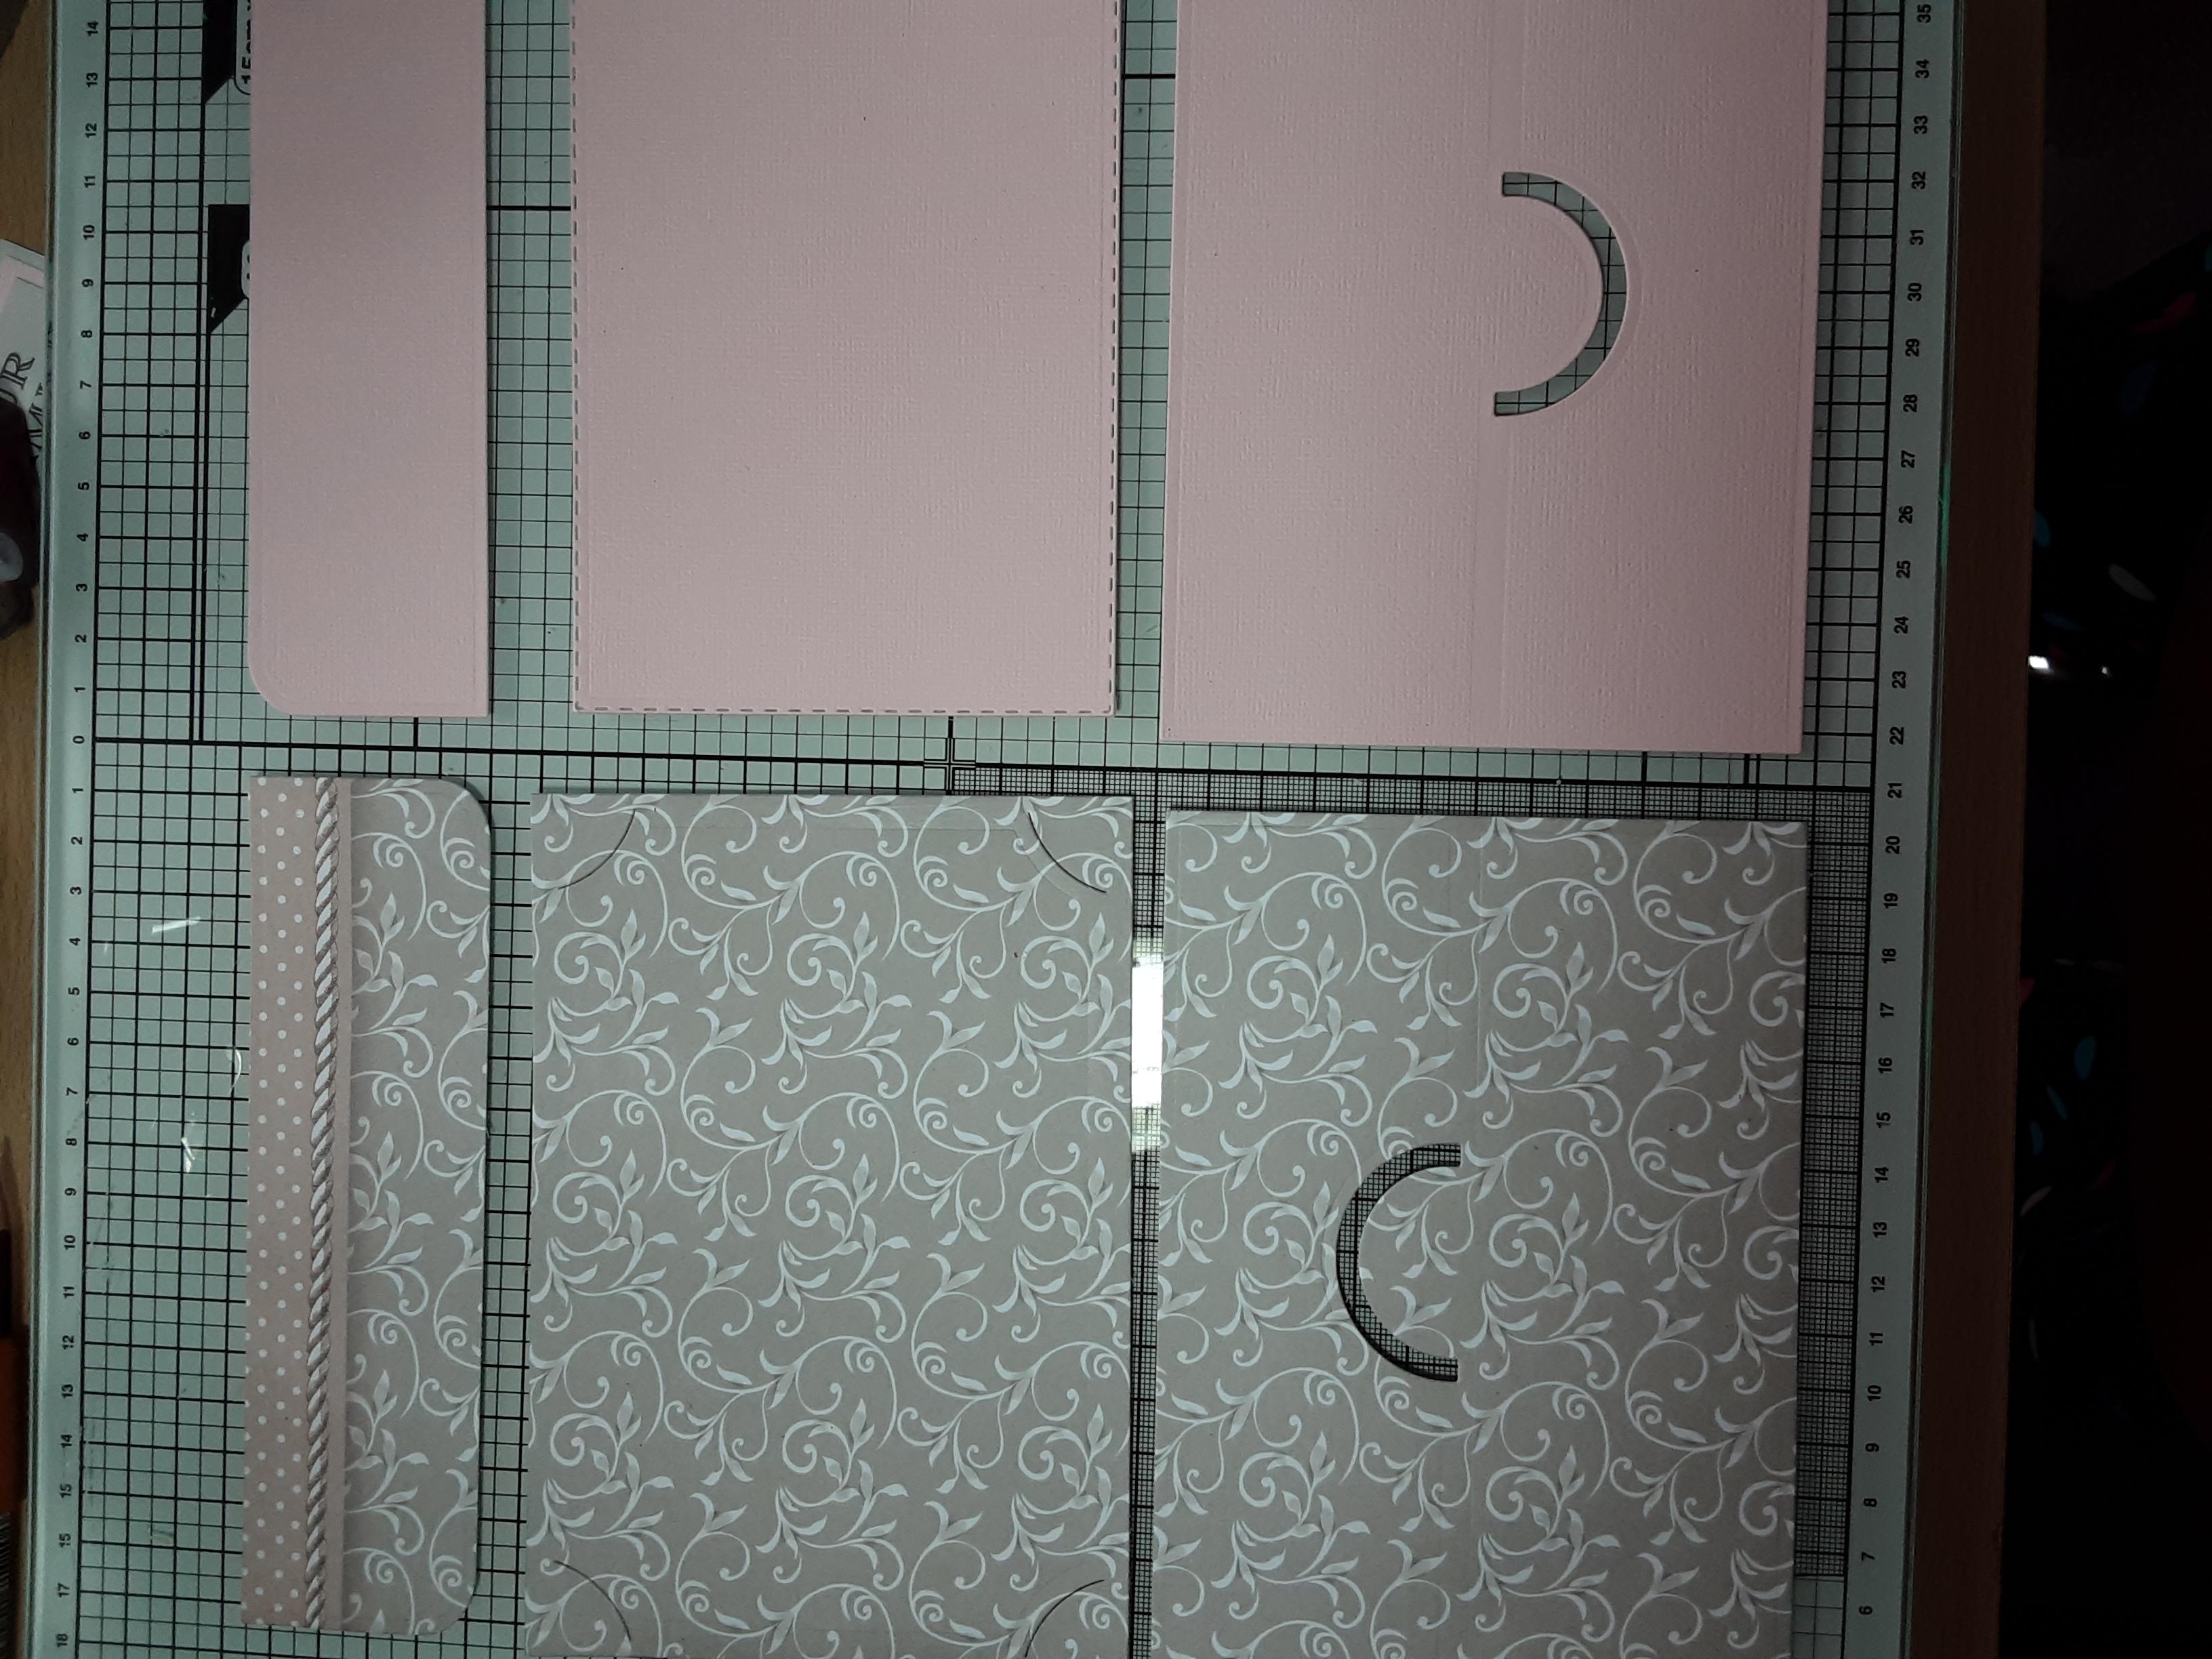
These are the pieces you will need for each Photo Wallet.
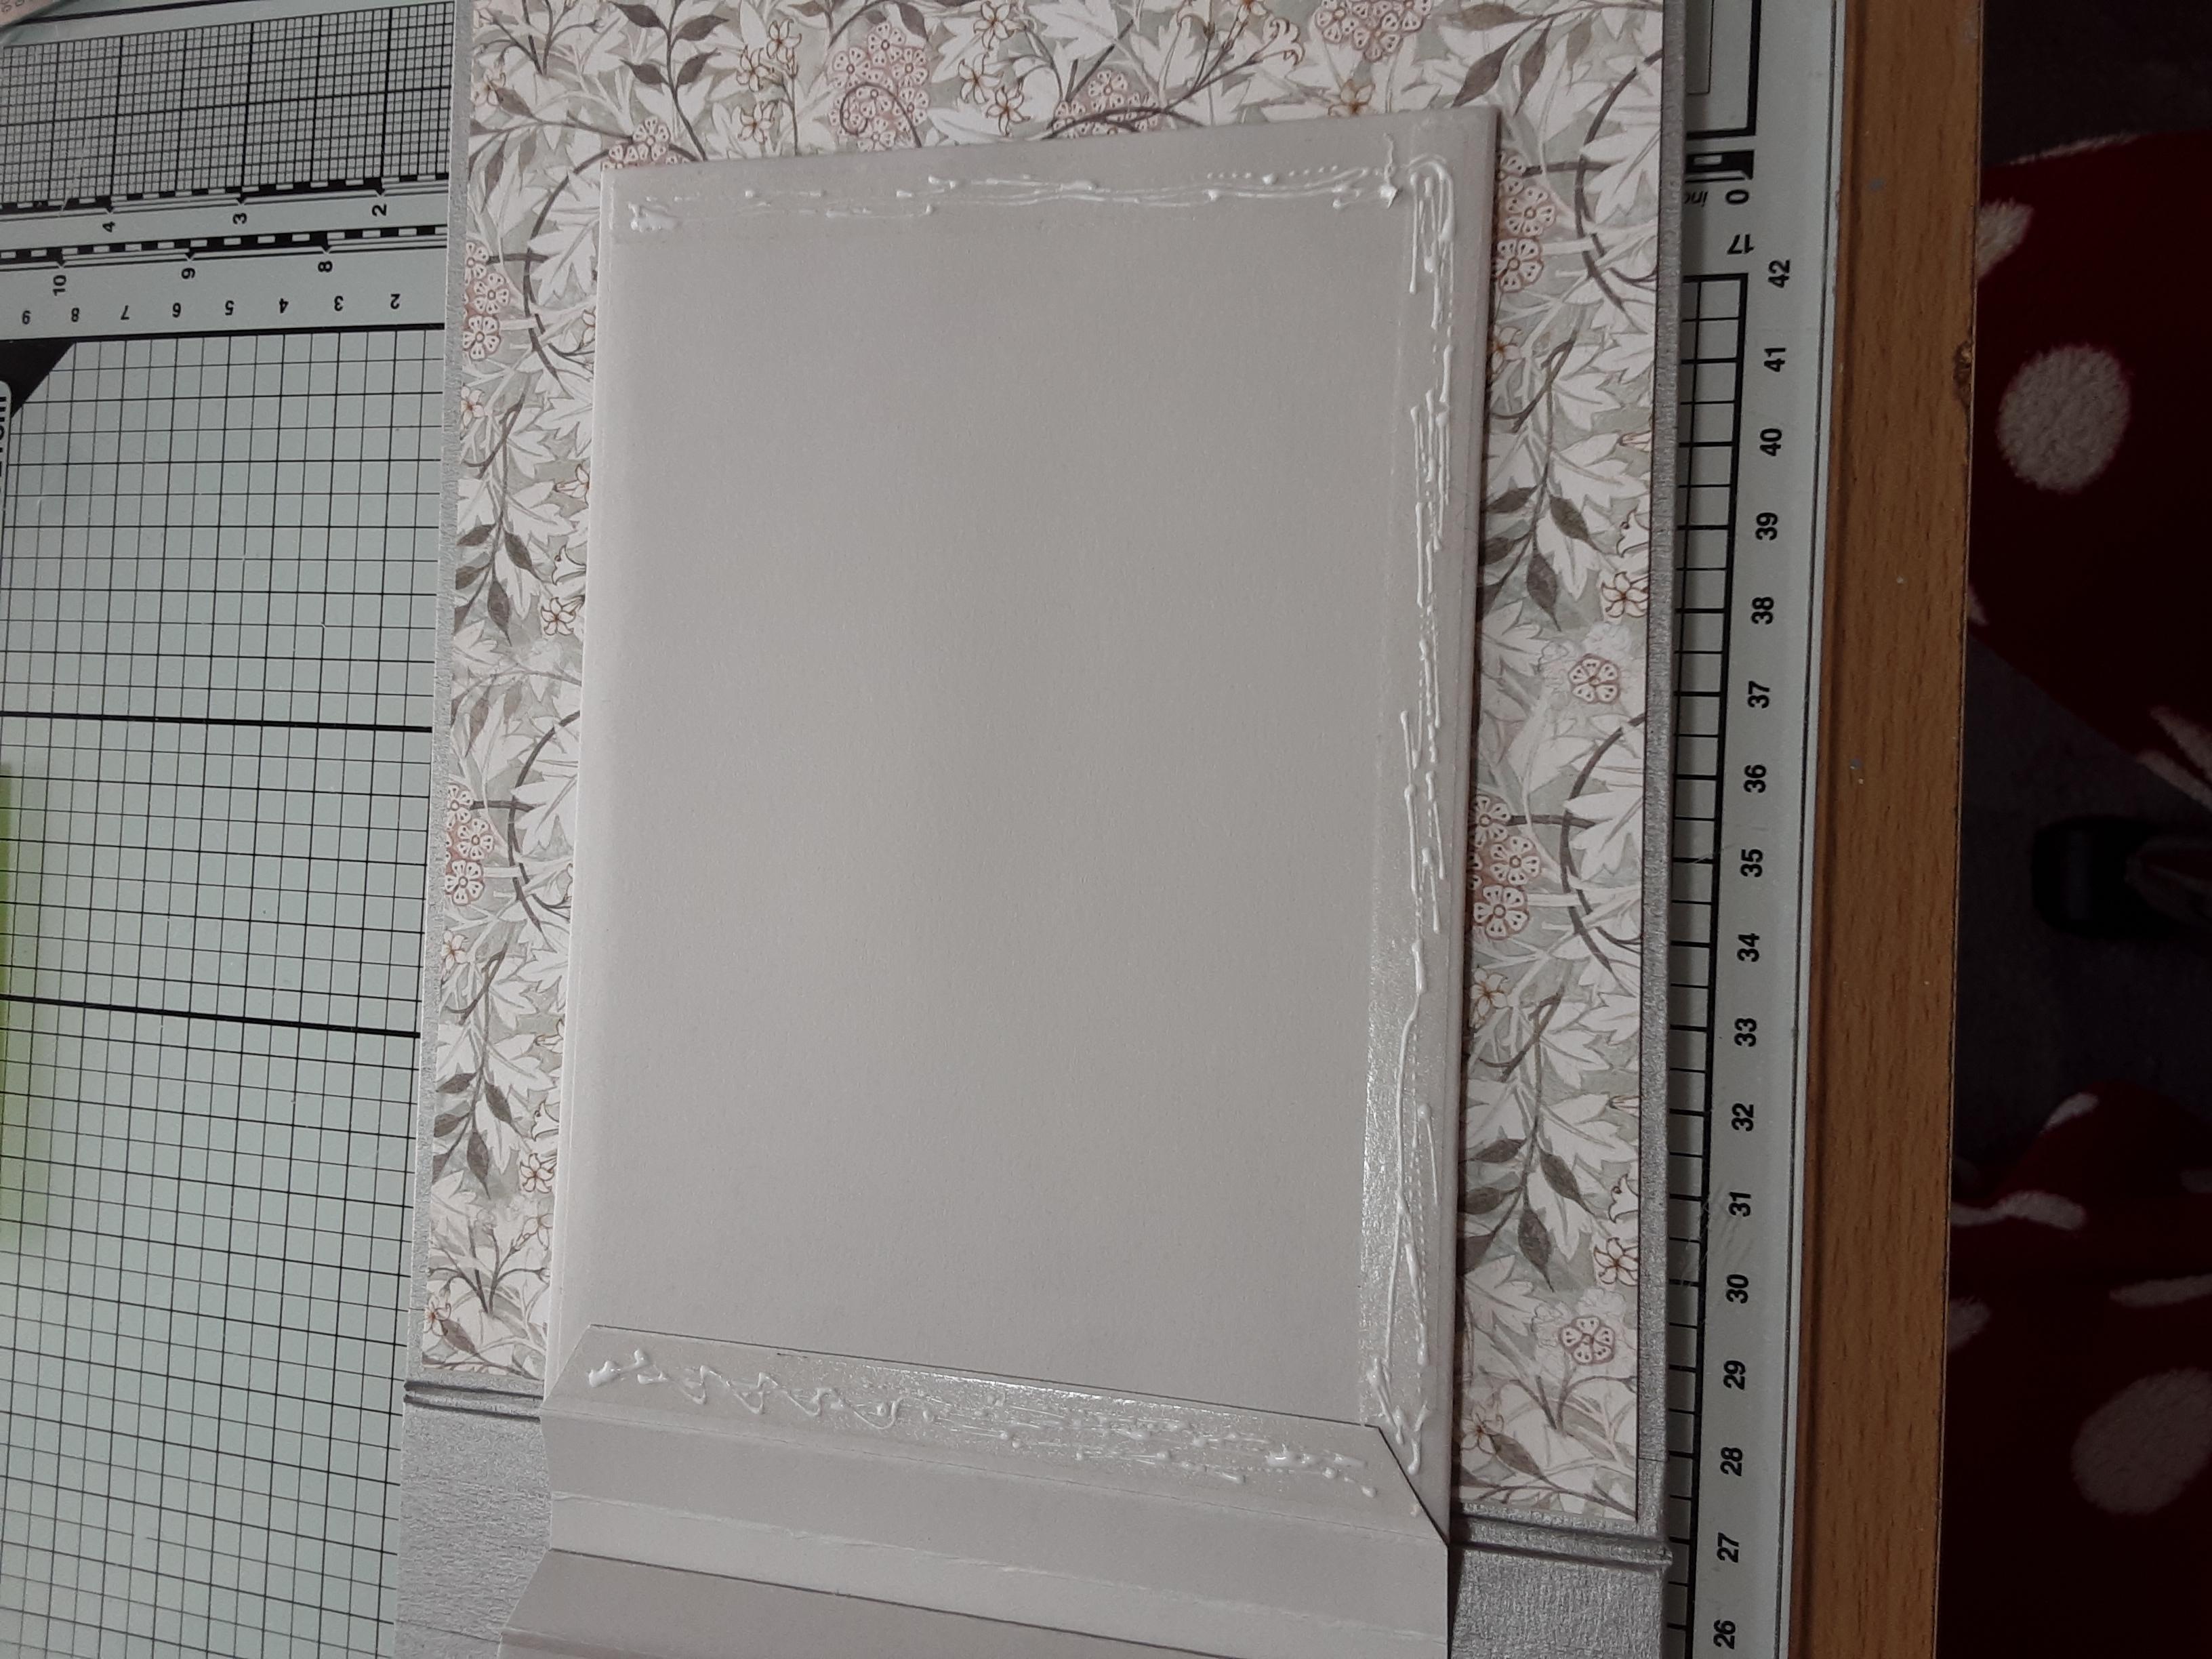
This photo shows how I put each photo wallet into the album using 9mm CoolKatz Sticky Paws Pro Tape and glue for wiggle room. I placed the Photo Wallets for the inside covers 1 inch up from the bottom edge of album and 1 1/ 8 inch in from the side edges.
Use the 2 middle sizes of the Bat Matting Tags to make 6 tags to go into the open top of the joined Photo Wallets. Cover the tags with the mats cut from the leftover patterned paper (as shown earlier). This photo shows what the finished Photo Wallet pocket pages look like inside the album.
List of supplies needed;
Merlin Landscape Album (covers & spine) - https://www.coolkatzcraft.com/merlin-album-cover-set
Silver Frame Tape 25mm & 50mm - https://www.coolkatzcraft.com/silver-frame-tape
Pack of light grey card (20 sheets 290gsm)
6mm & 9mm CoolKatz Sticky Paws Pro Tape - https://www.coolkatzcraft.com/coolkatz-sticky-paws-pro-tape
Bookbinding Glue - https://www.coolkatzcraft.com/coolkatz-bookbinding-glue-150ml
Spine Alignment Tools - https://www.coolkatzcraft.com/coolkatz-clevertools-spine-alignment-tools
Clever Corner Spacers - https://www.coolkatzcraft.com/coolkatz-clever-tools-corner-spacers
Photo Wallet Die Set - https://www.coolkatzcraft.com/photo-wallet-die-set
Curved Photo Slots Die Set 2 - https://www.coolkatzcraft.com/coolkatzcutz-large-curved-photo-slots-set-2
Bat Matting Tags Die Set - https://www.coolkatzcraft.com/bat-matting-tags
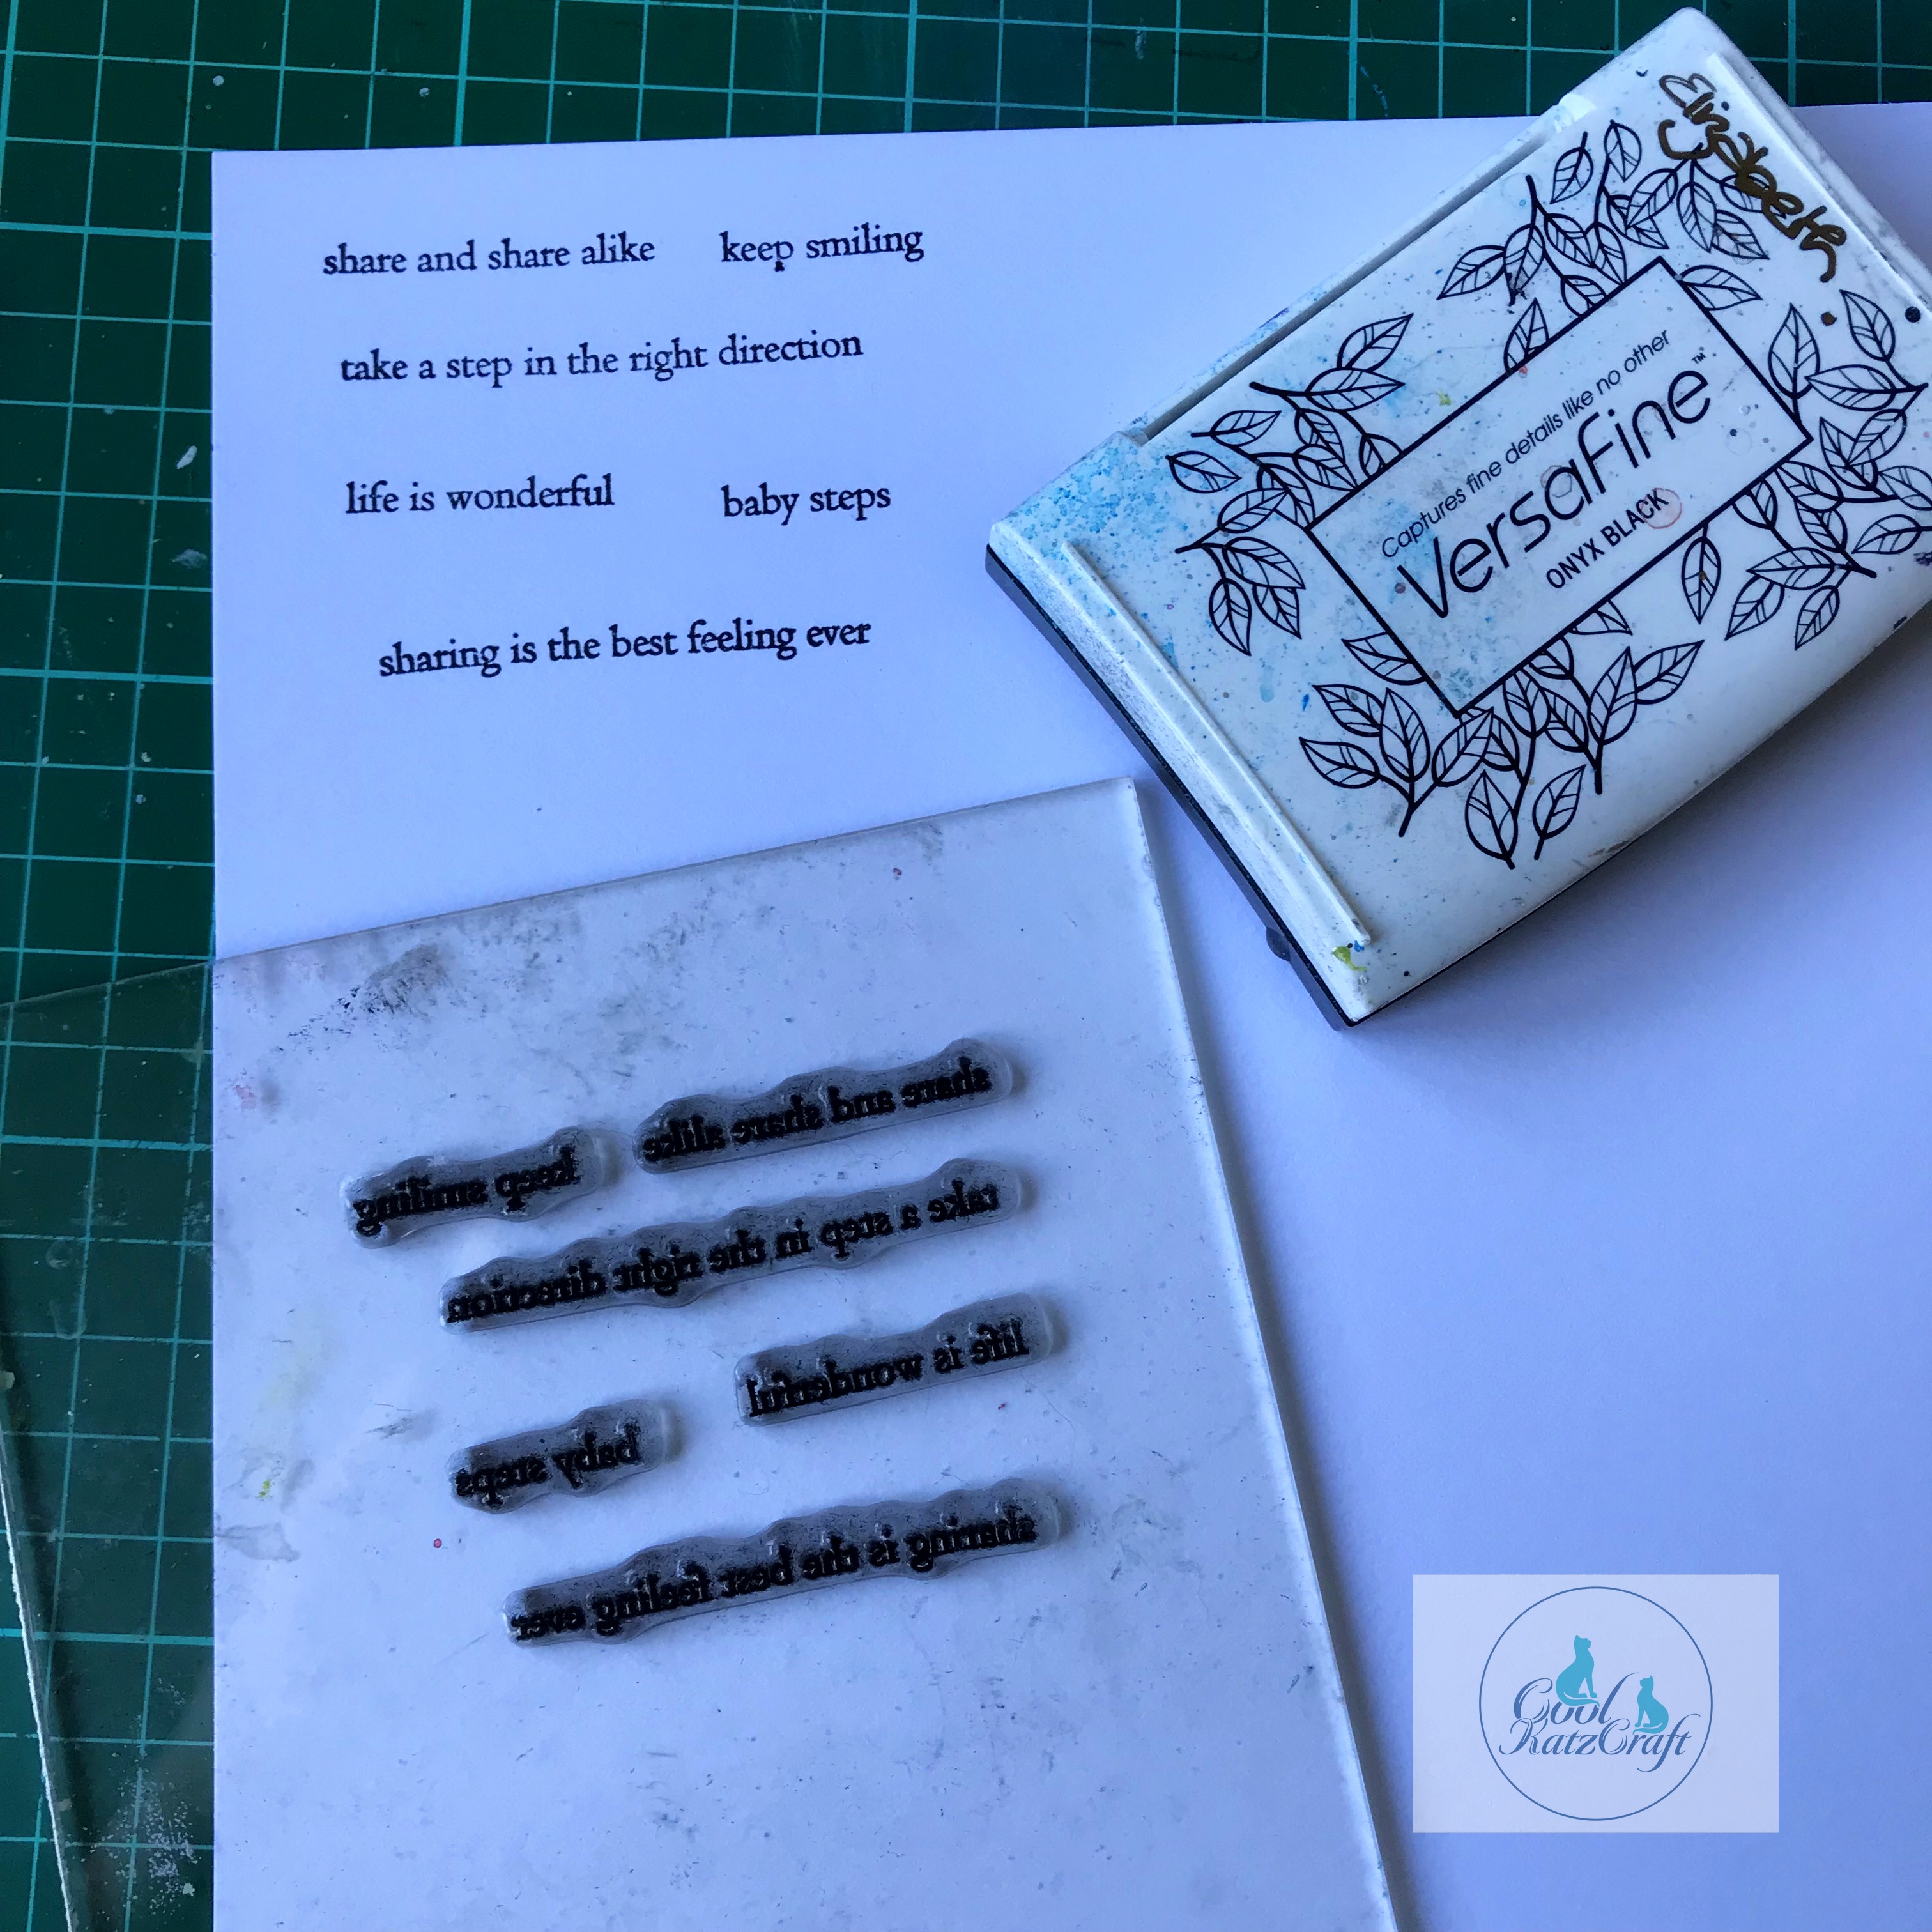
Memories Stamp Collection - https://www.coolkatzcraft.com/memories-stamp-collection
Extras;
14 sheets of 12x12 patterned paper
10 sheets of A4 plain cardstock (I used ballet pink & misty grey)
What a fantastic album Lynne!!! Such a clever way to use your Photo Wallets to make a truly interactive album.
Happy Crafting
The CoolKatz Team x
https://www.youtube.com/@CoolKatzCraft